Arizona Trip Part 9, Guided Takahashi Shots
[NOTE: For the most part, if a preview image looks bad, it’s because of the way WordPress is compressing the full image. Click for a better picture.]
Before I get to the pictures, I wanted to mention that I got to use a new Canon 60DA for these shots. This is a camera designed with astrophotography in mind. The mirror-release is extremely quiet, there is very low light during shooting and it is more sensitive in several wavelengths of interest to astronomers. I’m seriously considering buying one.
So the one bad thing was that we had to use a cable release instead of an intervalometer or a computer. That meant someone had to monitor the shots. Almost all of them were made up of 3 3 minute exposures at ISO 3200.
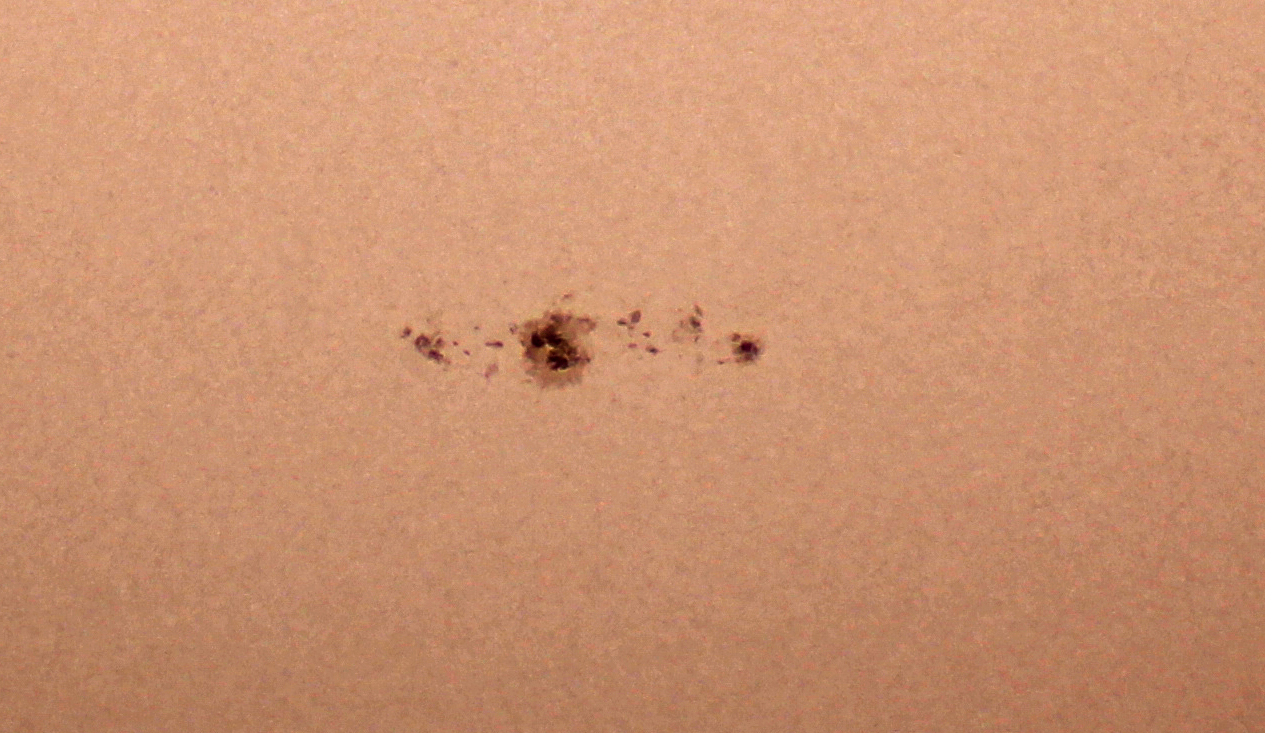
The first object we went to was the Leo Triplet (M65, M66 and NGC 3628). M65 is the lower one. It has a recent supernova in it. It’s the star on the left side of the galaxy.
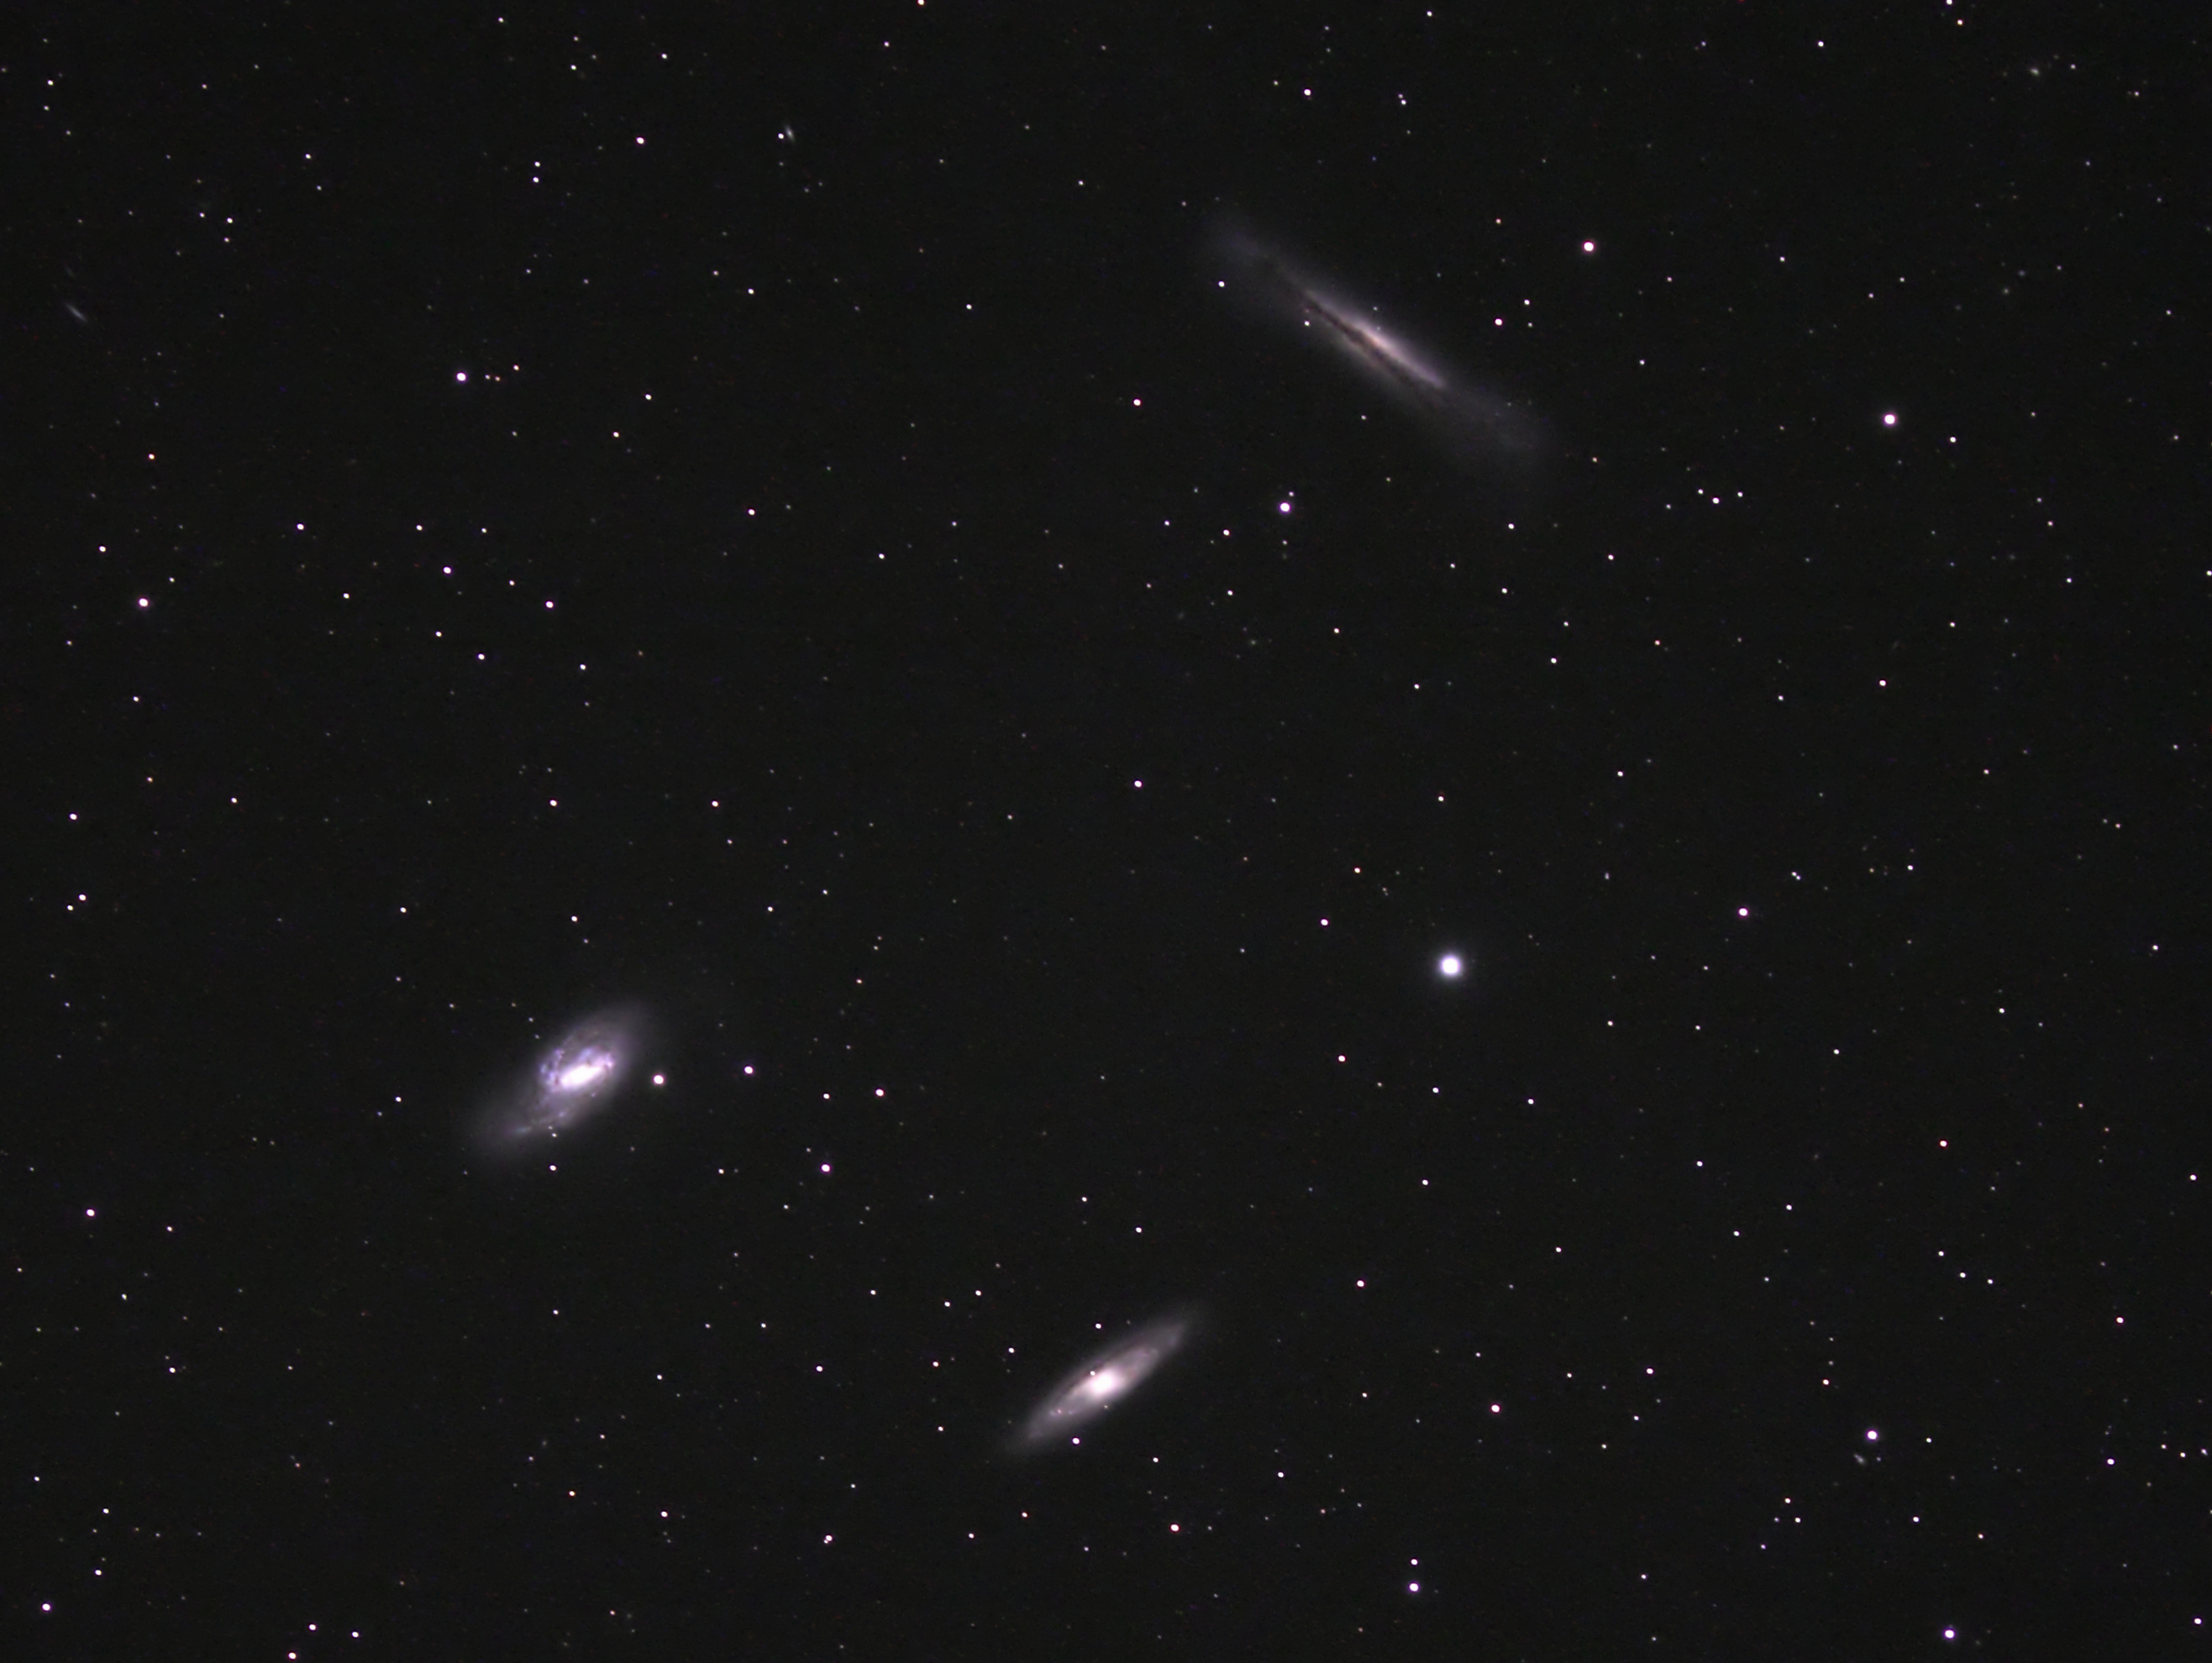
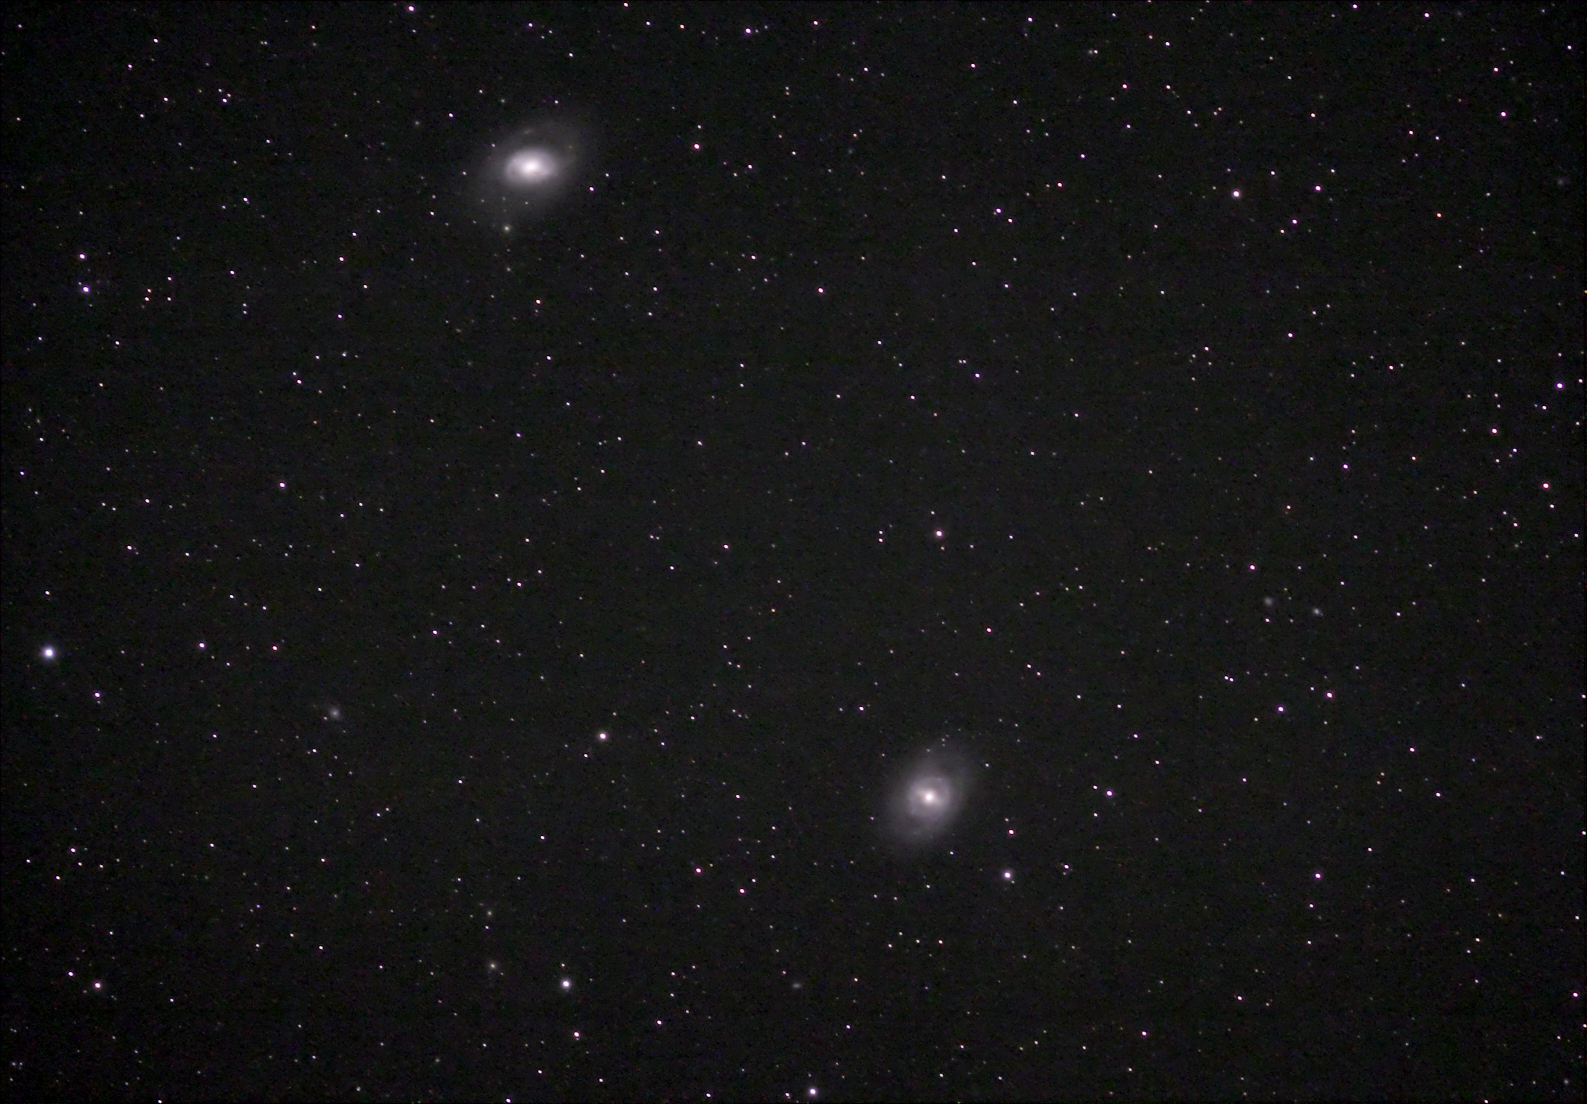
Next, I went to nearby M95 and M96. I was hoping to get M105 in there as well, but it didn’t make it in:
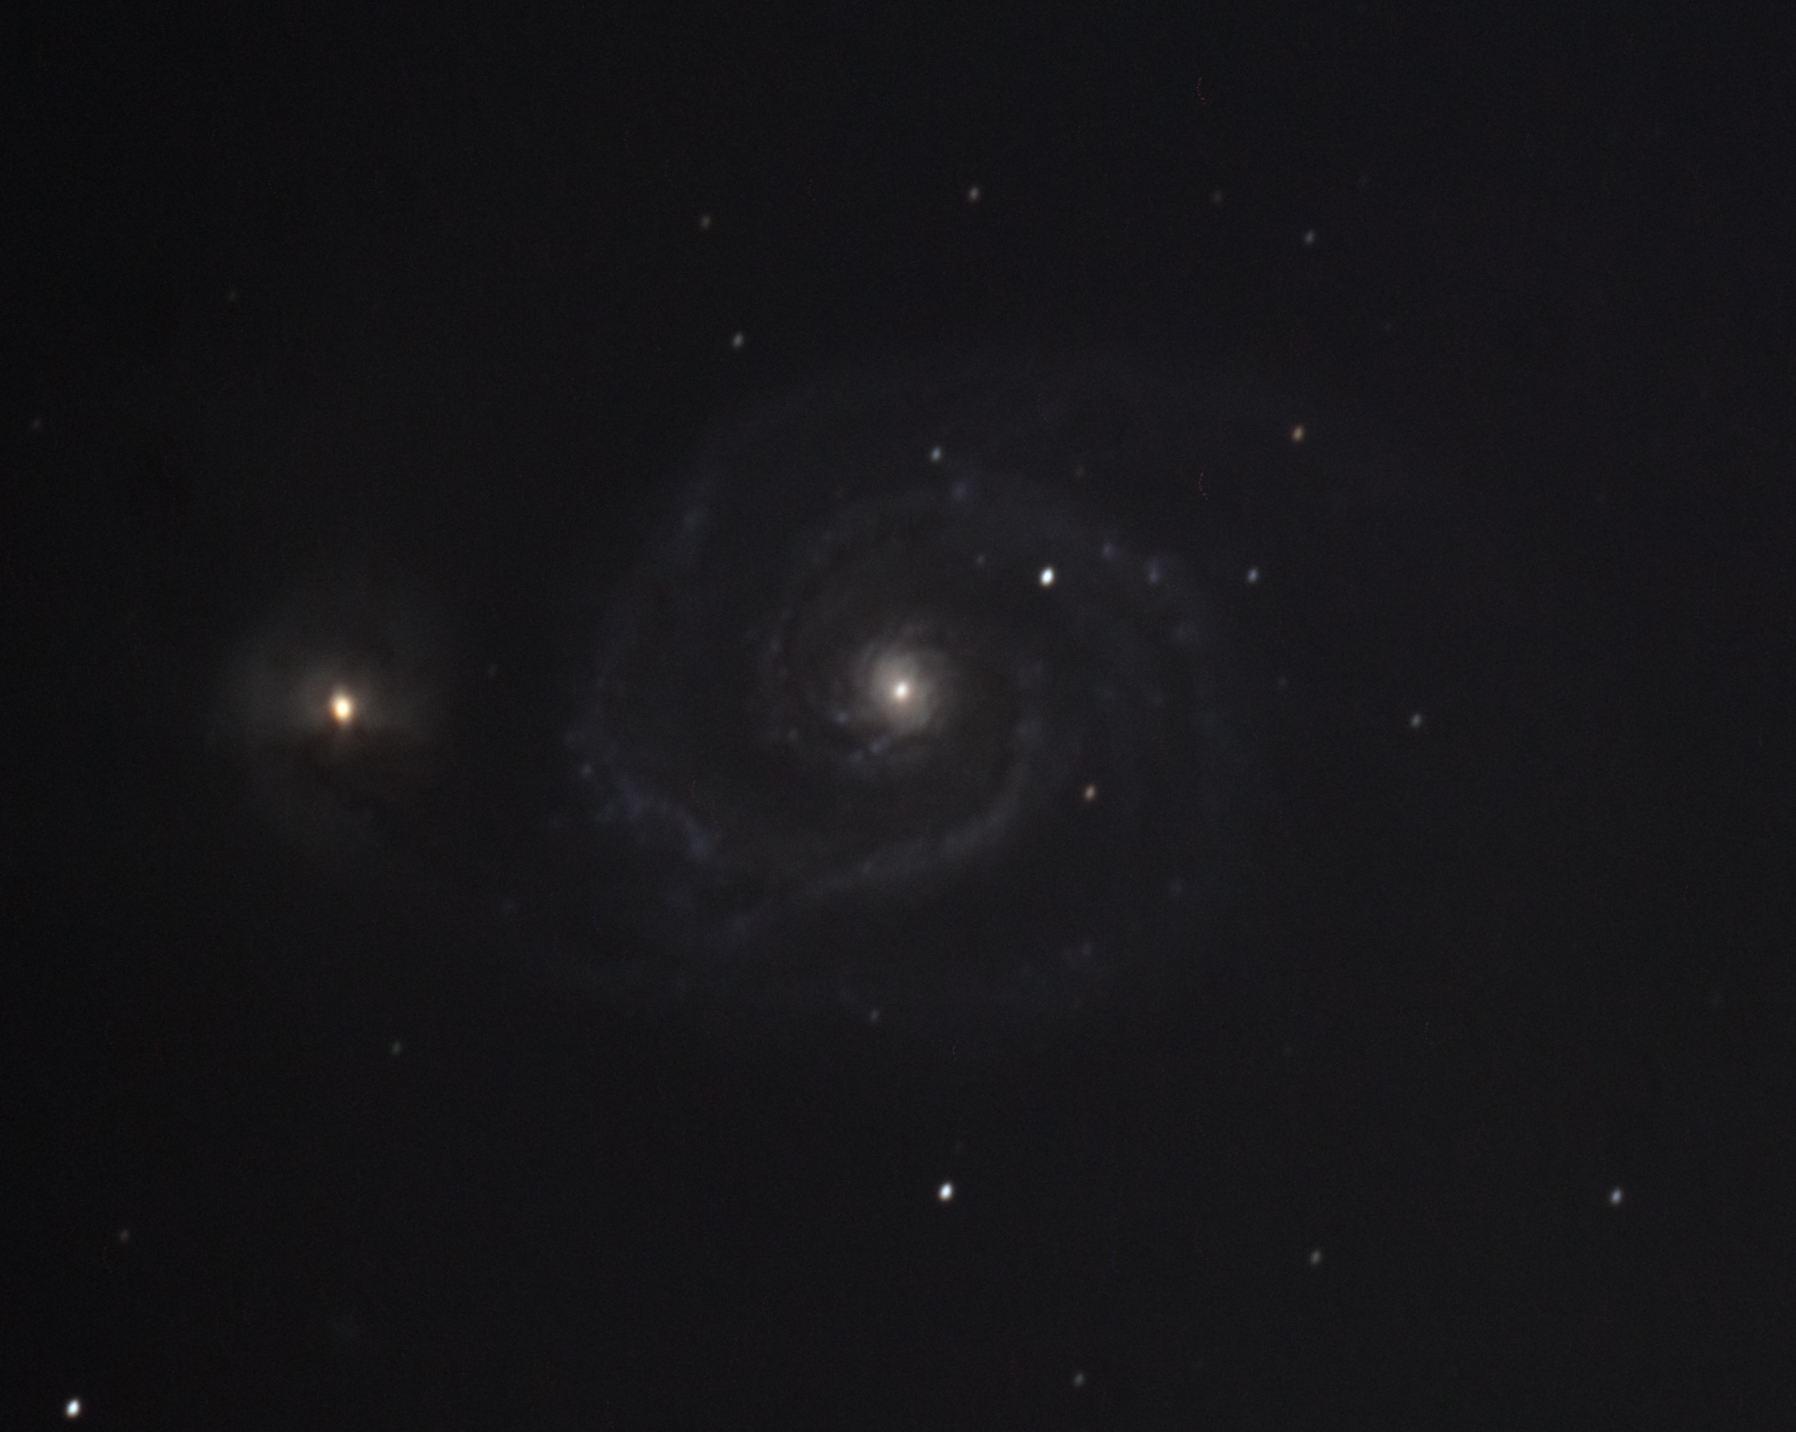
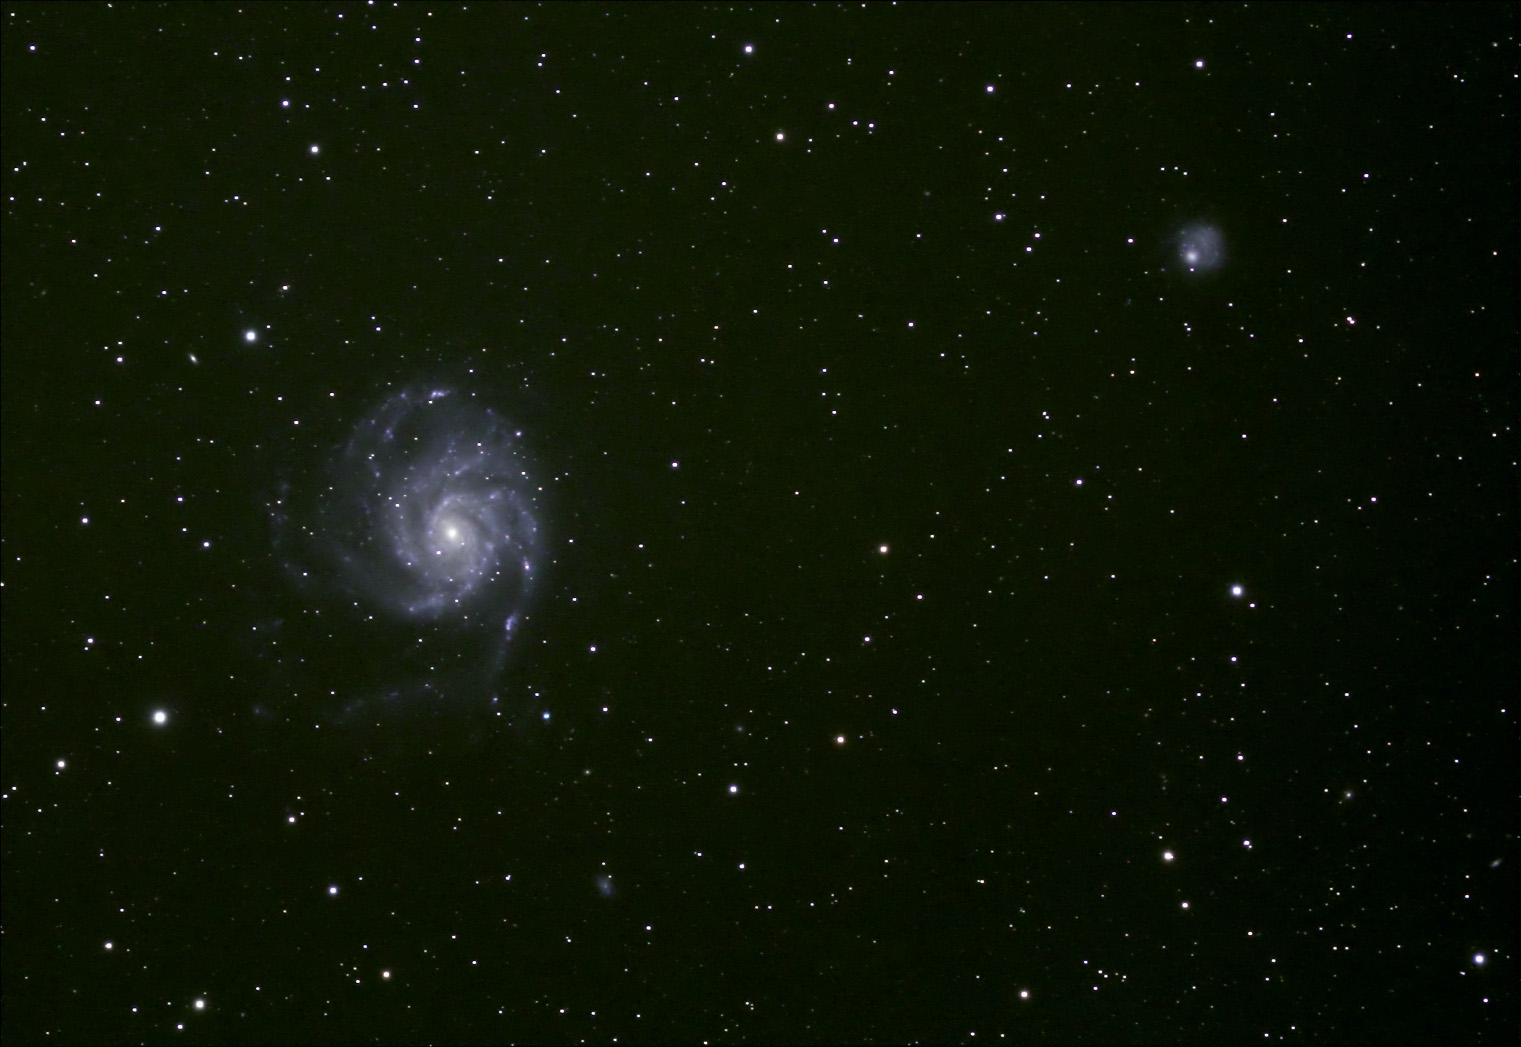
I went to M101 next. This was four shots. The other bright galaxy, NGC 5474 intrigued me. Turns out it’s a dwarf galaxy.
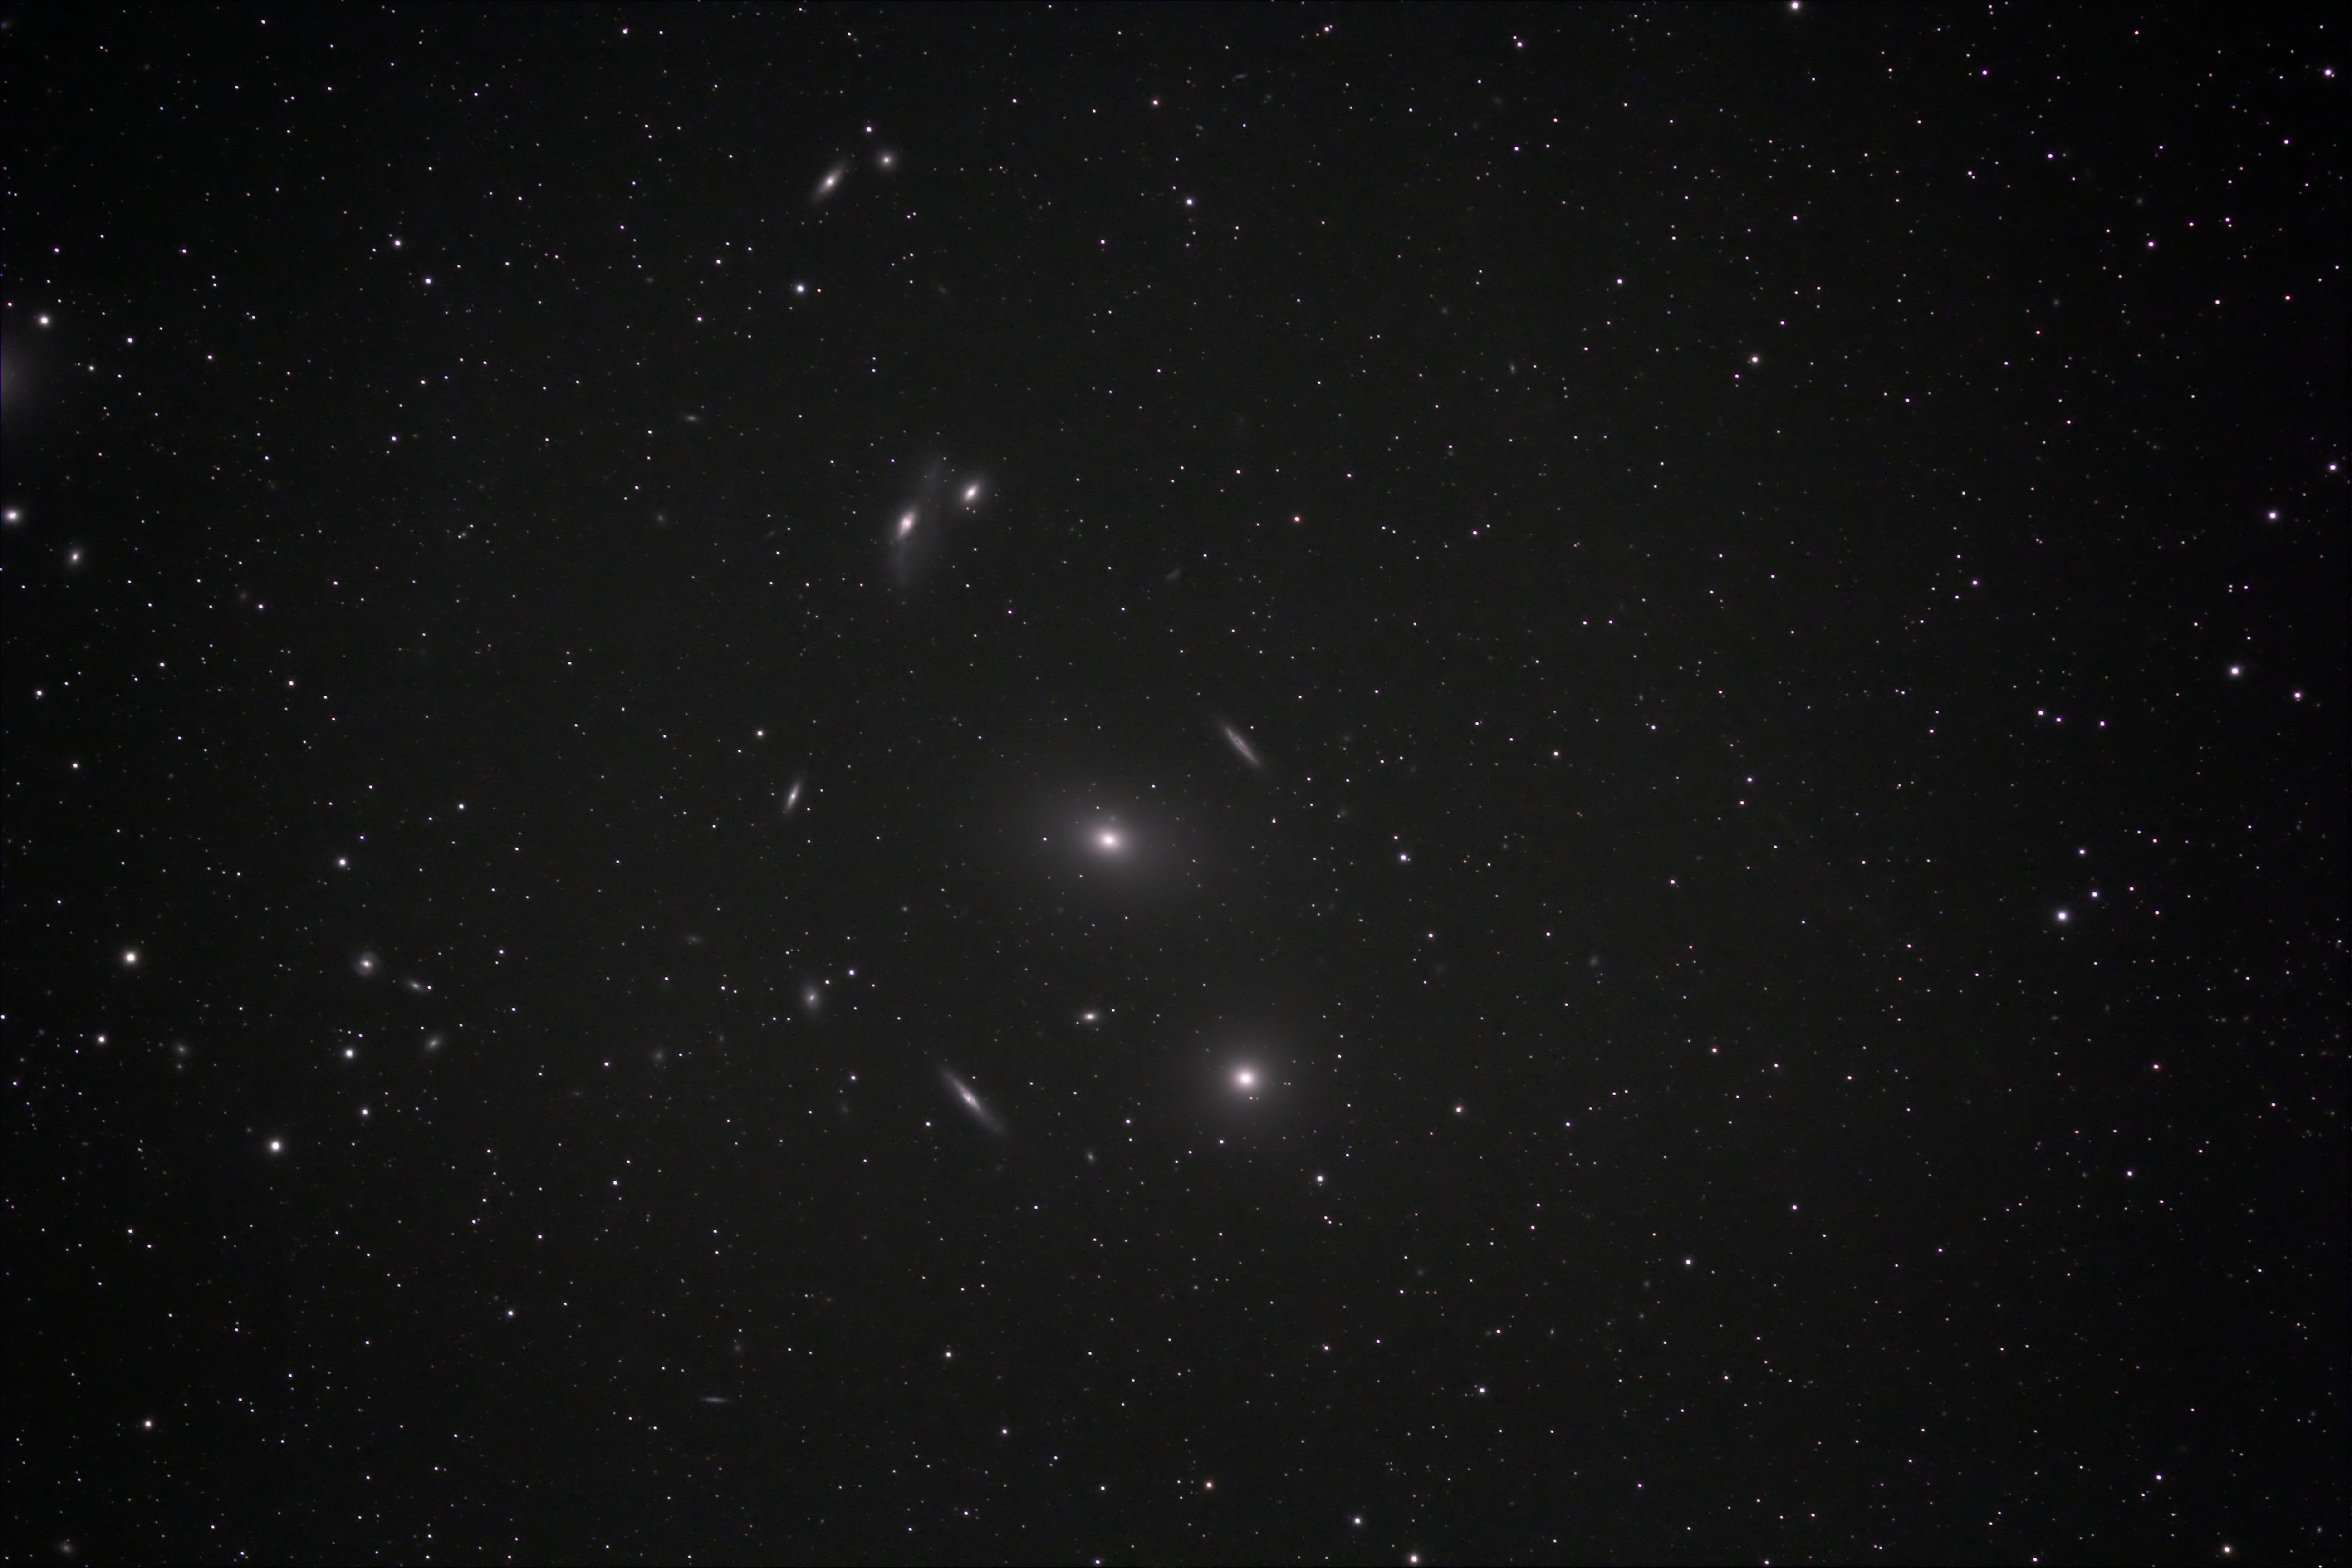
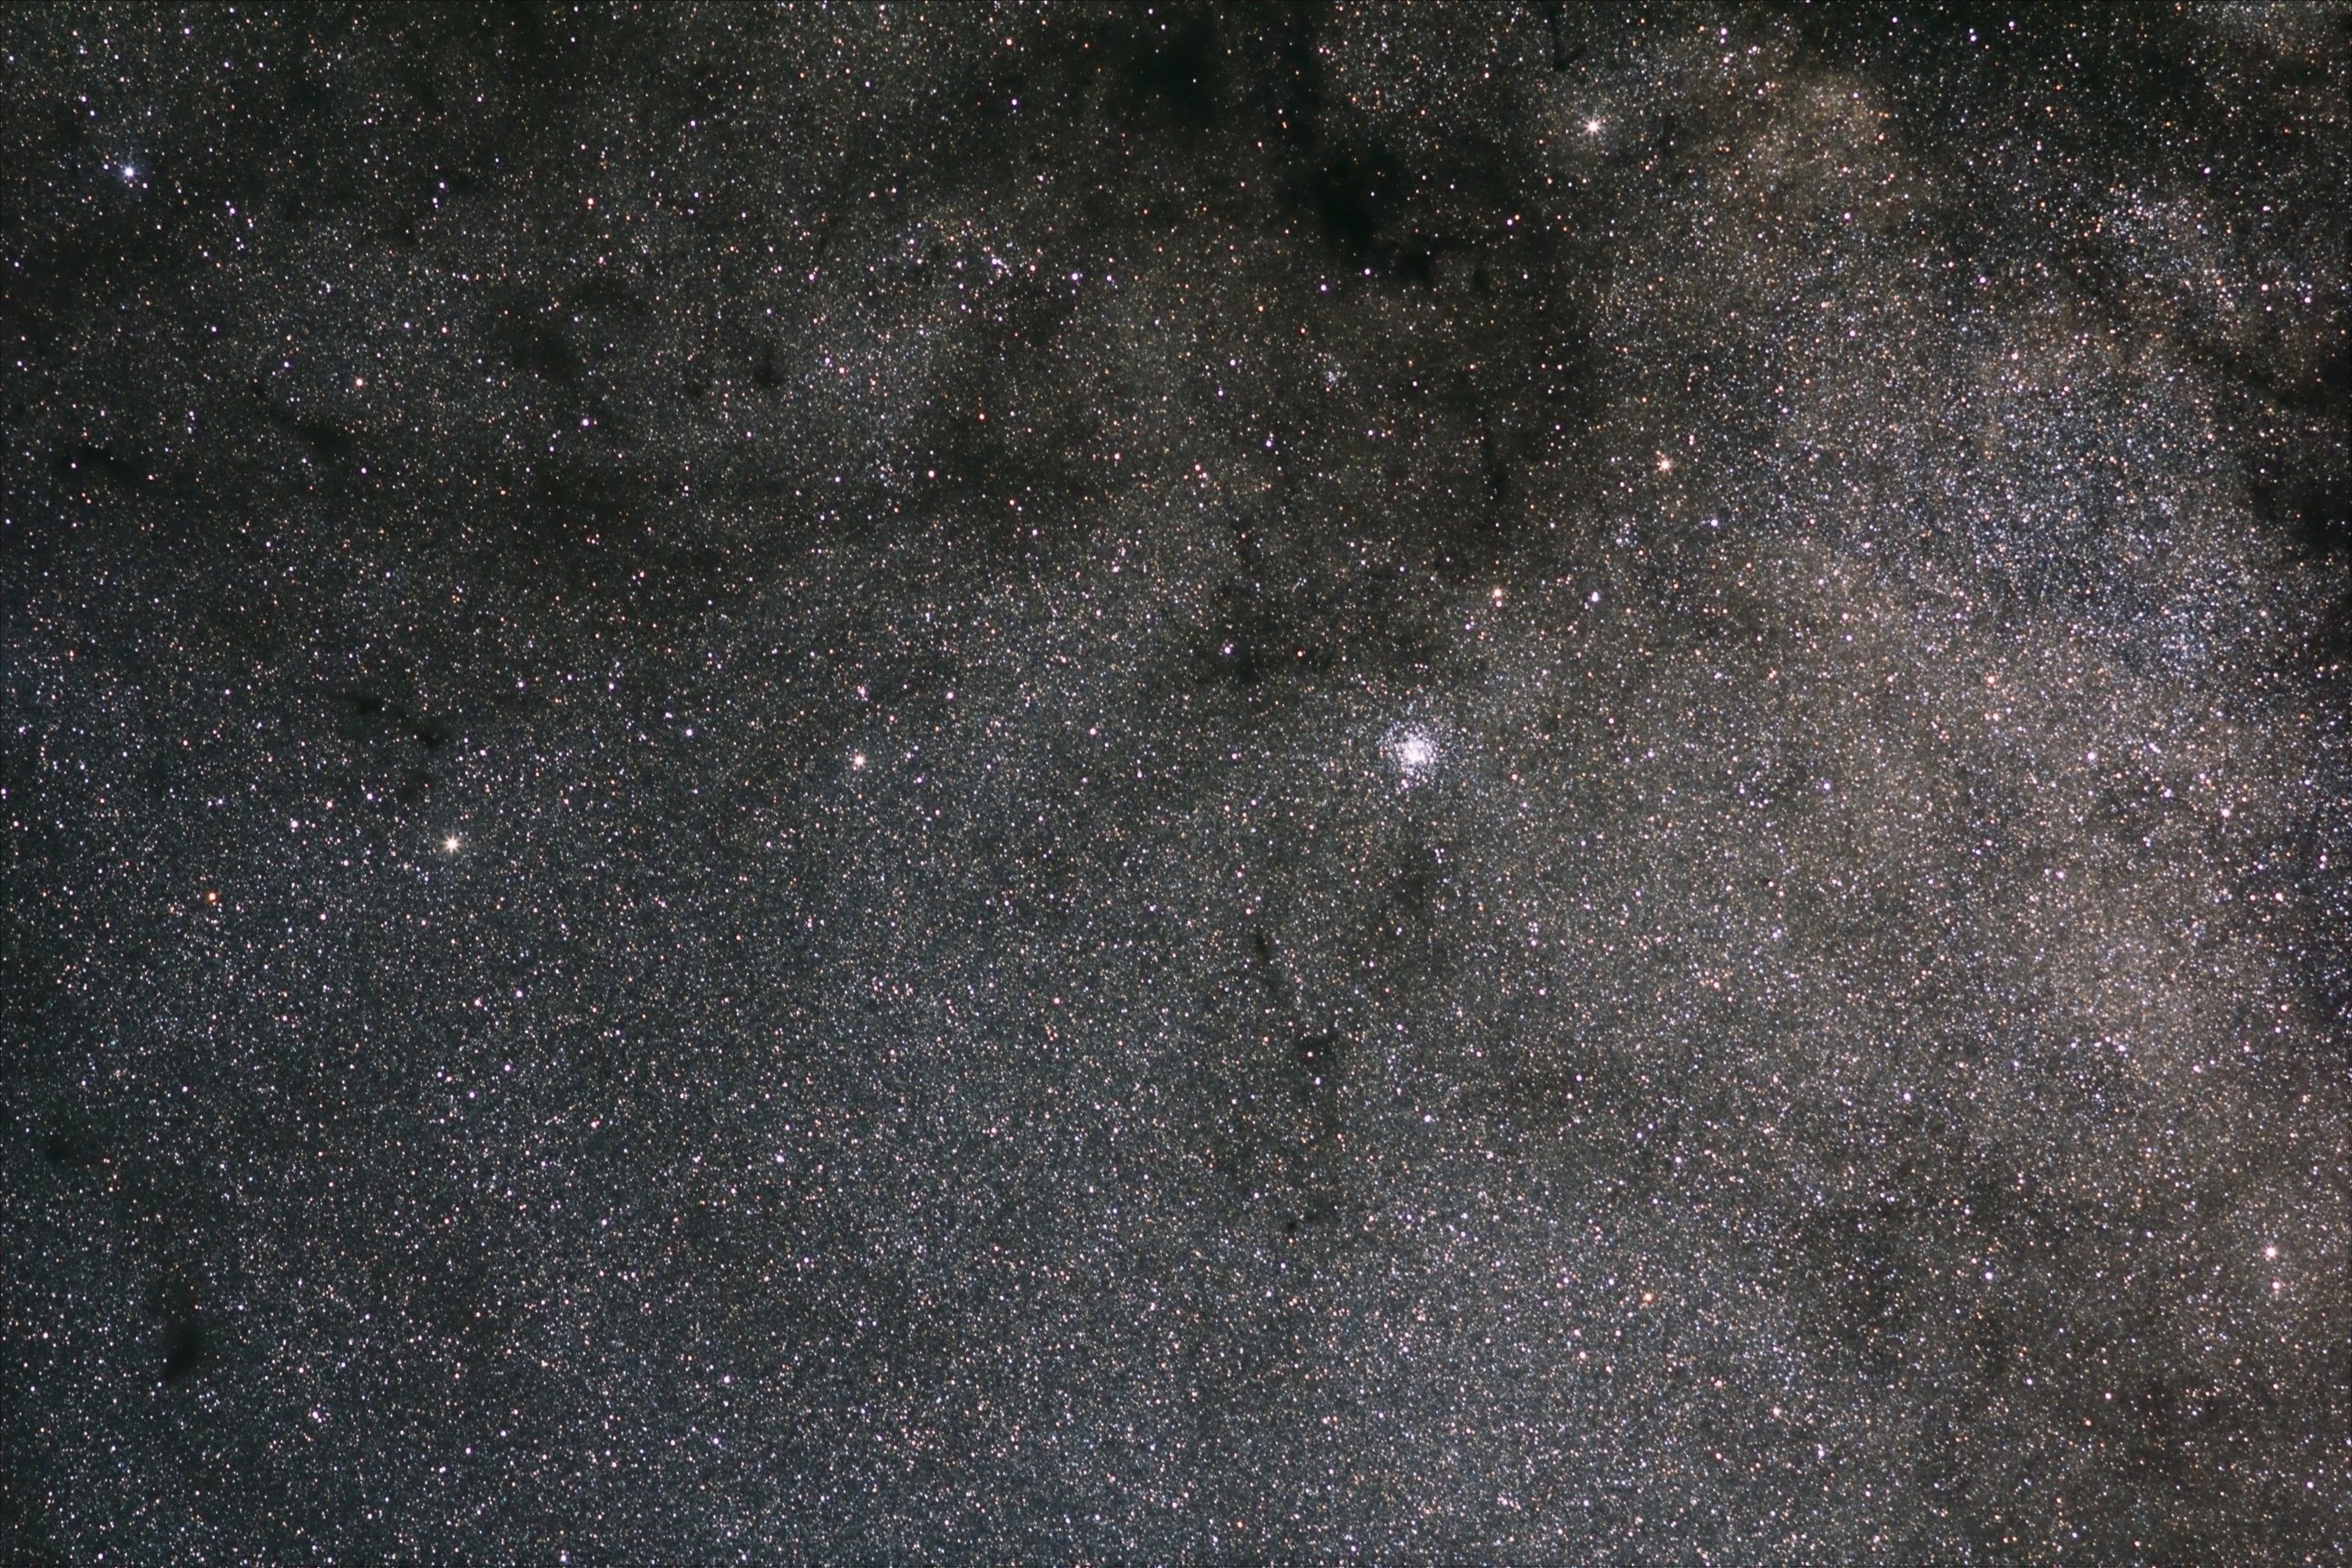
Markarian’s Chain was next. I did four shots here. There is a huge number of galaxies visible in here.
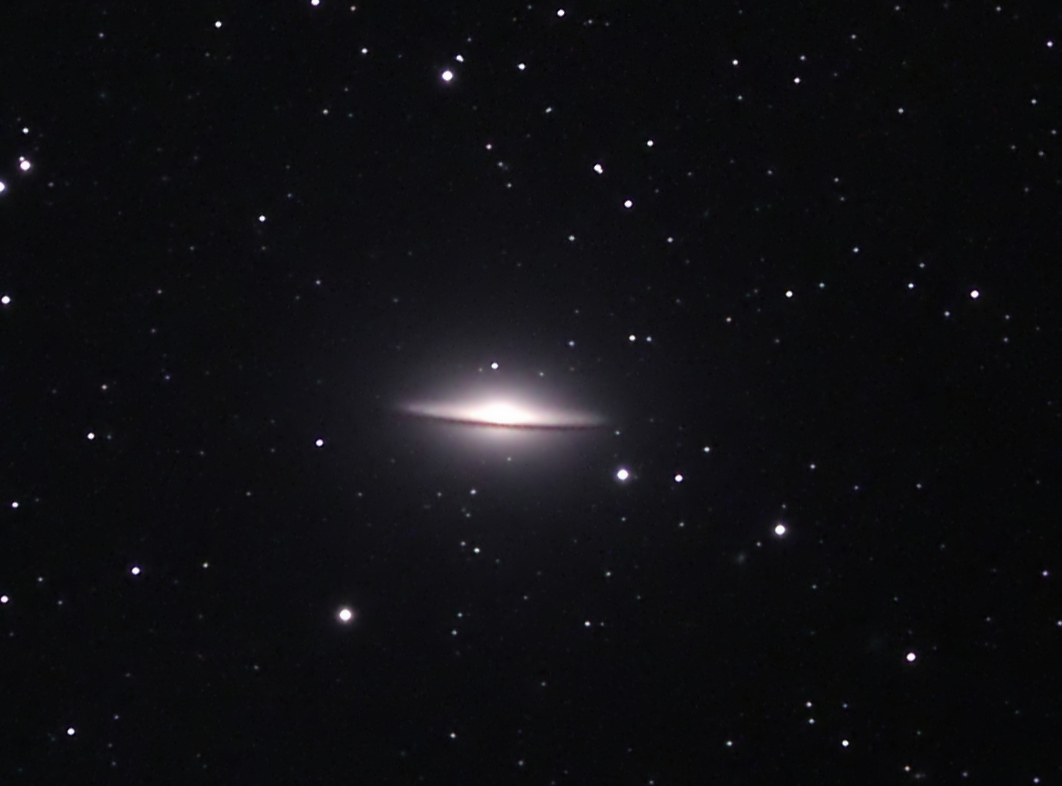
M104, the Sombrero Galaxy came next. In spite of the wide field, the Sombrero shape is clear.
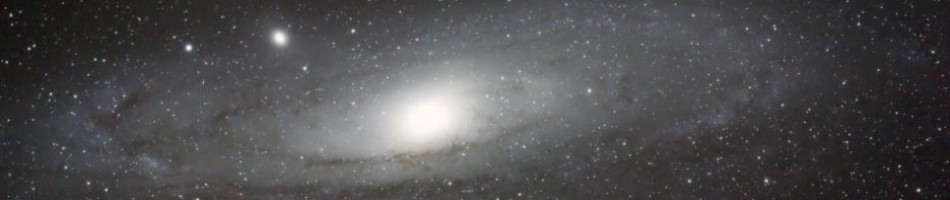
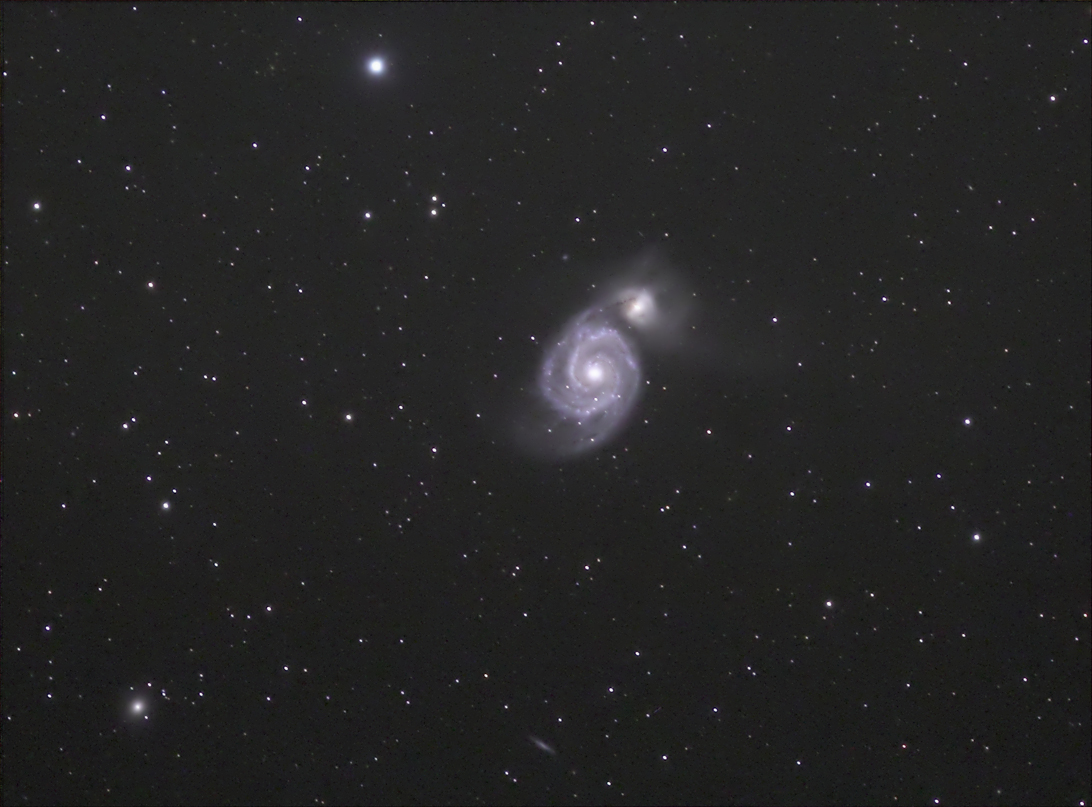
Next came M51 and its companion NGC 5195.
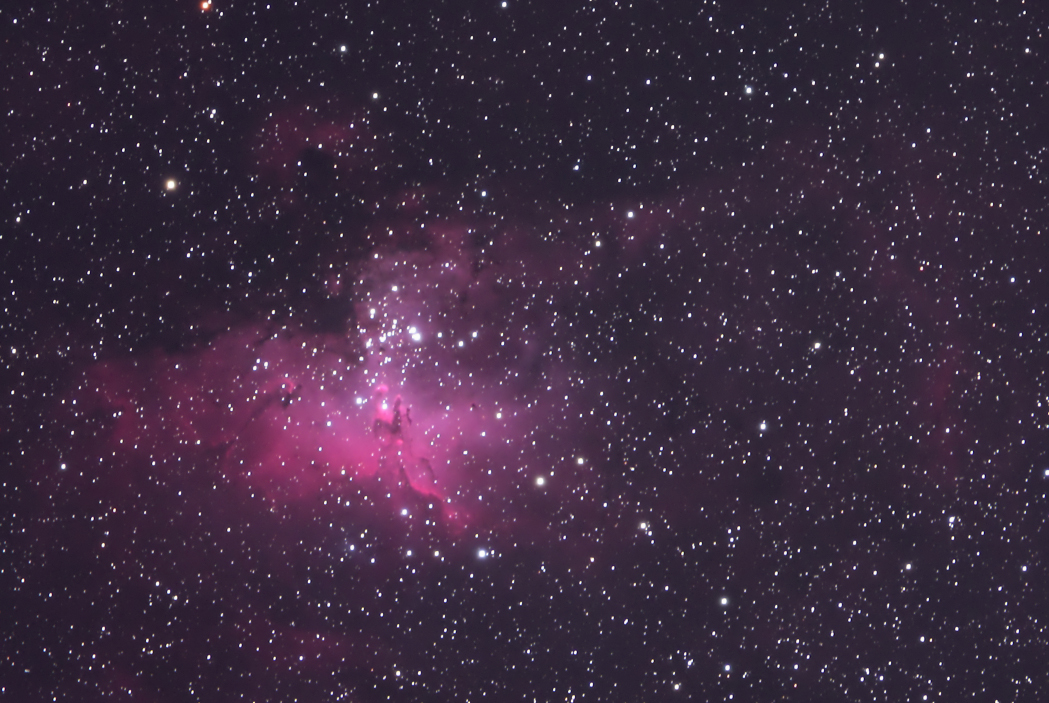
I then did M16, the Eagle Nebula (four shots). The color really dazzled in these shots straight off the camera.
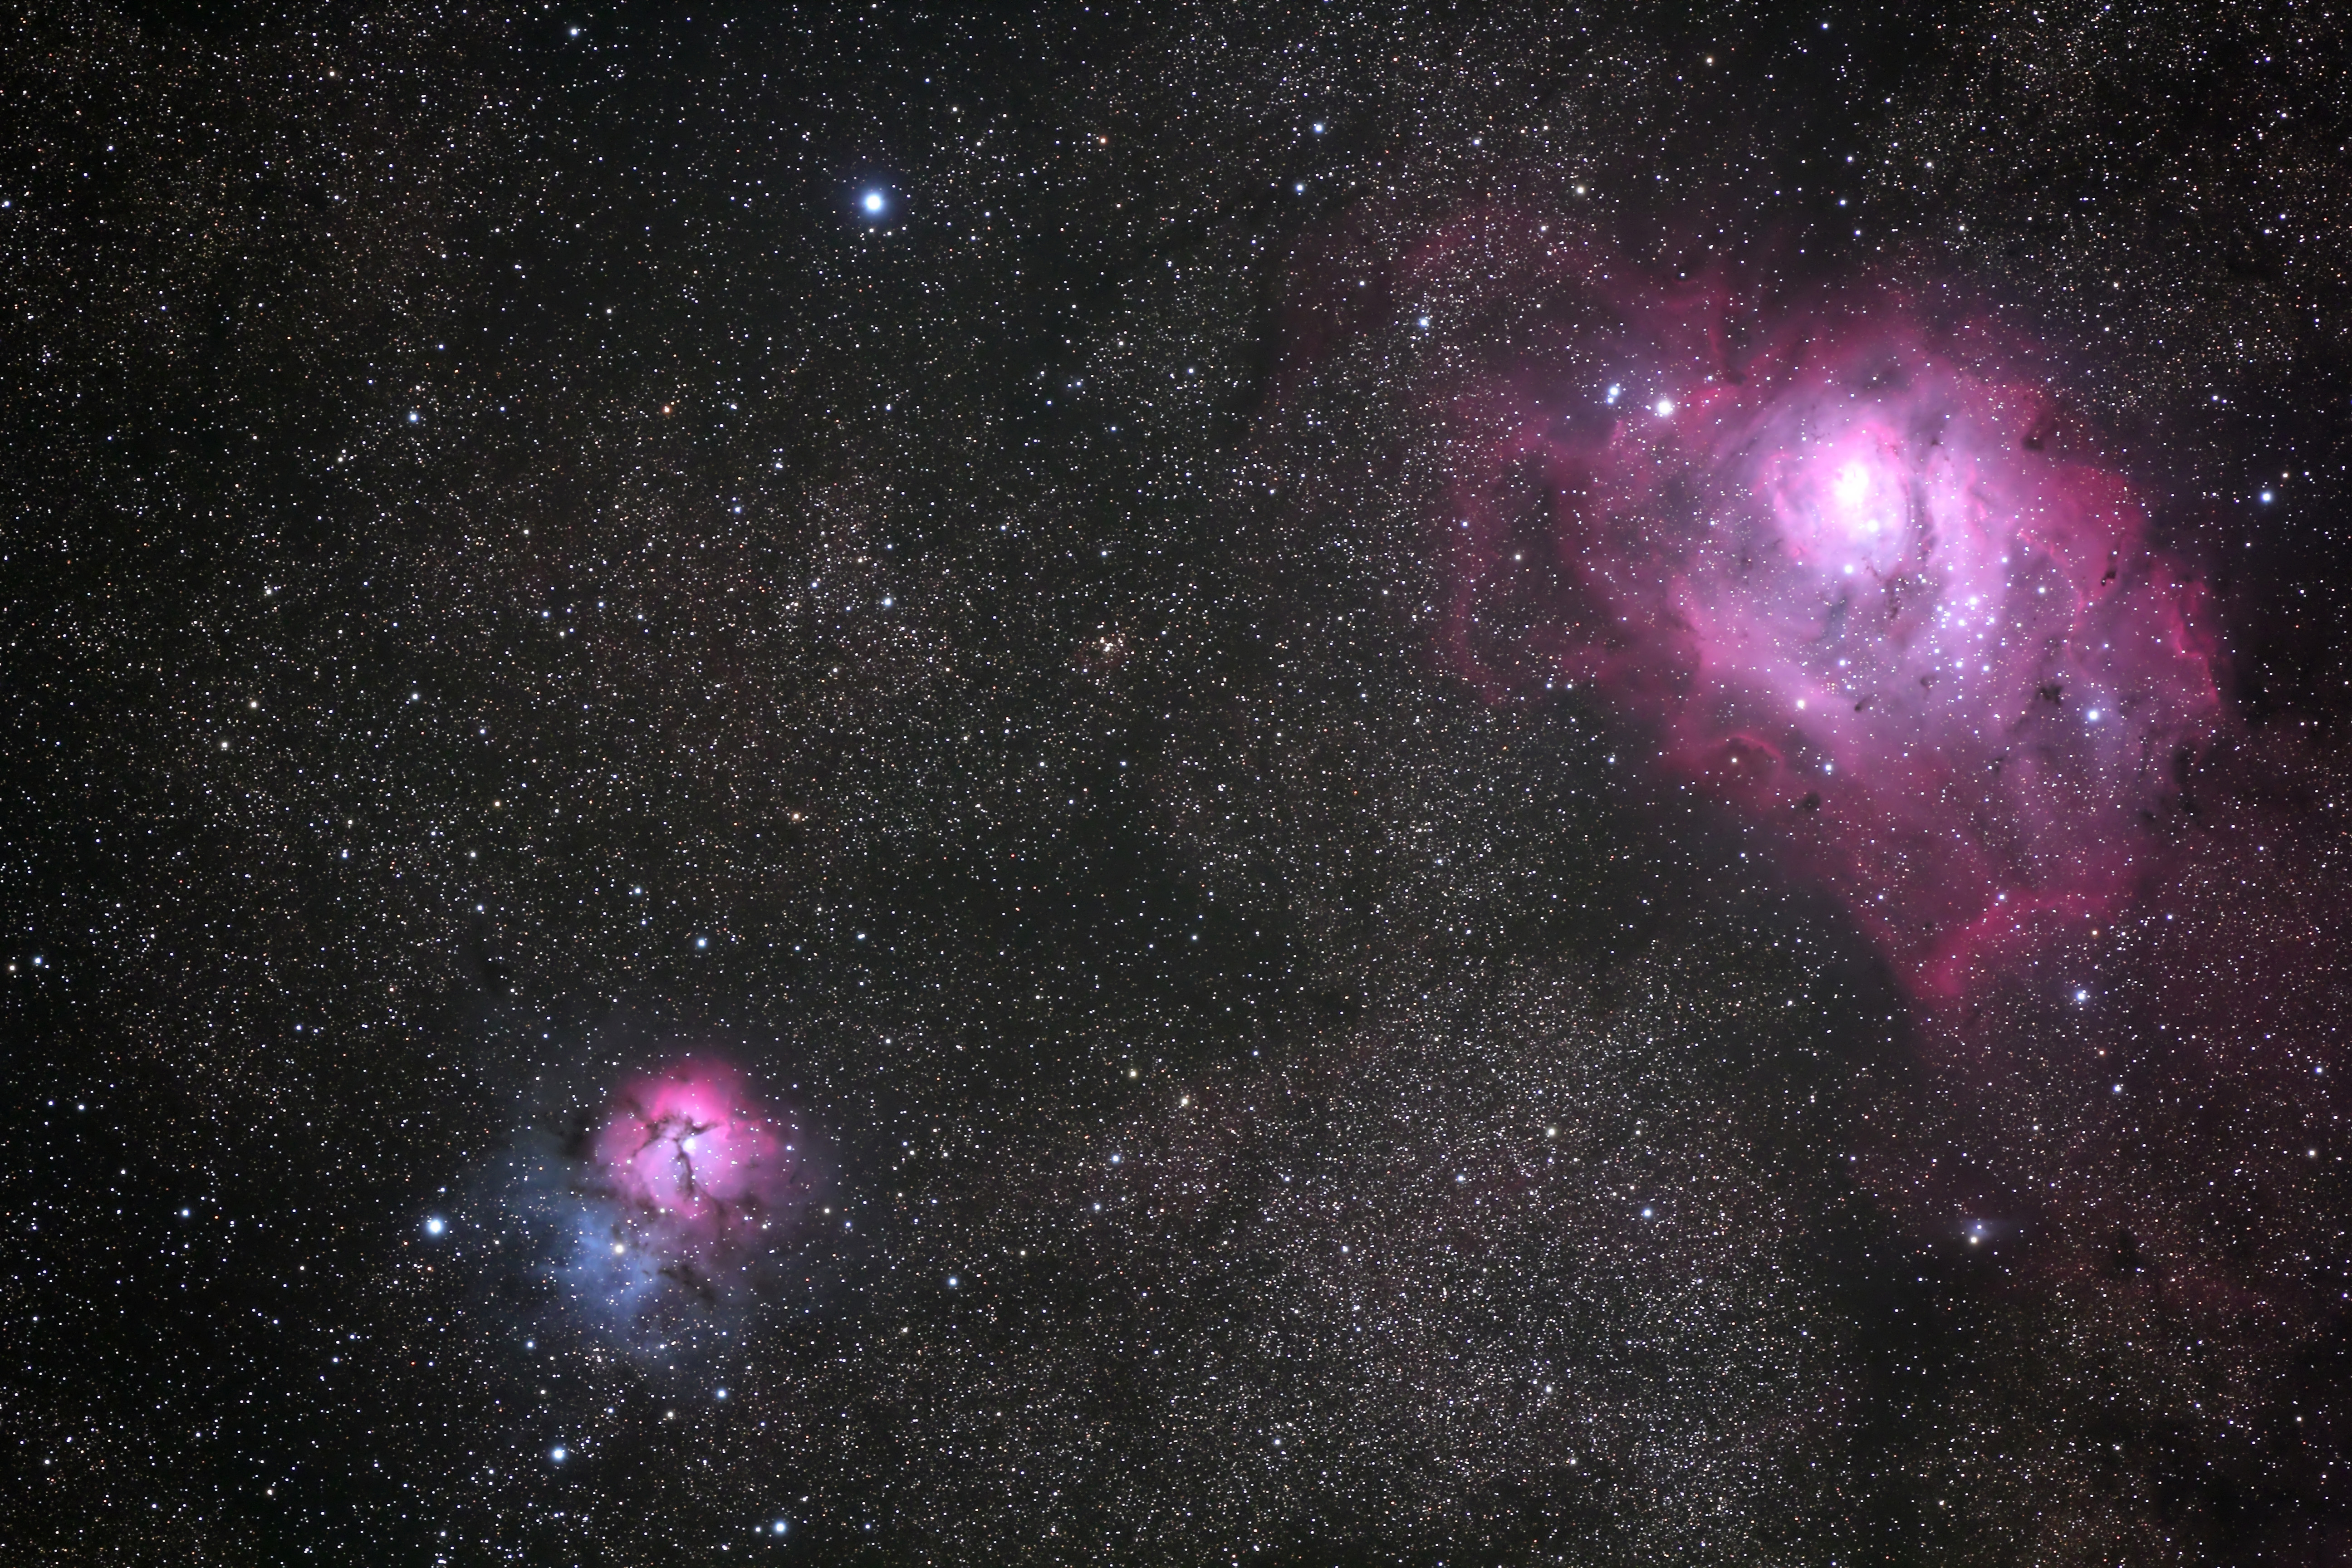
Then the objects I was dying to get a good picture of, M8 and M20. I think these were my best shots of the night.
Then I did the Pipe Nebula, in Ophiuchus. On reflection, this would’ve been better in the 200mm, but I got a great shot of the bowl portion of this dark nebula. This was only two shots.

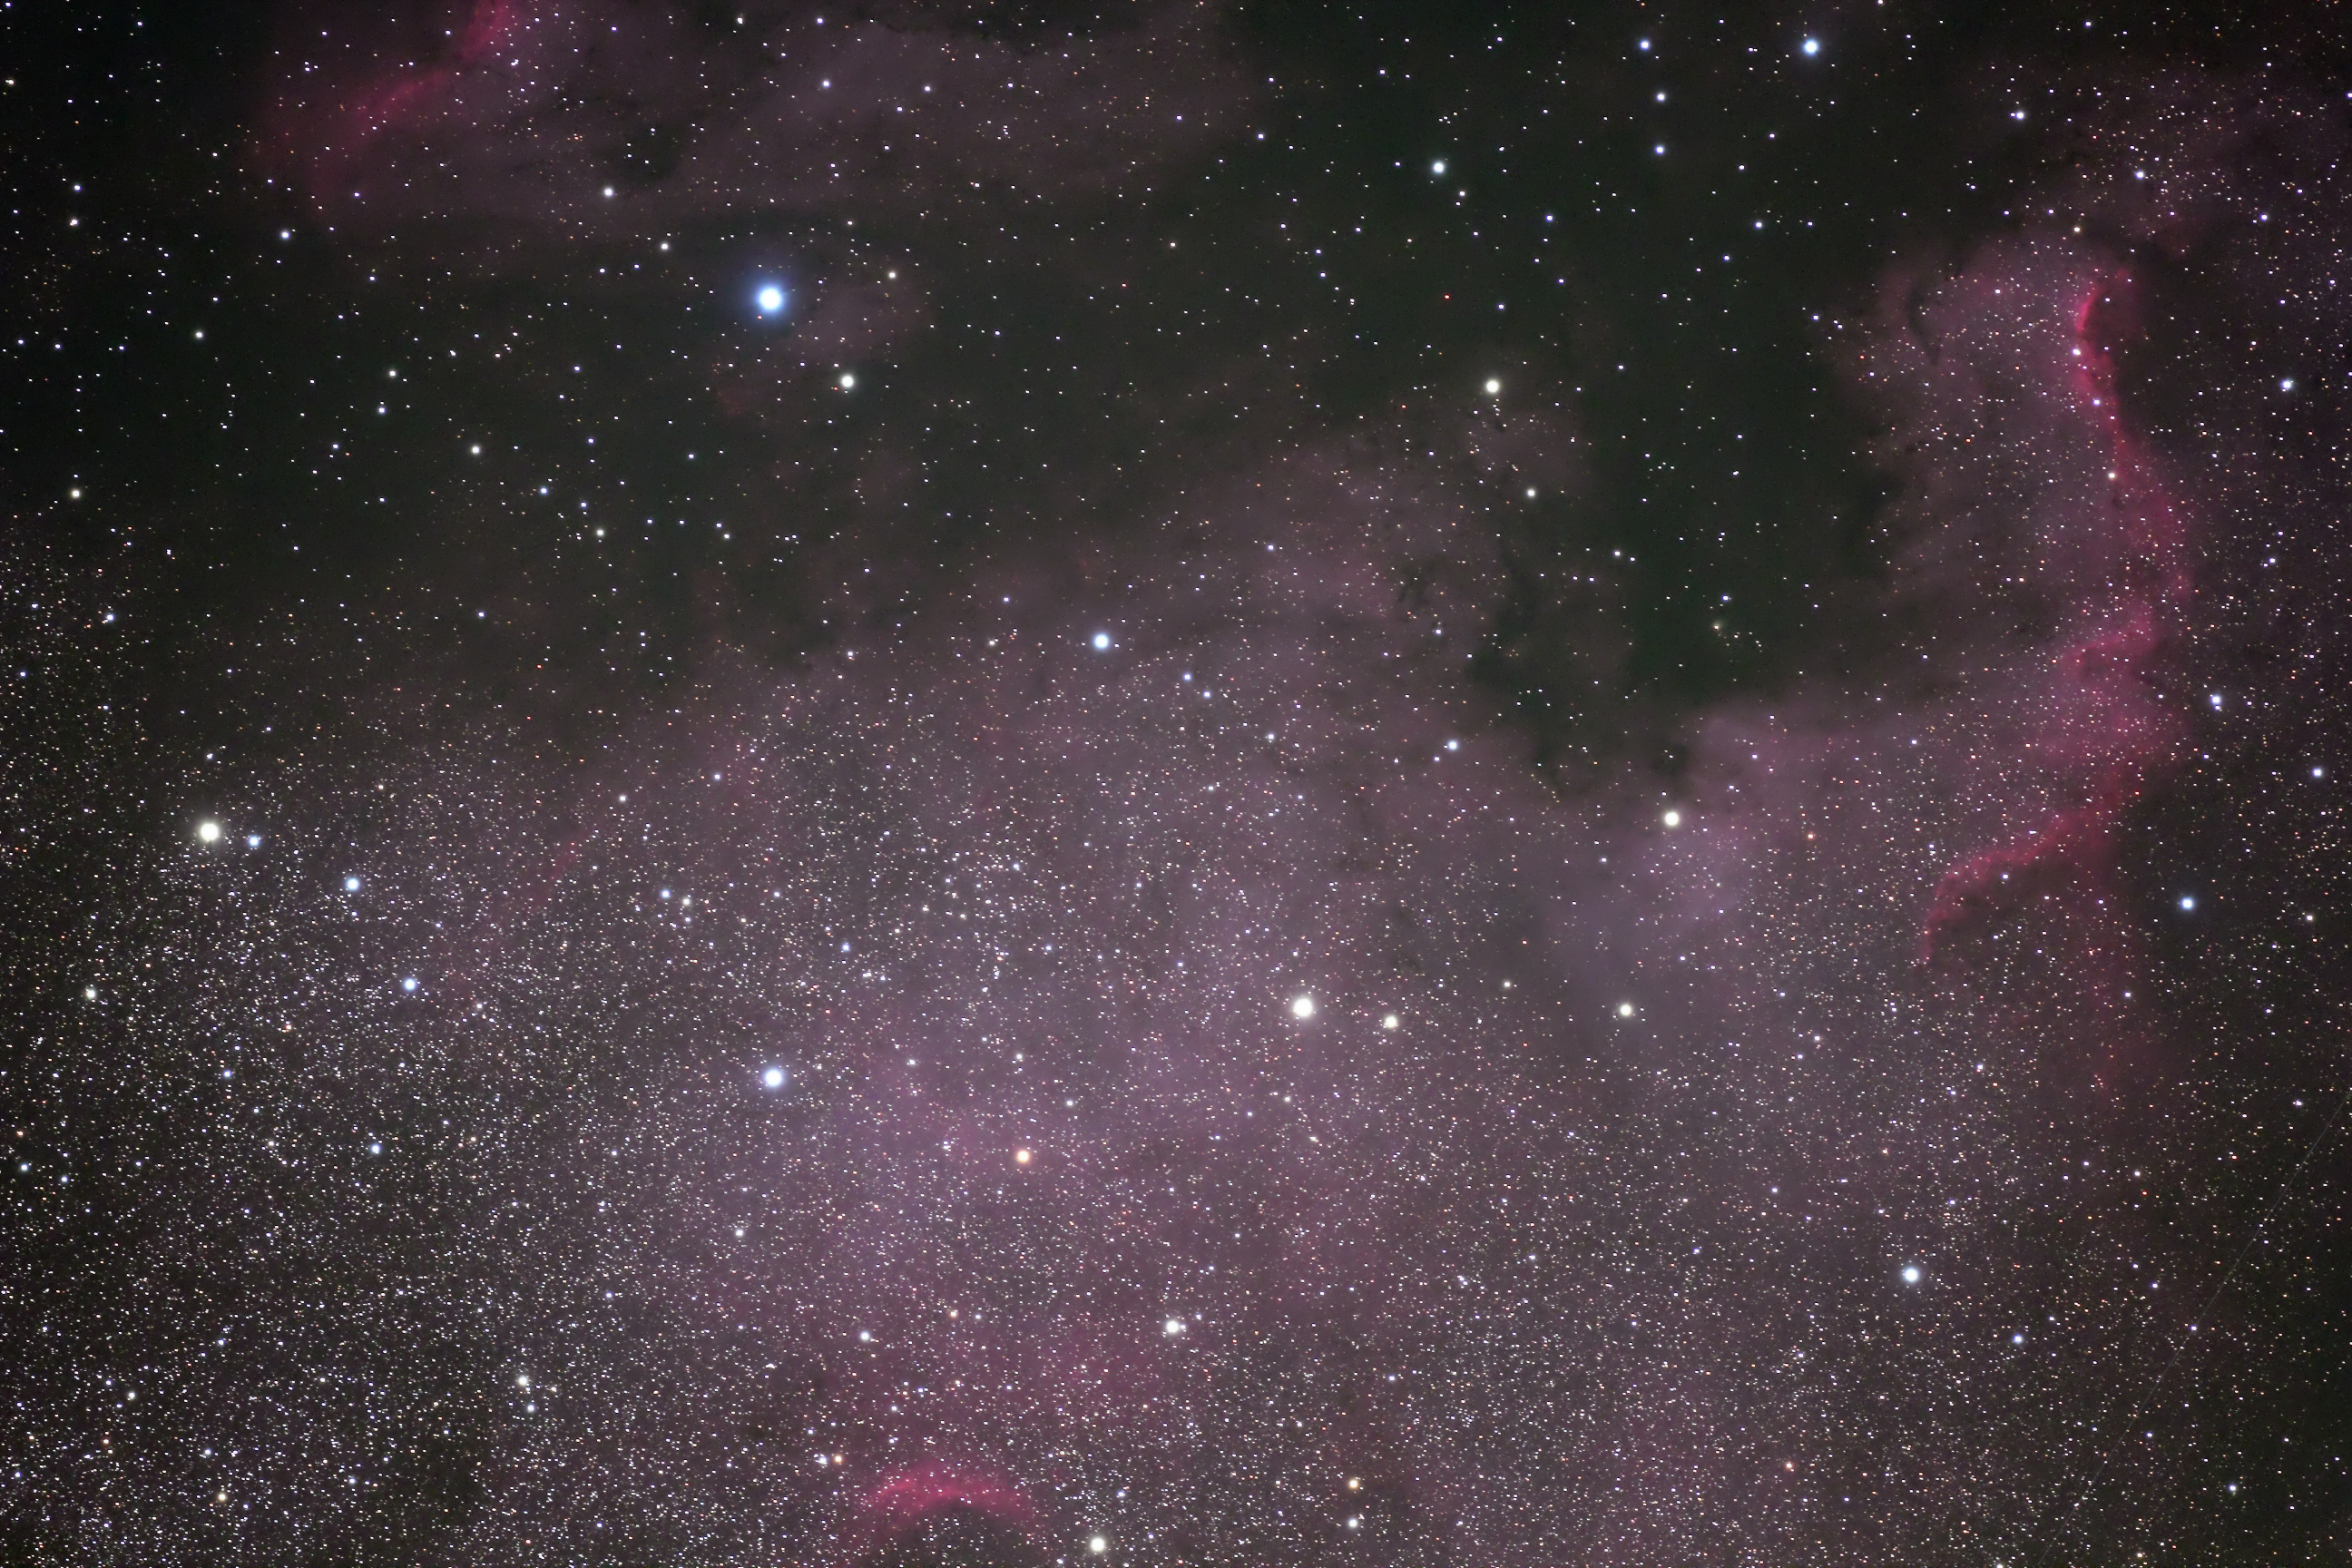
I did the North America Nebula next. I tried this out the last time I was here and wanted to compare. This was only two shots.
I ended the night with M13. This was just a single shot! Amazing clarity here.

All in all, this night was probably the best night I’ve ever spent under the stars. Totally worth the money. Thanks to the people at Kitt Peak, specifically Emily, who runs the observing programs and John who was our guide.
Arizona Trip Part 8, Guided Canon T2i Shots
[NOTE: For the most part, if a preview image looks bad, it’s because of the way WordPress is compressing the full image. Click for a better picture.]
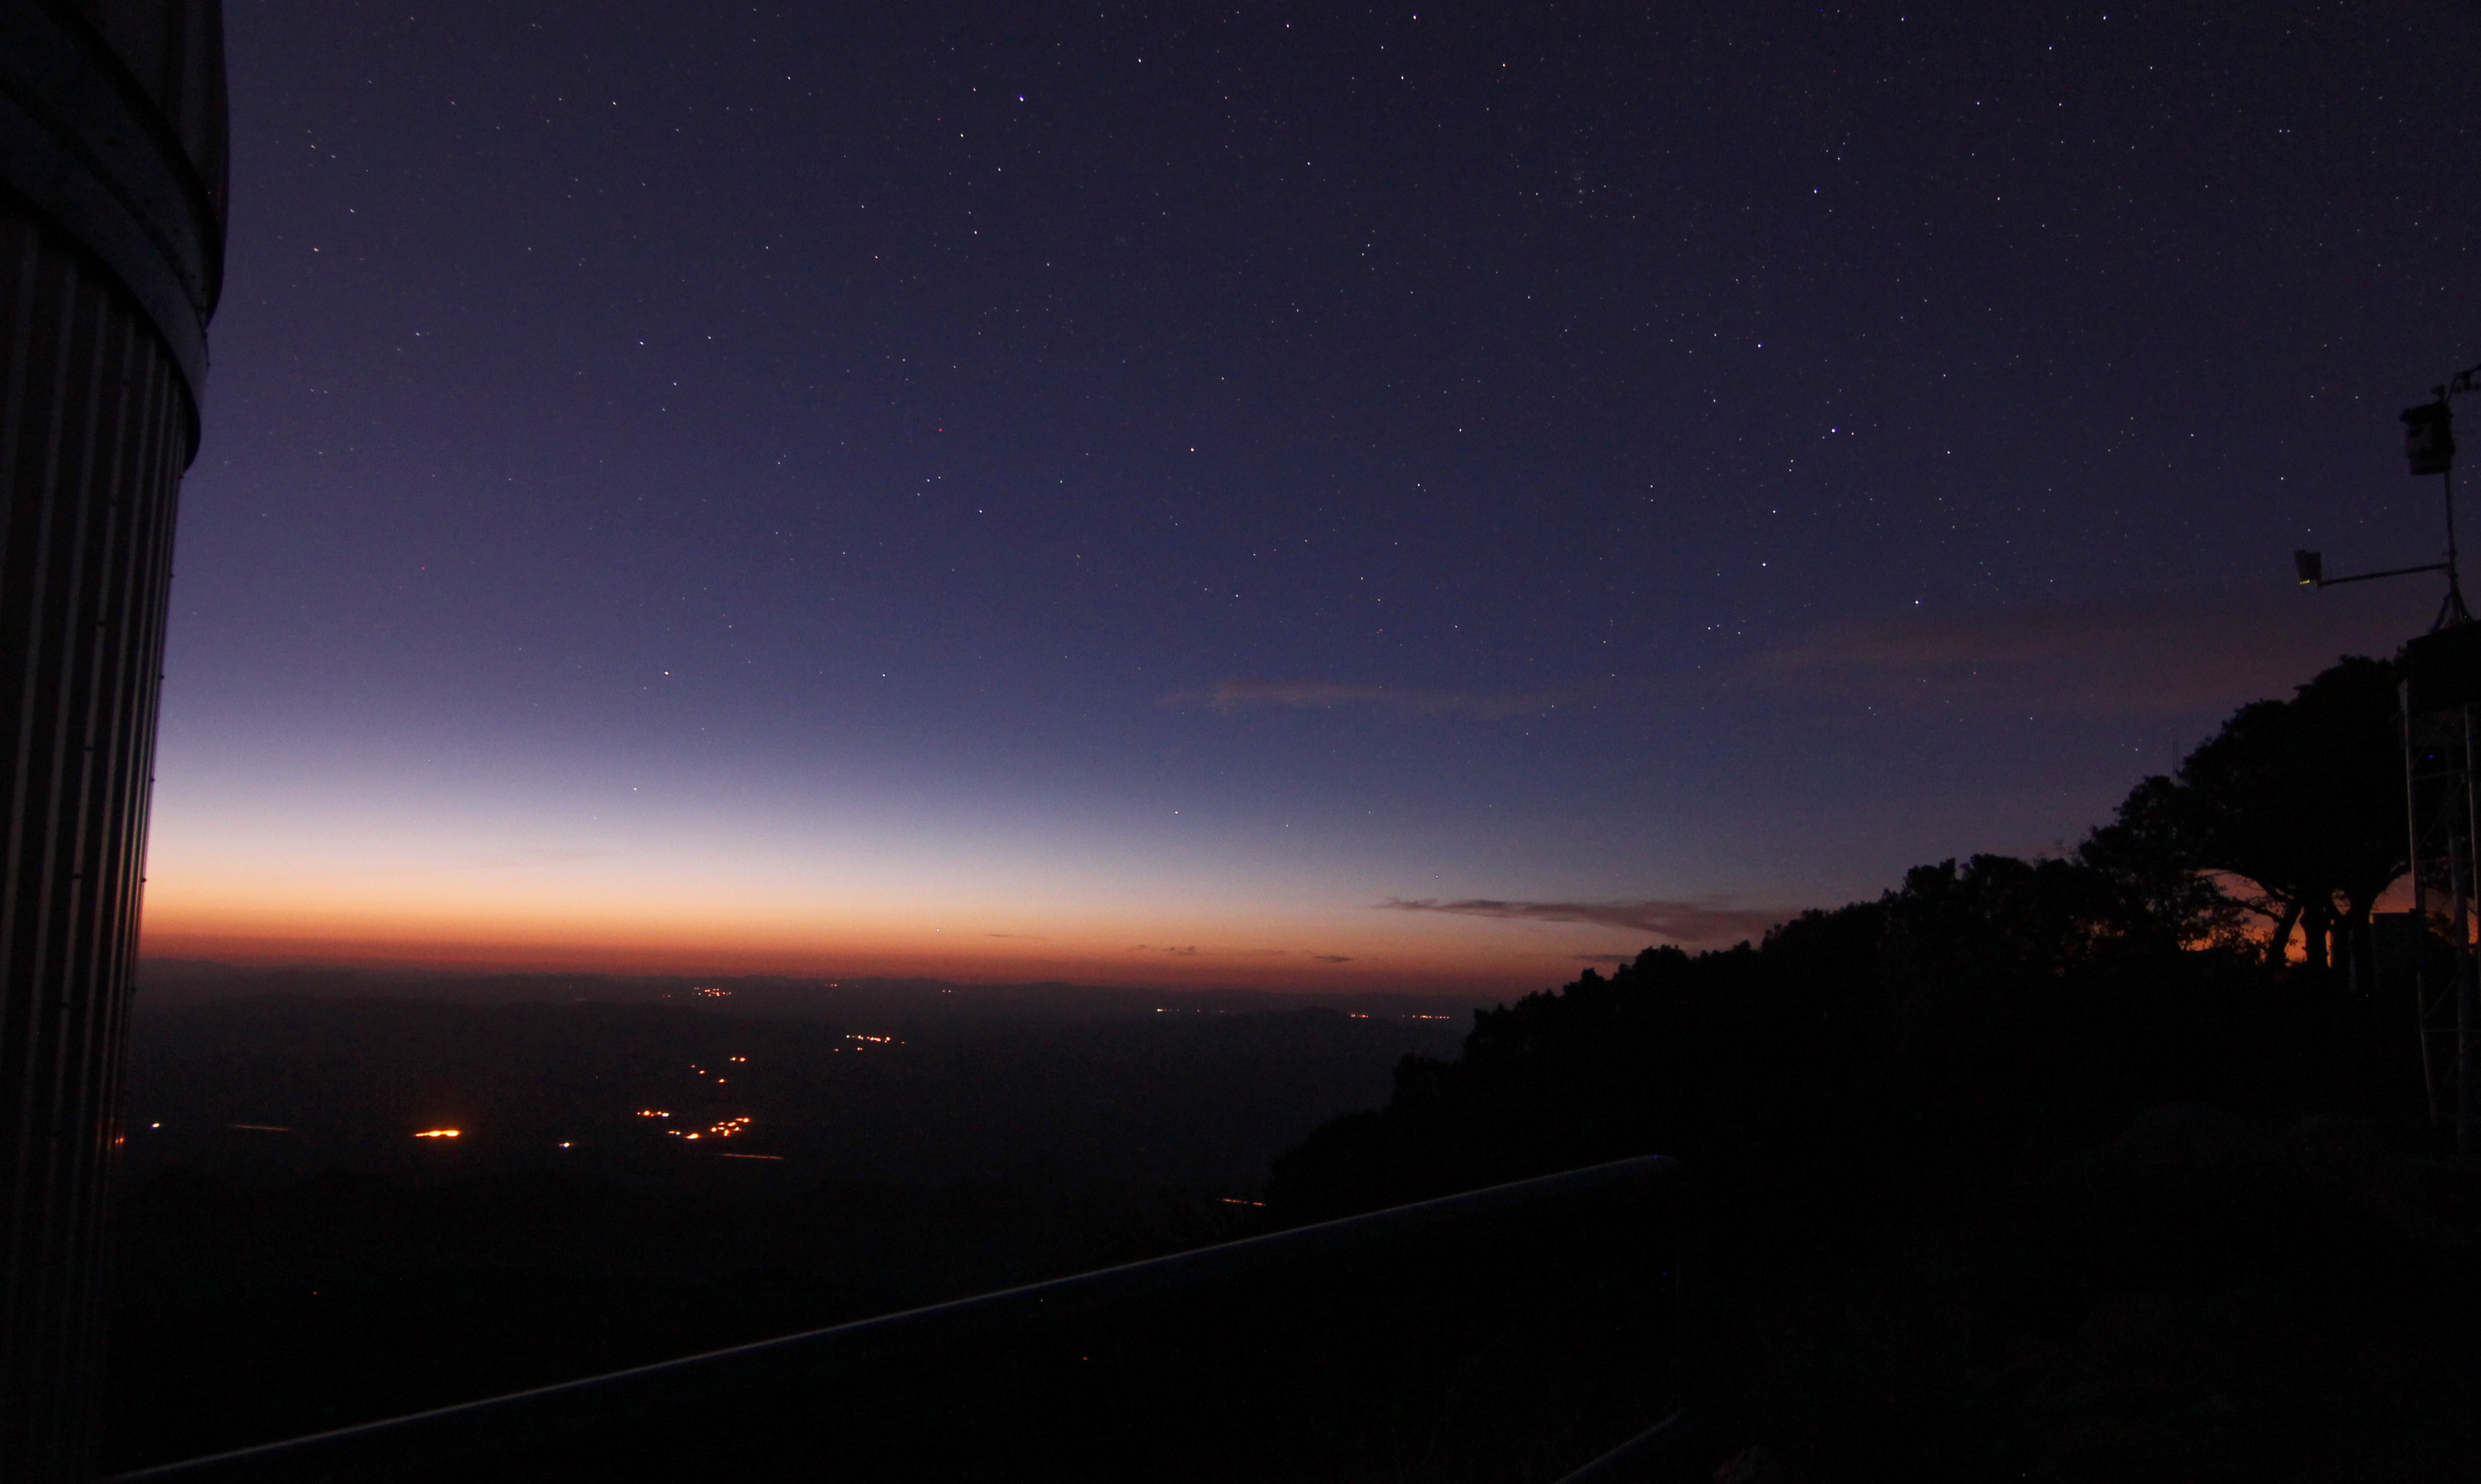
The Astrotrac is an amazing tool for taking wide-field shots. It’s compact, can easily go on a plane, and will give you 5 minute shots with good polar alignment. I borrowed mine from a friend in the local astronomy club. Near the beginning of the night, I was having a lot of trouble getting it aligned properly. I only got a few shots taken before my laptop battery was near death. None of them were really worth processing. I ended up setting up for the rest of the night on the patio next to the visitors center, which is where the 20″ RC was. Thankfully, there was a power outlet there!
For the most part, I stuck with the 50mm lens. First, I got the region around Corvus. Six four-minute subs at ISO 1600.
This was right around the time the NOP ended and my AOP started, so there was a little break. The next one I did was a wide field of Virgo. Lots of galaxies are visible in this image. Same camera settings as above.
There was another break of about an hour while I waited for interesting stuff to rise. The following shot of M11 was a stack of ten 2-minute shots at ISO 1600 with the 200mm lens.
By this time, Sagitarrius was starting to rise and was dazzling. Here’s a wide-field with the 50mm. 60 seconds at ISO 1600.
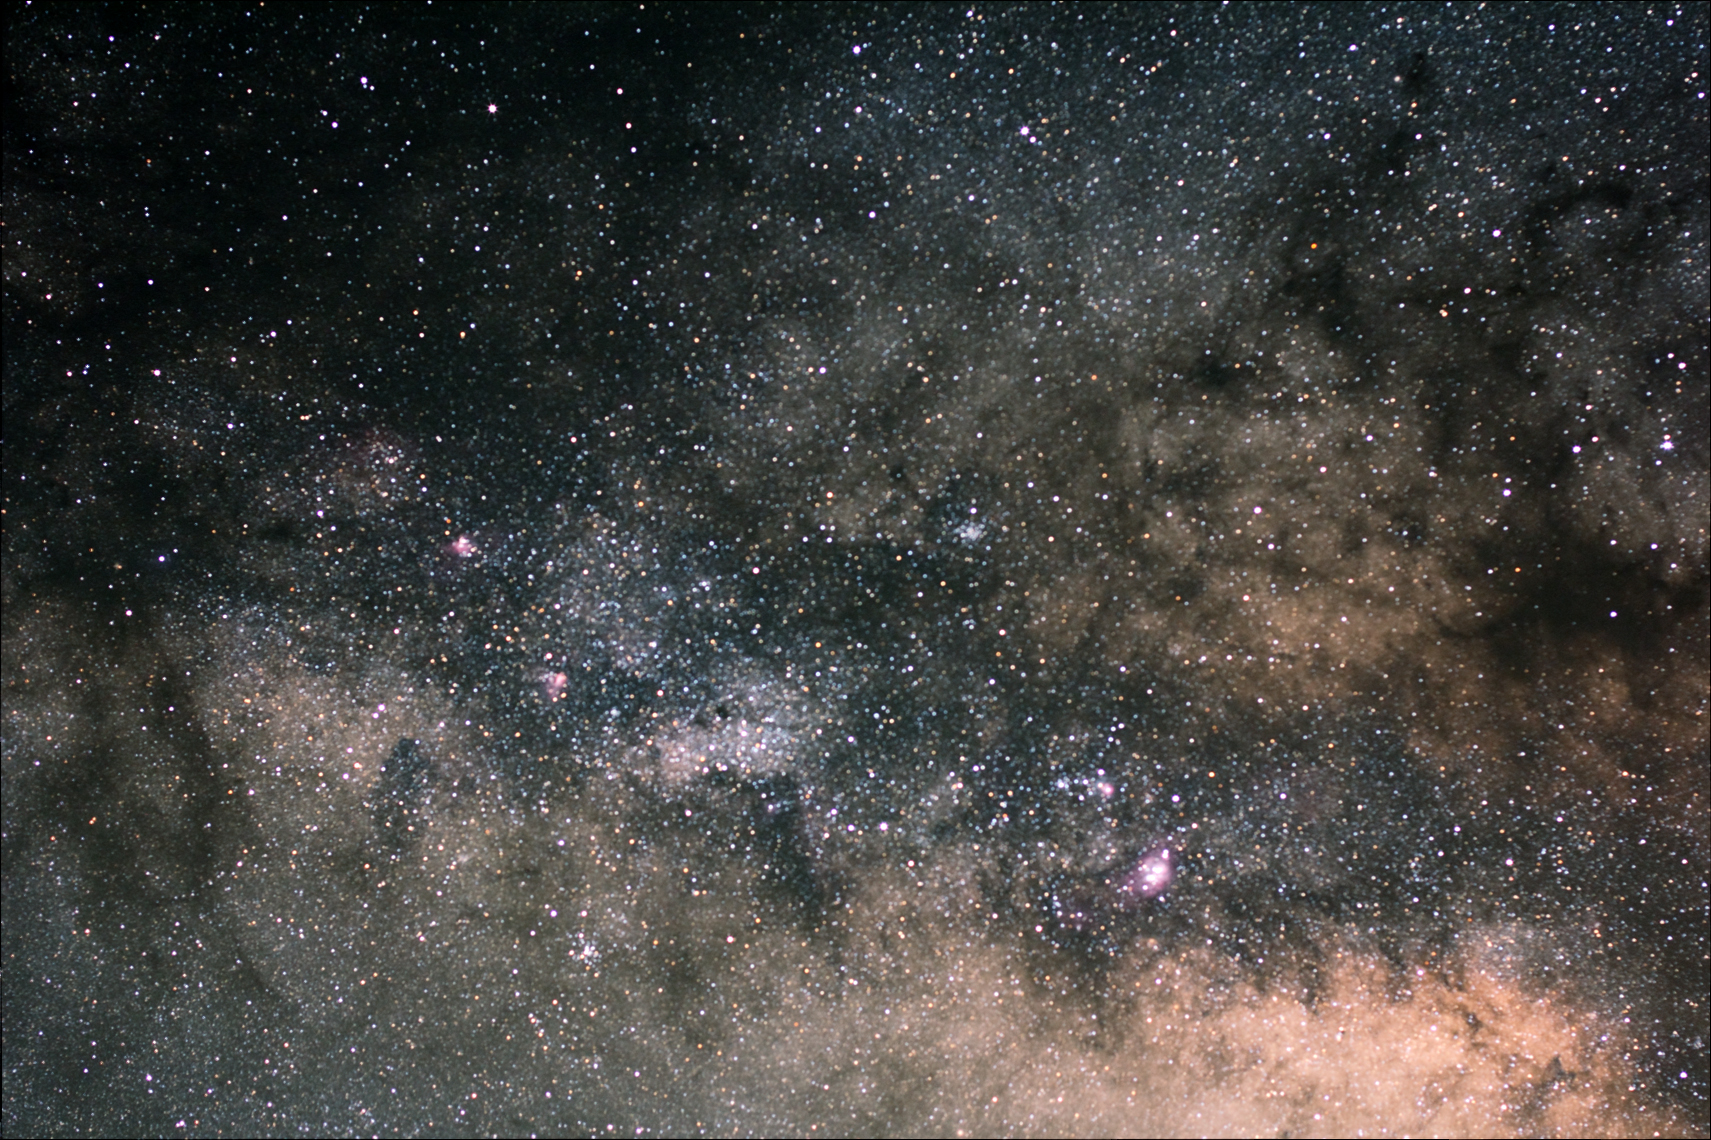
I then decided to do some 200mm shots of the very nebulous regions of Sagittarius and nearby constellations.
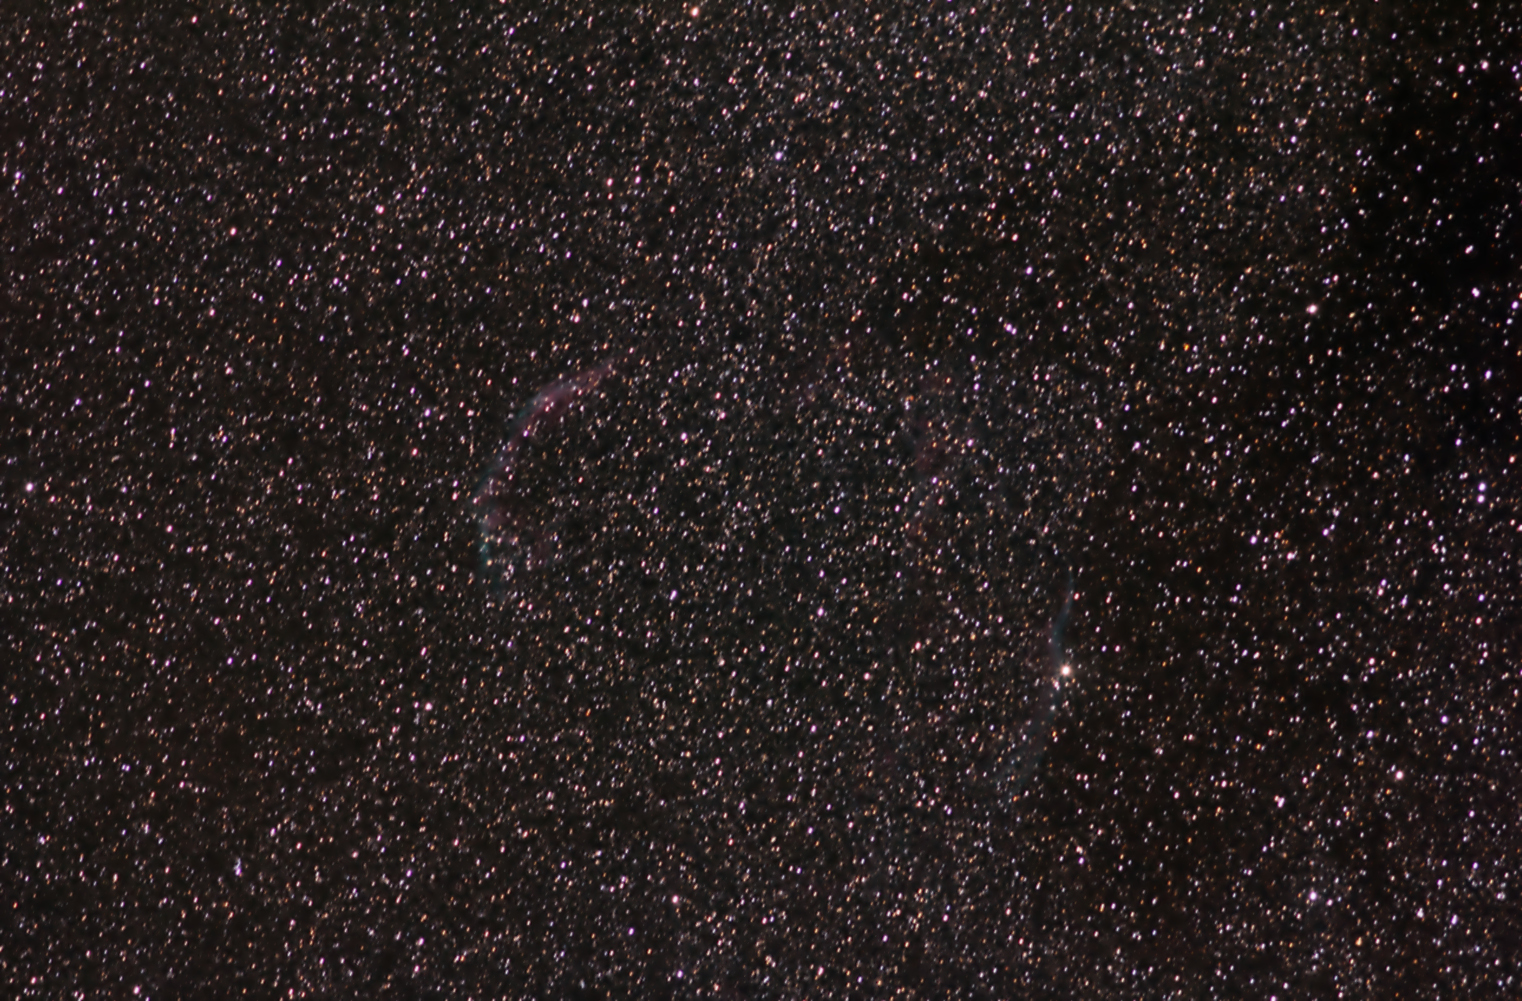
The last shot I did on the mount was of the two Veil Nebulae, in Cygnus. This was 6 4-minute shots with the 200mm lens at ISO 1600.
The next post will contain my pics through the Takahashi.
Arizona Trip Part 7, Kitt Peak Unguided Astropics
[NOTE: For the most part, if a preview image looks bad, it’s because of the way WordPress is compressing the full image. Click for a better picture.]
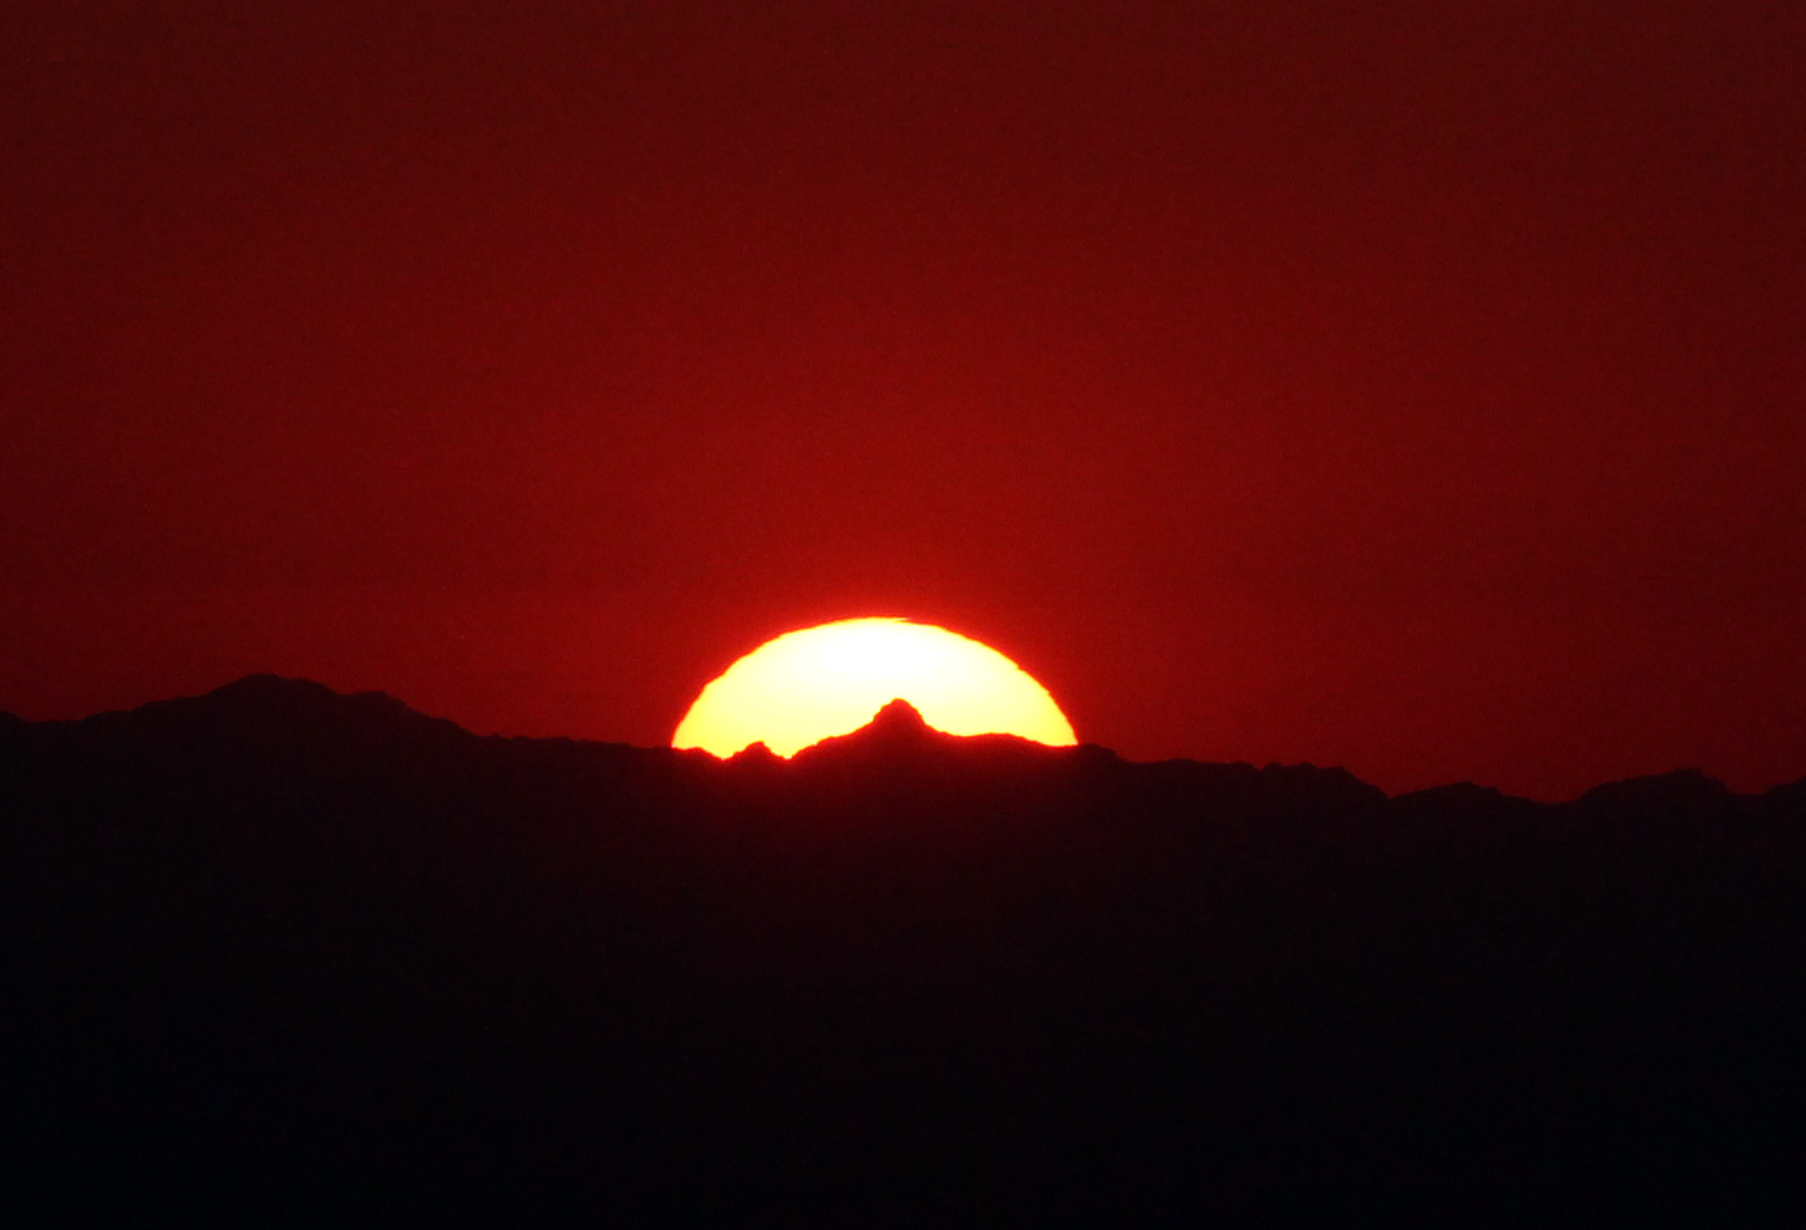
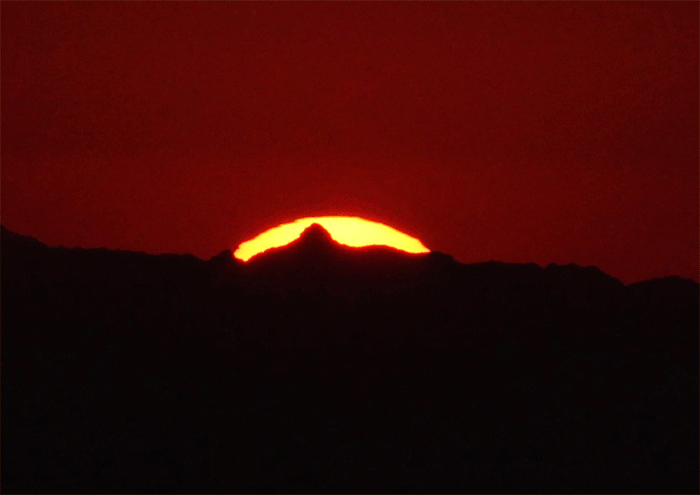
The night starts around sunset. While you don’t participate in the NOP, you ought to watch sunset, then hang around for the stars coming out. Pretty quickly, I realized just how much darker this place is than Maryland! Unless specfically mentioned, f/4.0 was used for all shots.
At sunset, there’s a perfect view to the west, where you can watch and hope to see a green flash. I’m still kicking myself for this, but I forgot that my camera does HD video, so I tried capturing it with regular photos. I made an animated GIF of them, which you can see below the regular sunset shot. The next-to-last photo might show a hint of green.
The stars gradually started to come out.
The next thing I wanted to try to get was Comet PanSTARRS. It was within just a few degrees of Andromeda that night, so I decided to try it out. One of the guides thought it couldn’t be done, but I got a shot of the comet a few weeks ago and figured I could do it. This shot is with my 50mm lens, ISO 200 for 5 seconds.
The second one is a stack of 6 images, ISO 6400 for 2 seconds.

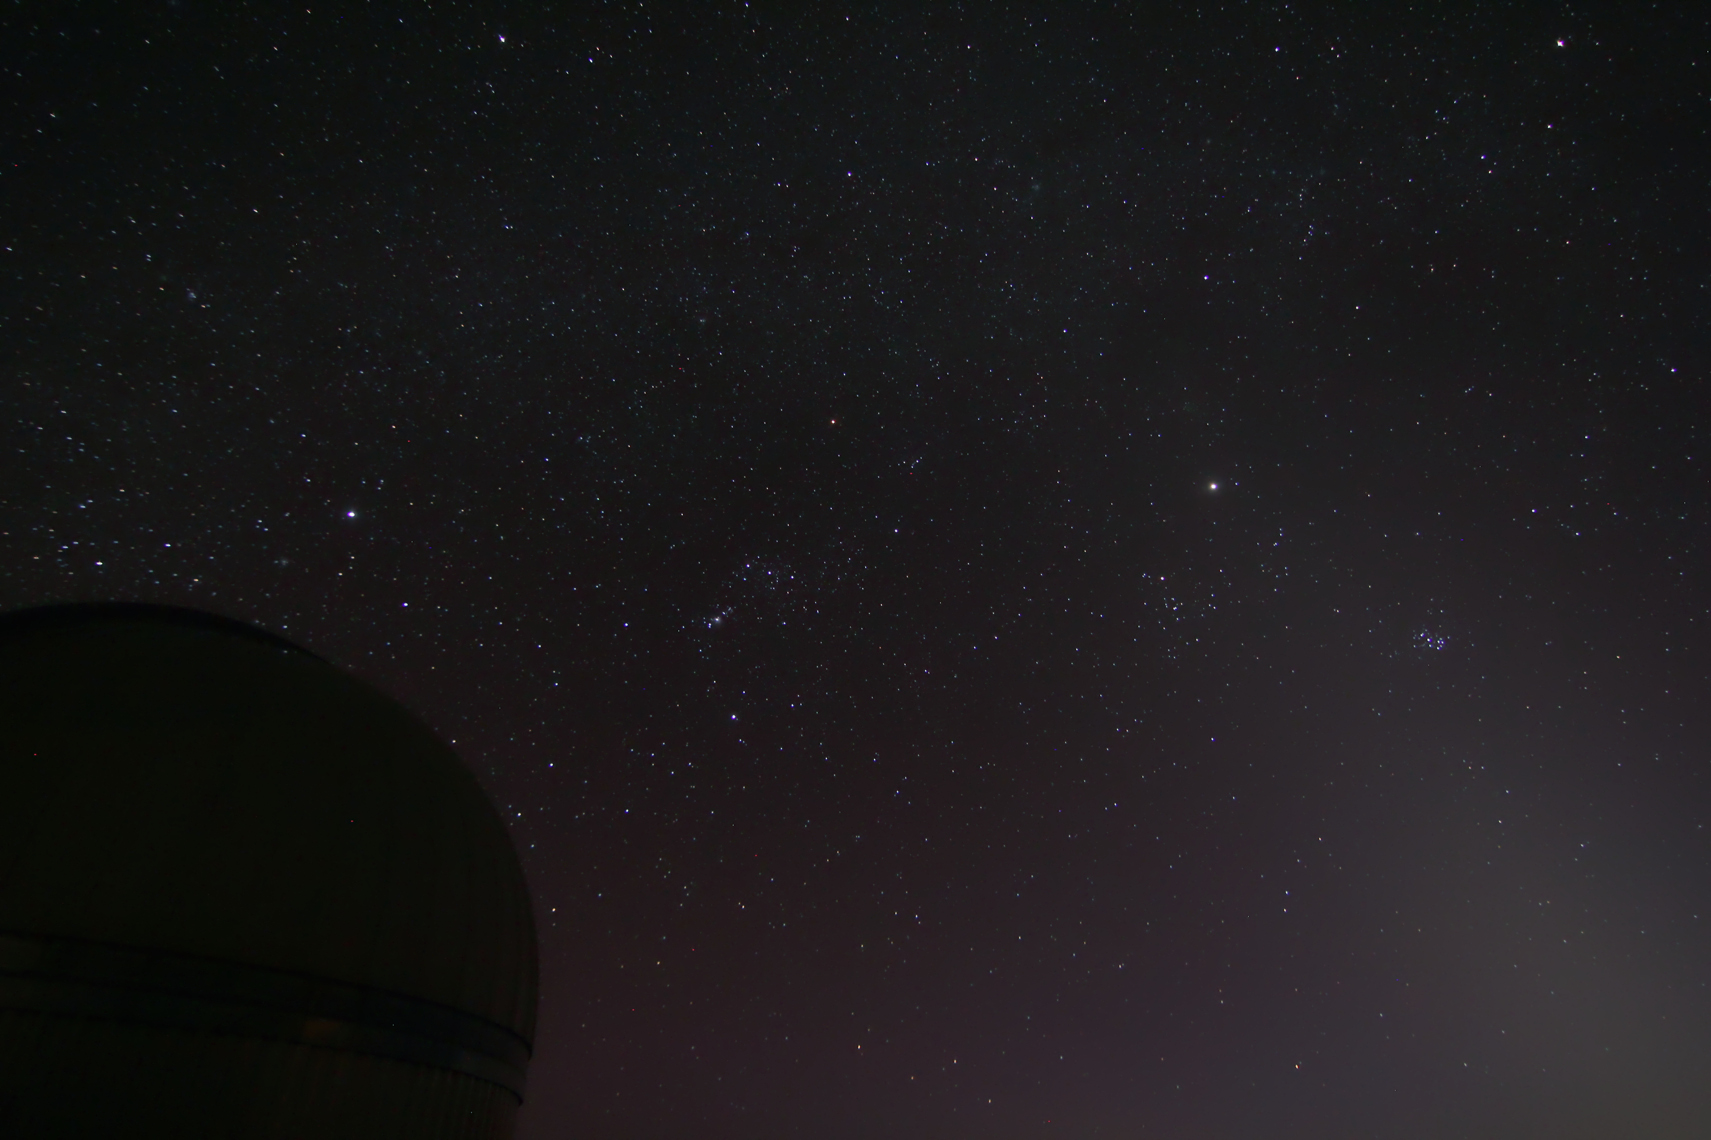
After this, while I waited for it to get fully dark, I shot some wide fields of various constellations with domes in the foreground. These were unguided and 13 second exposures. The first is ISO 800 and of Orion and the Pleiades.
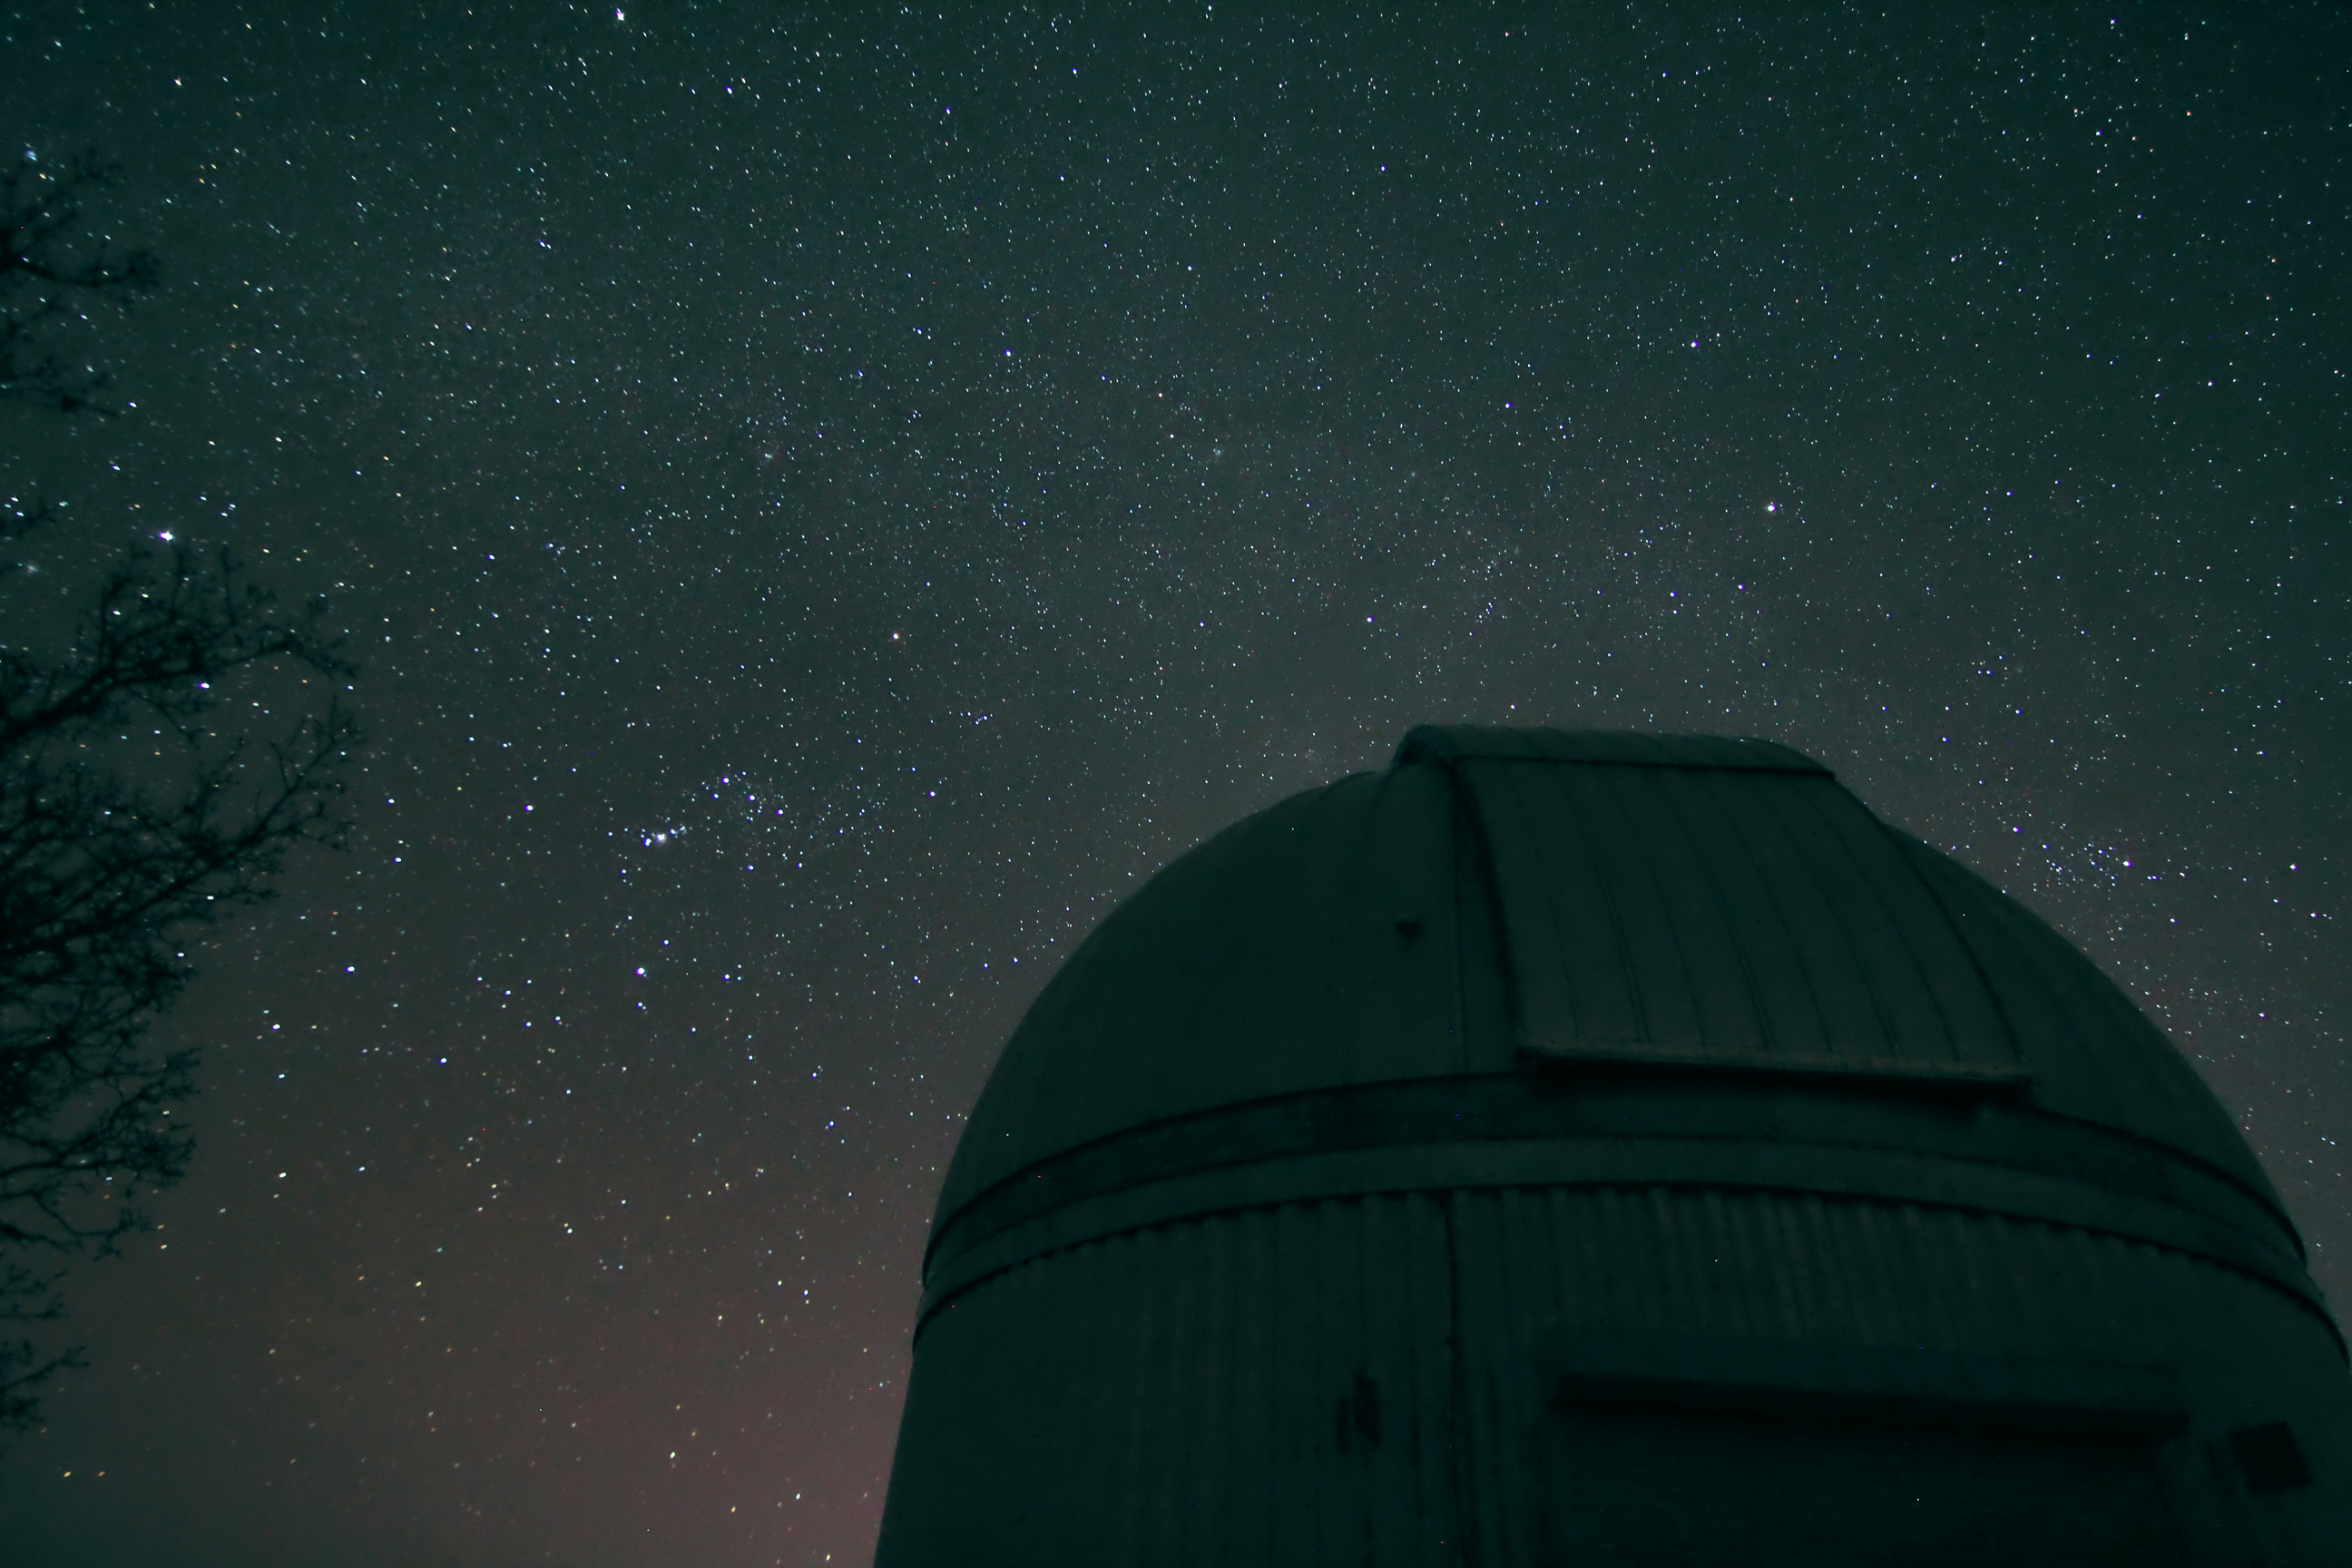
The second is Orion on the other side of the dome.
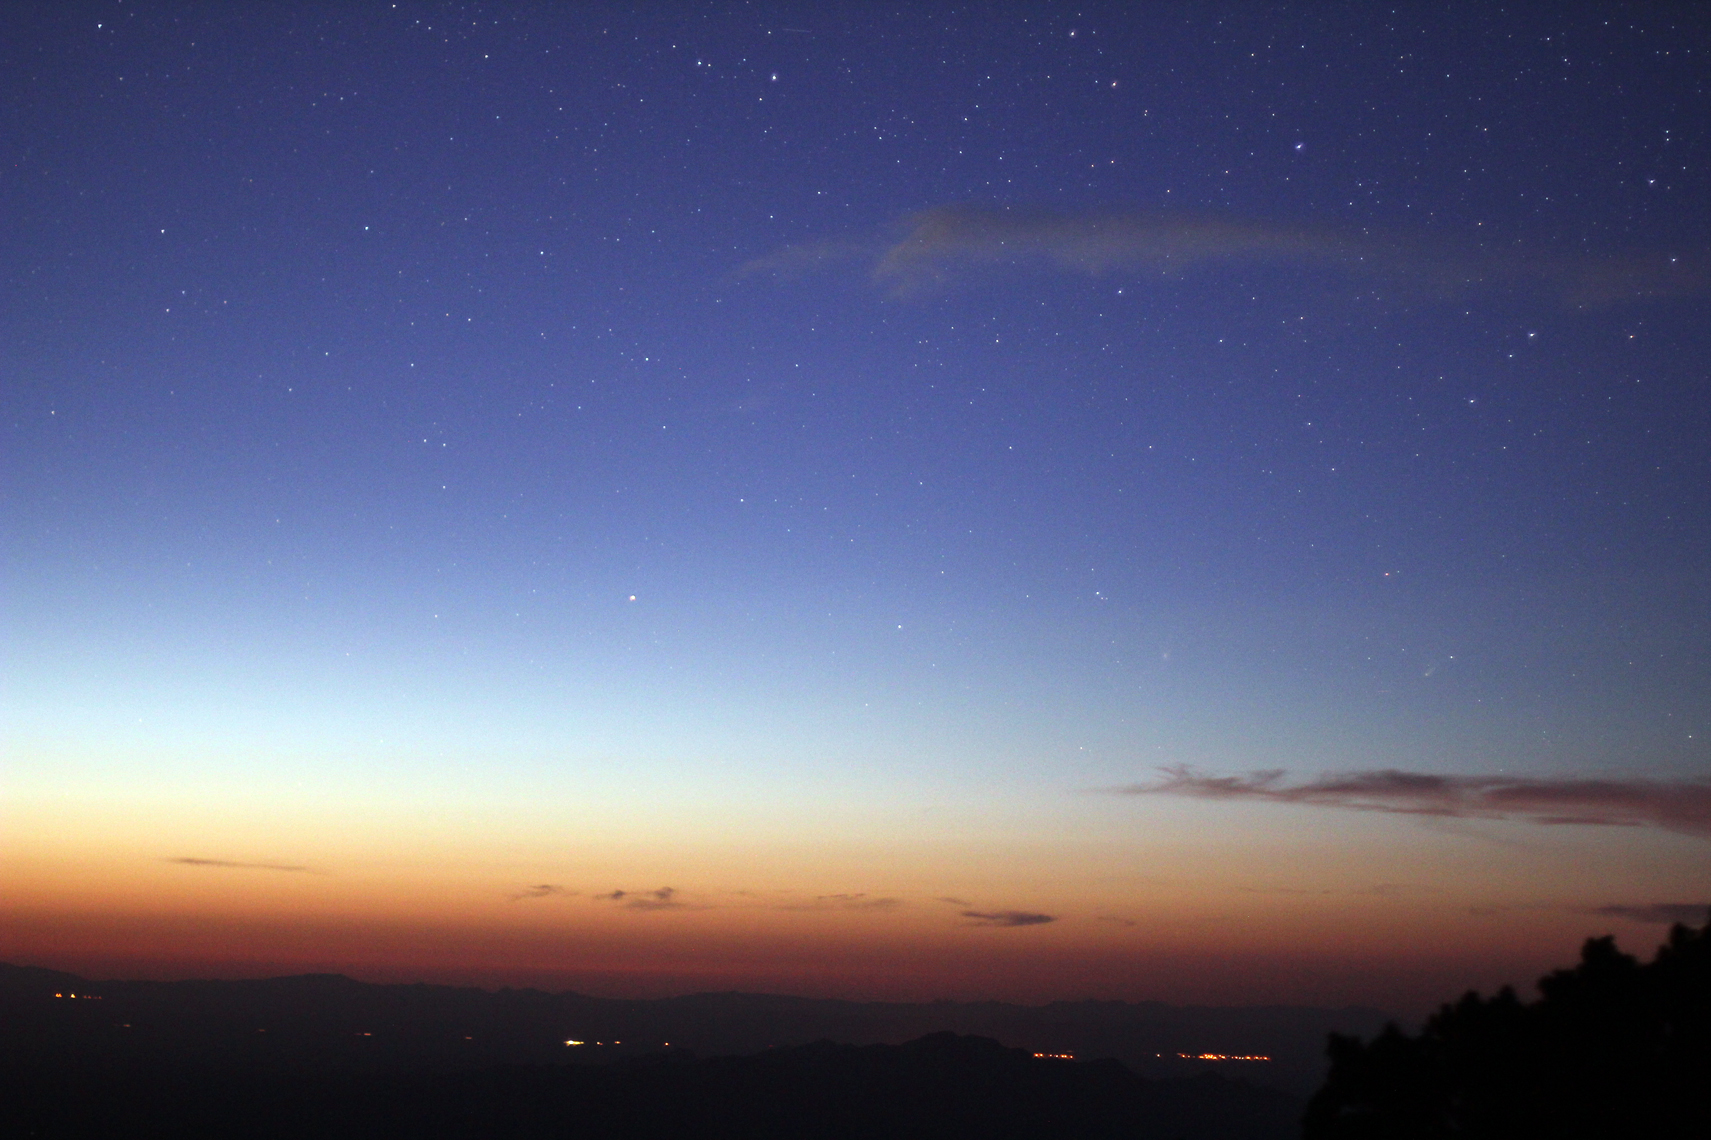
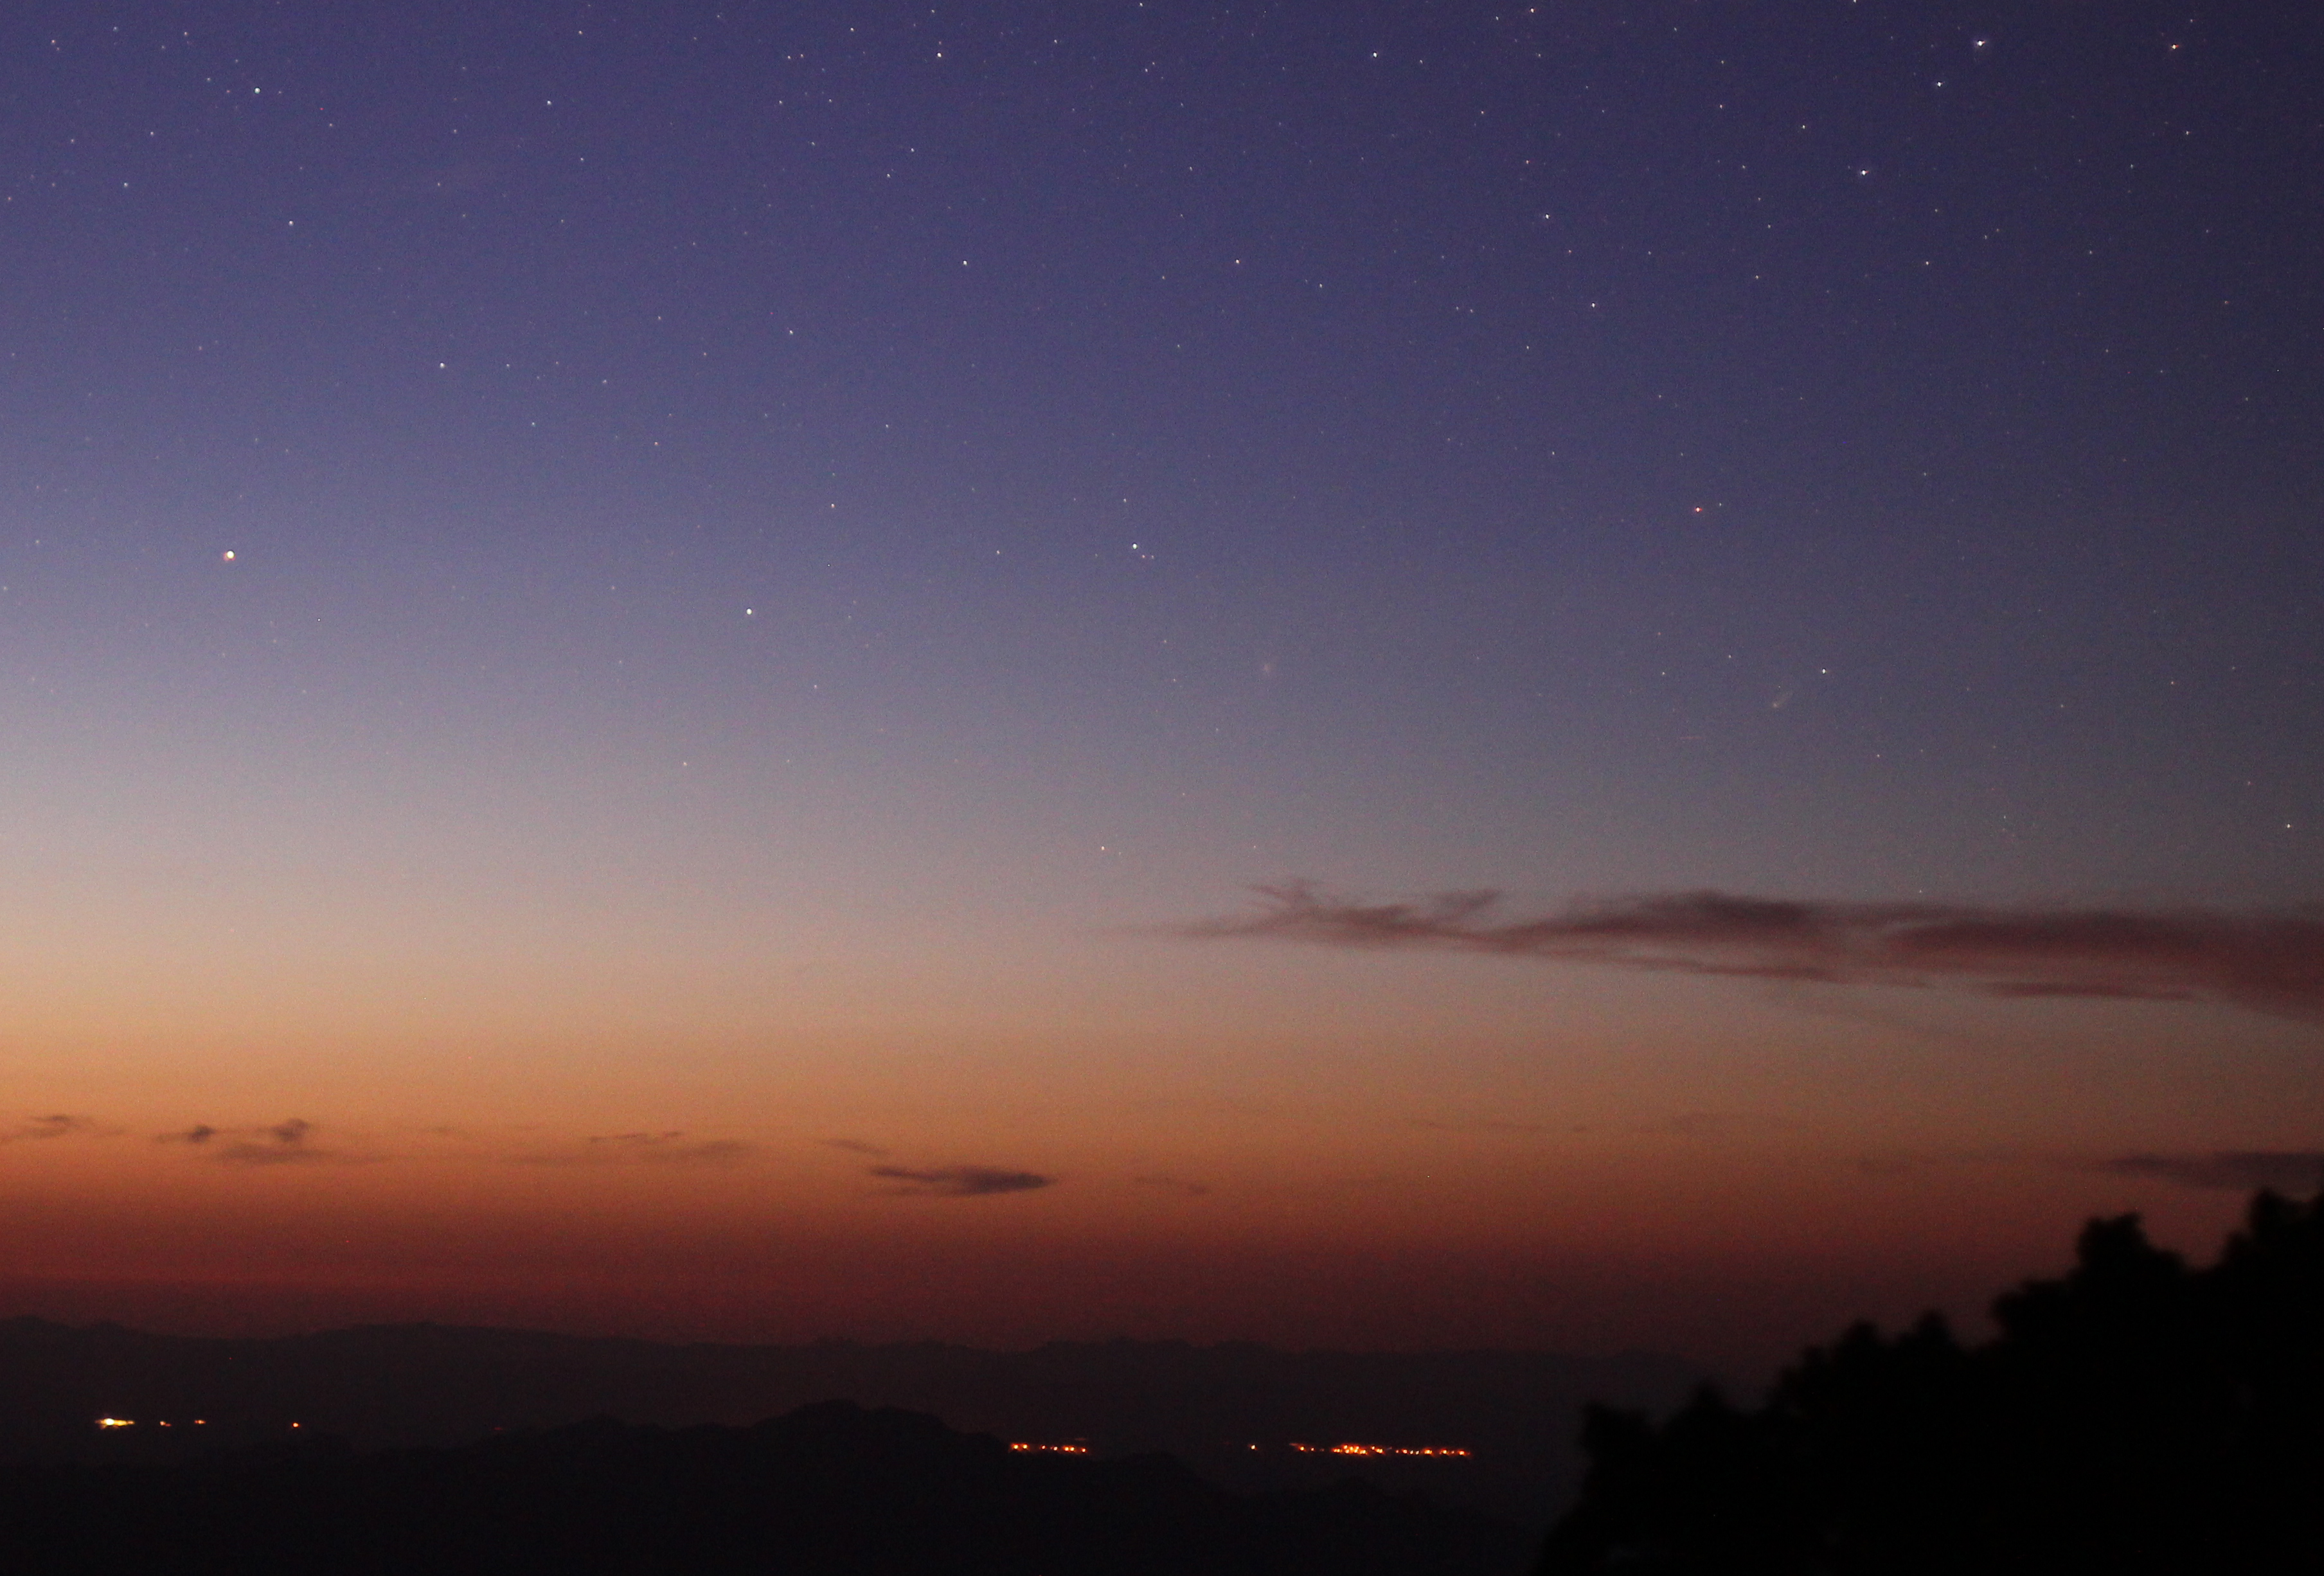
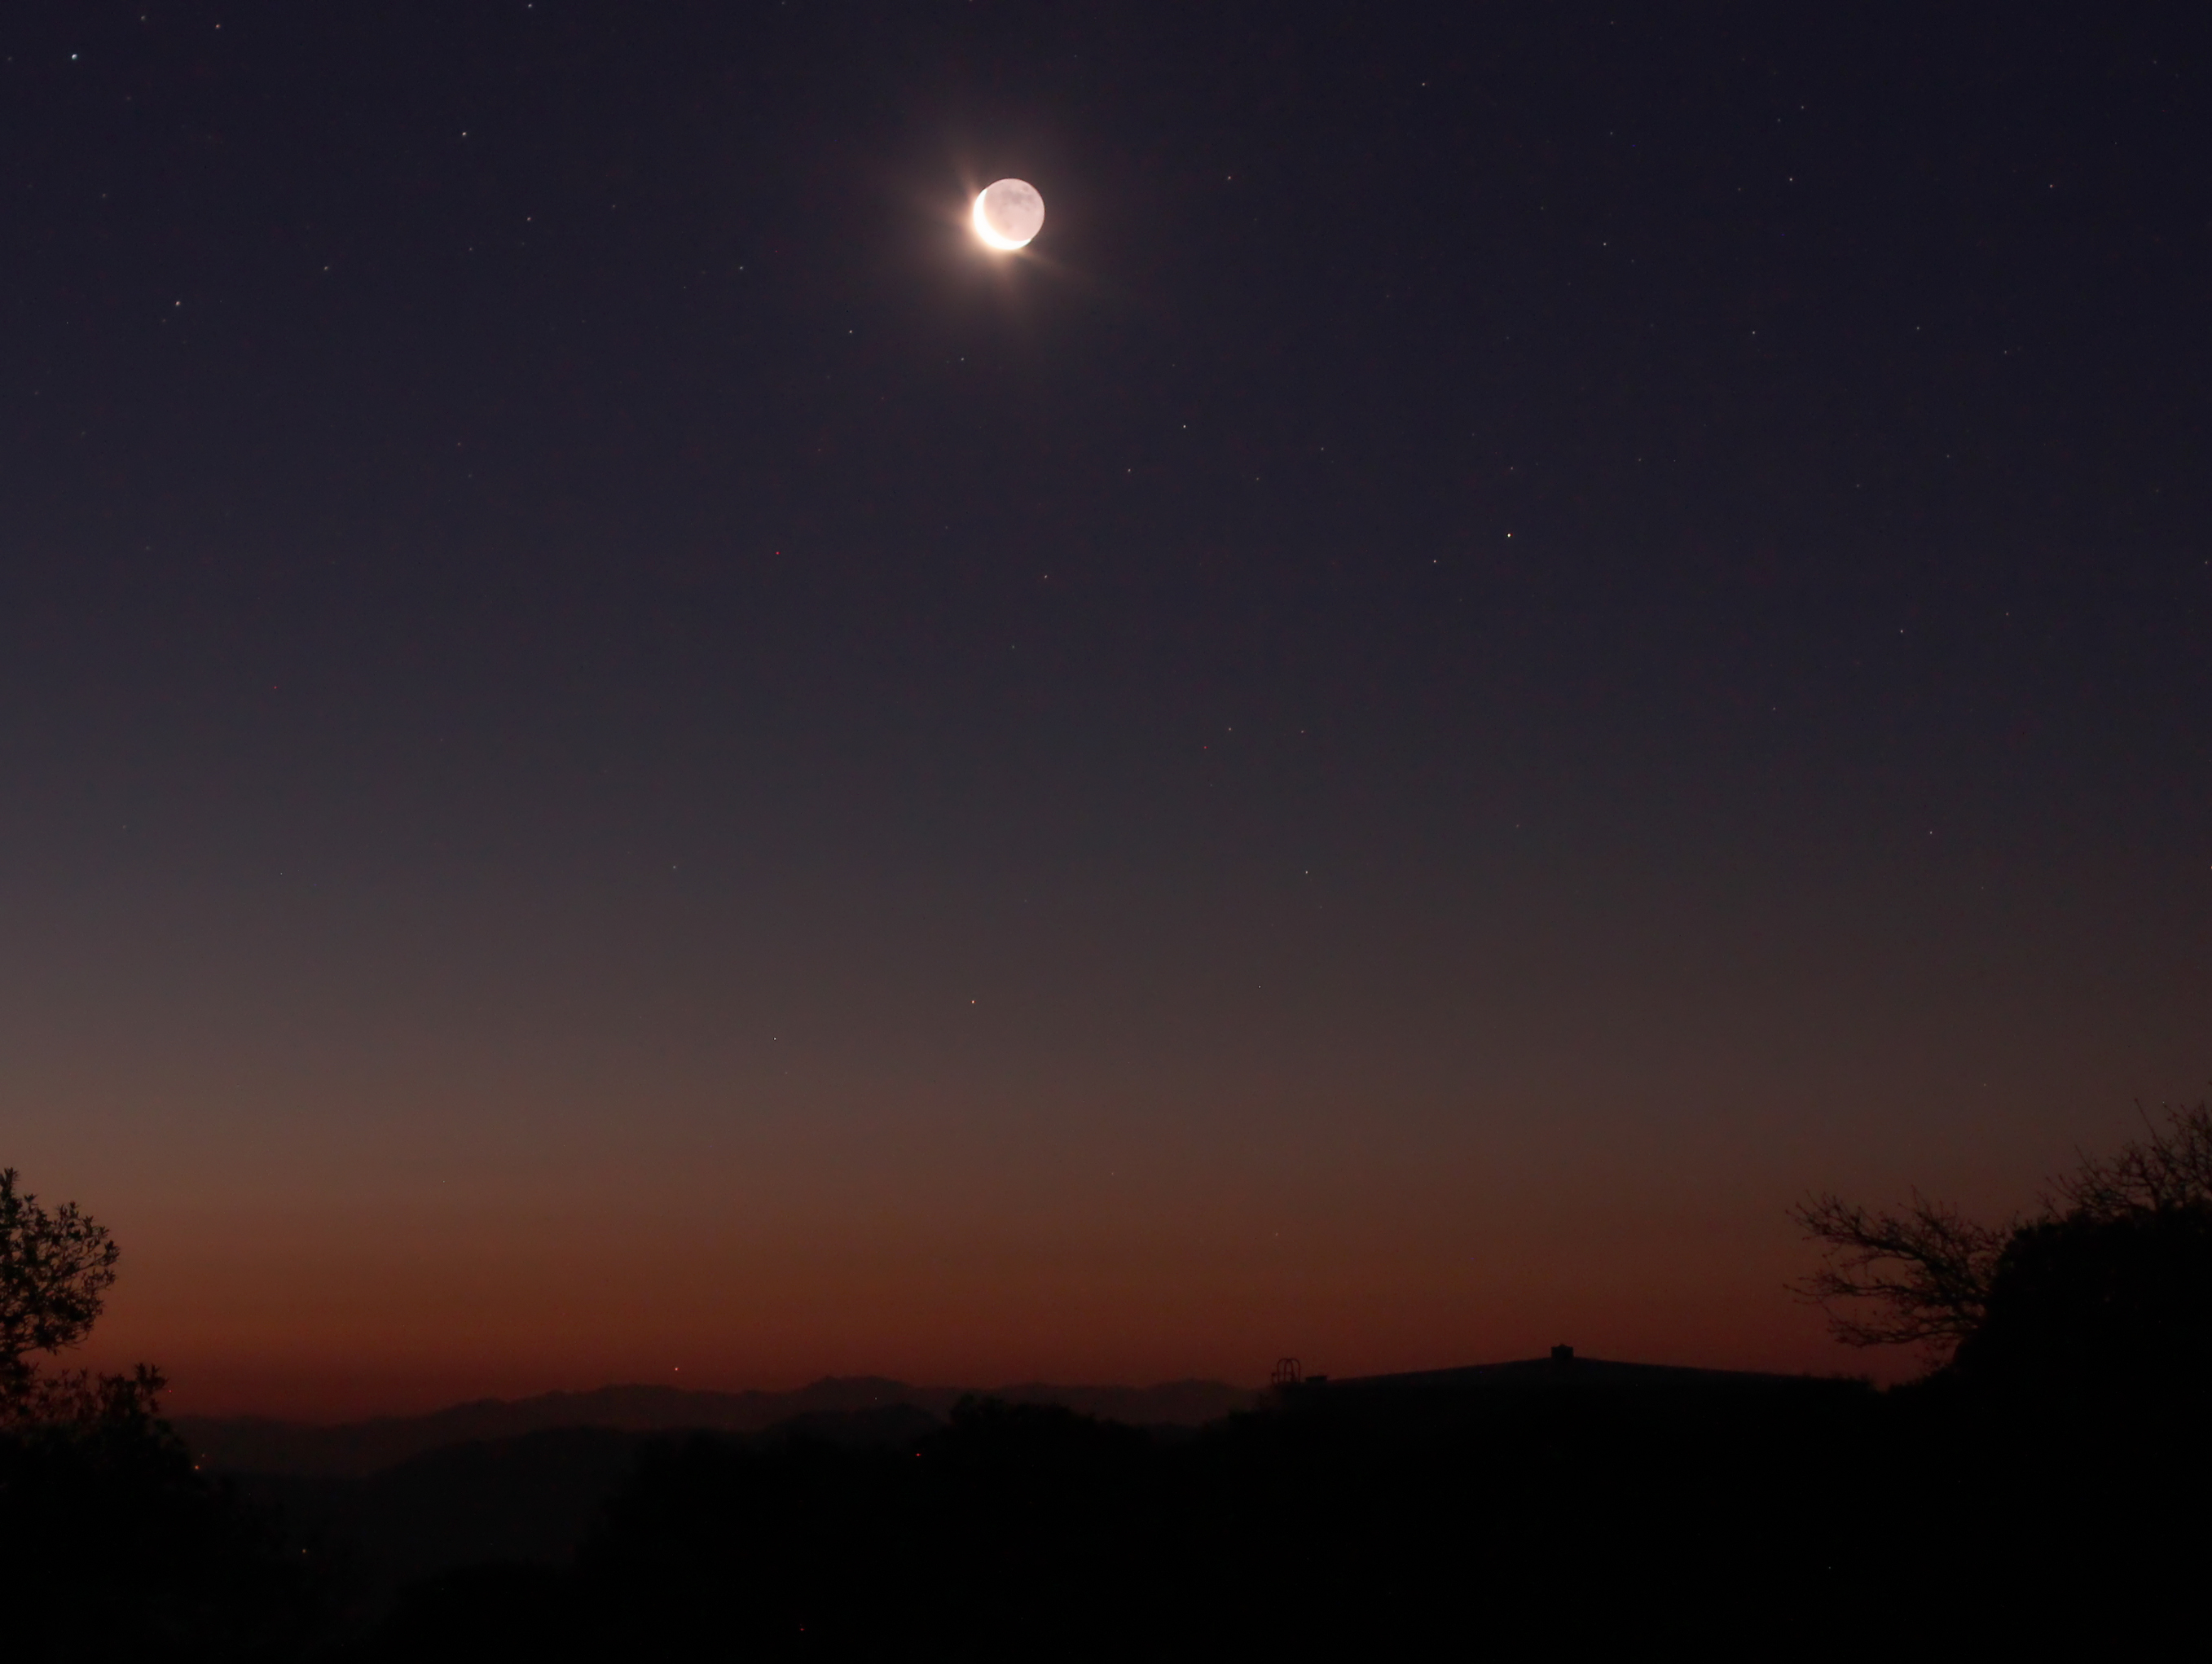
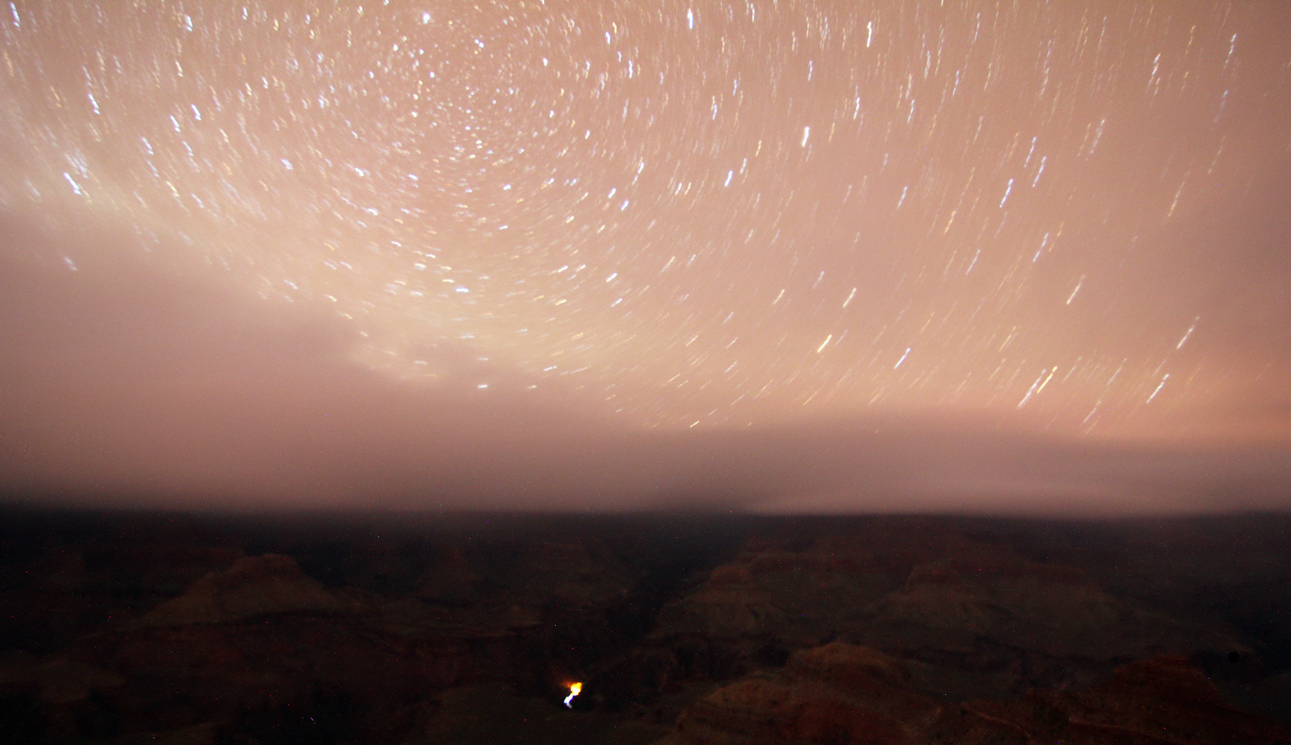
The last shot I got before heading down to set up my Astrotrac was of the Zodiacal light. It is caused by sunlight scattering space dust and is visible just after evening twilight and just before morning twilight. It is impossible to see this from a non-dark site. I easily saw it both evening and morning.
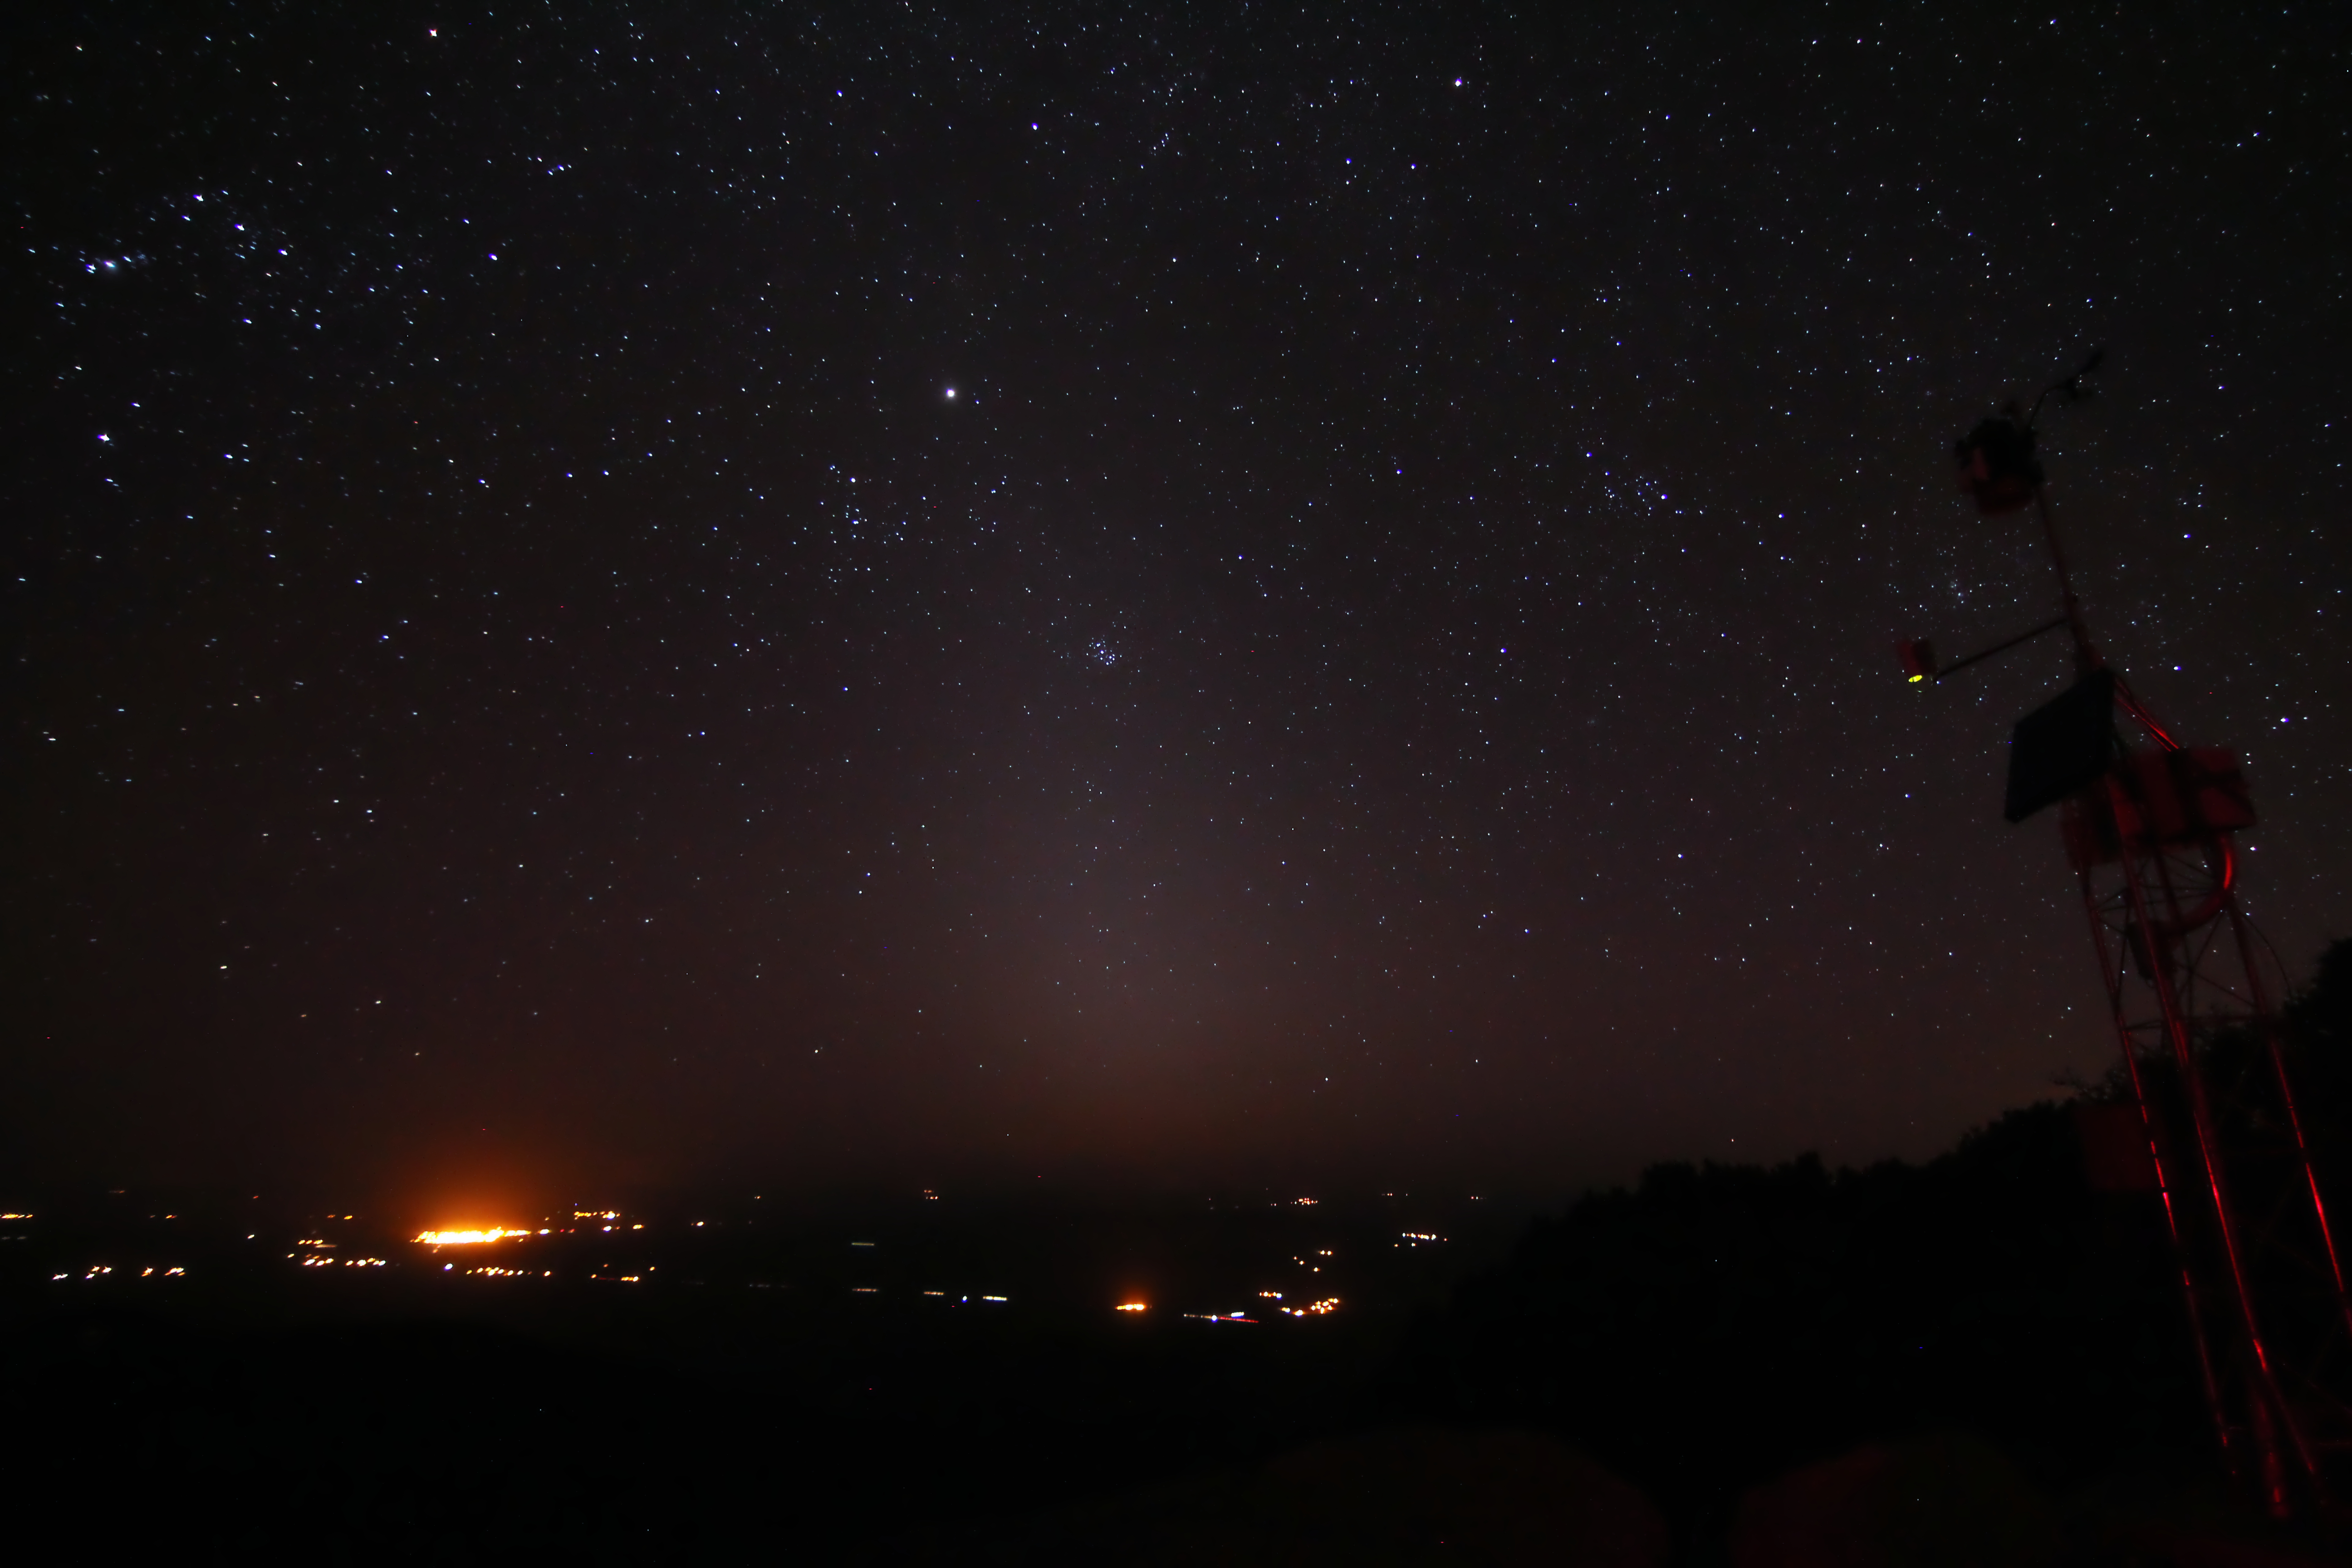
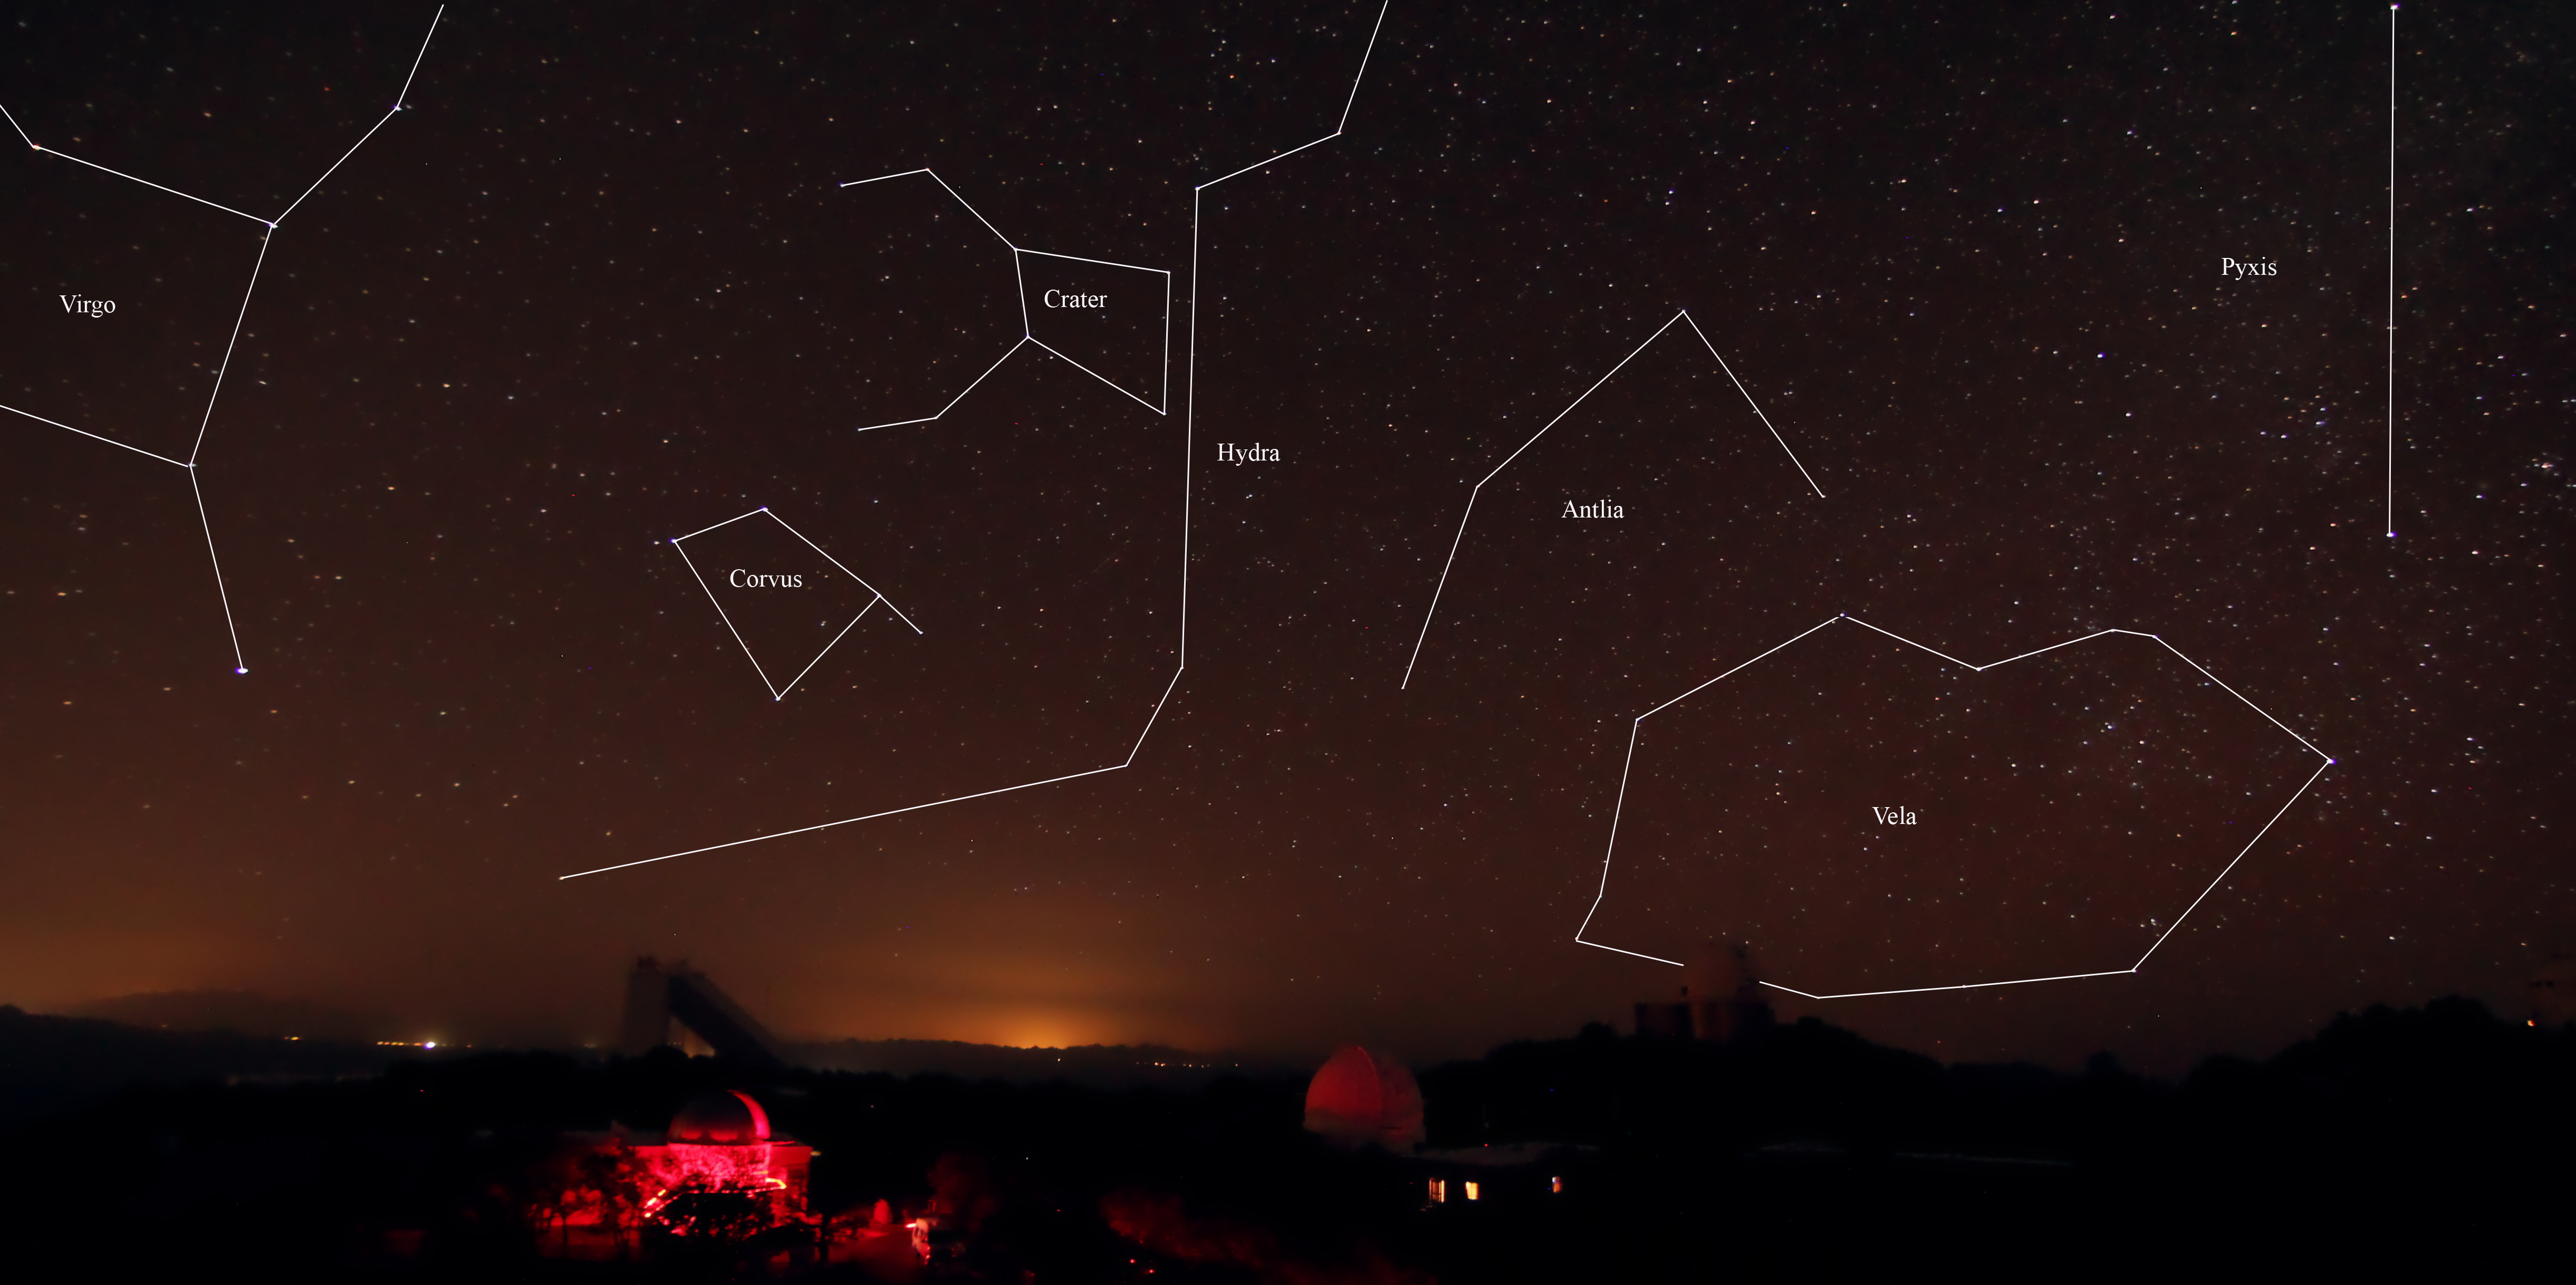
Throughout the night, I took a few other unguided shots with my T2i. Up near the 16″ RC is a platform that you get a great view to the south. I got the following early in the evening. I was most interested in Vela since we can’t really see it from Maryland. This was ISO 1600 for 13 seconds. I’ve labelled the constellations.
I also took Omega Centauri and Centaurus A later in the night. This was 5 seconds at ISO 1600. Also visible is the radio galaxy Centaurus A.
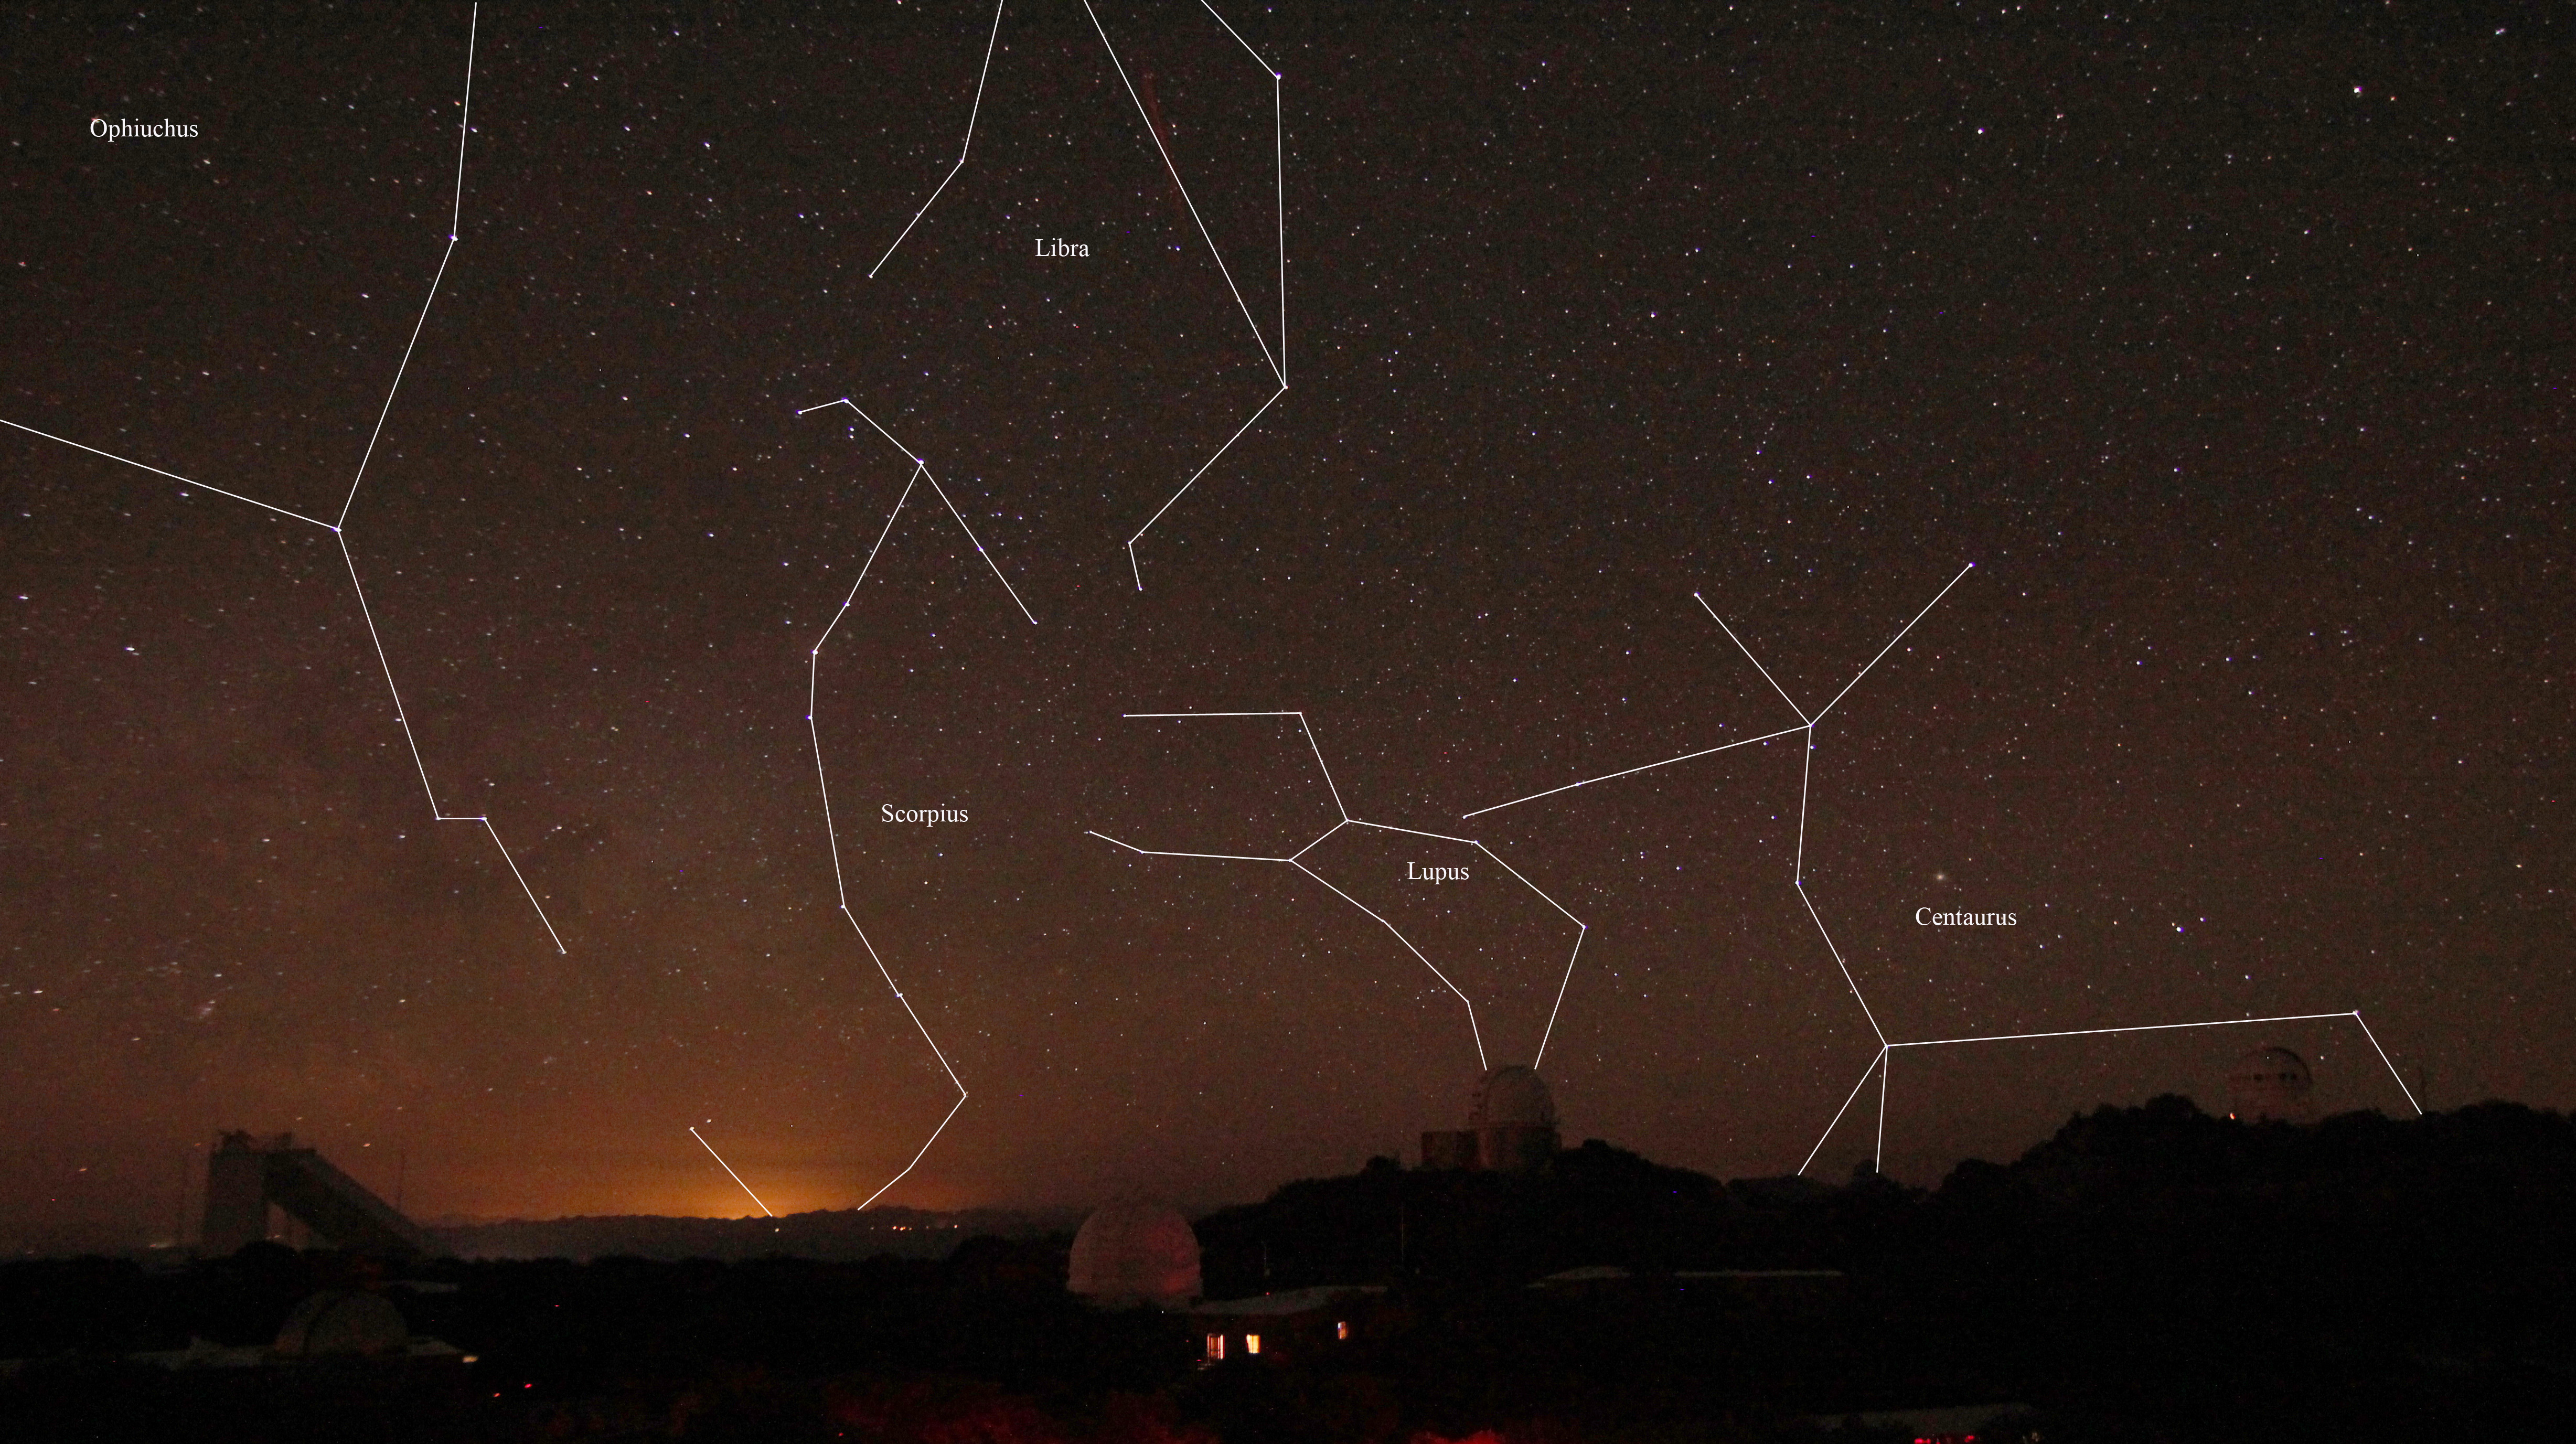
Also a wide-field of Centaurus, labeled. ISO 1600 for 13 seconds.
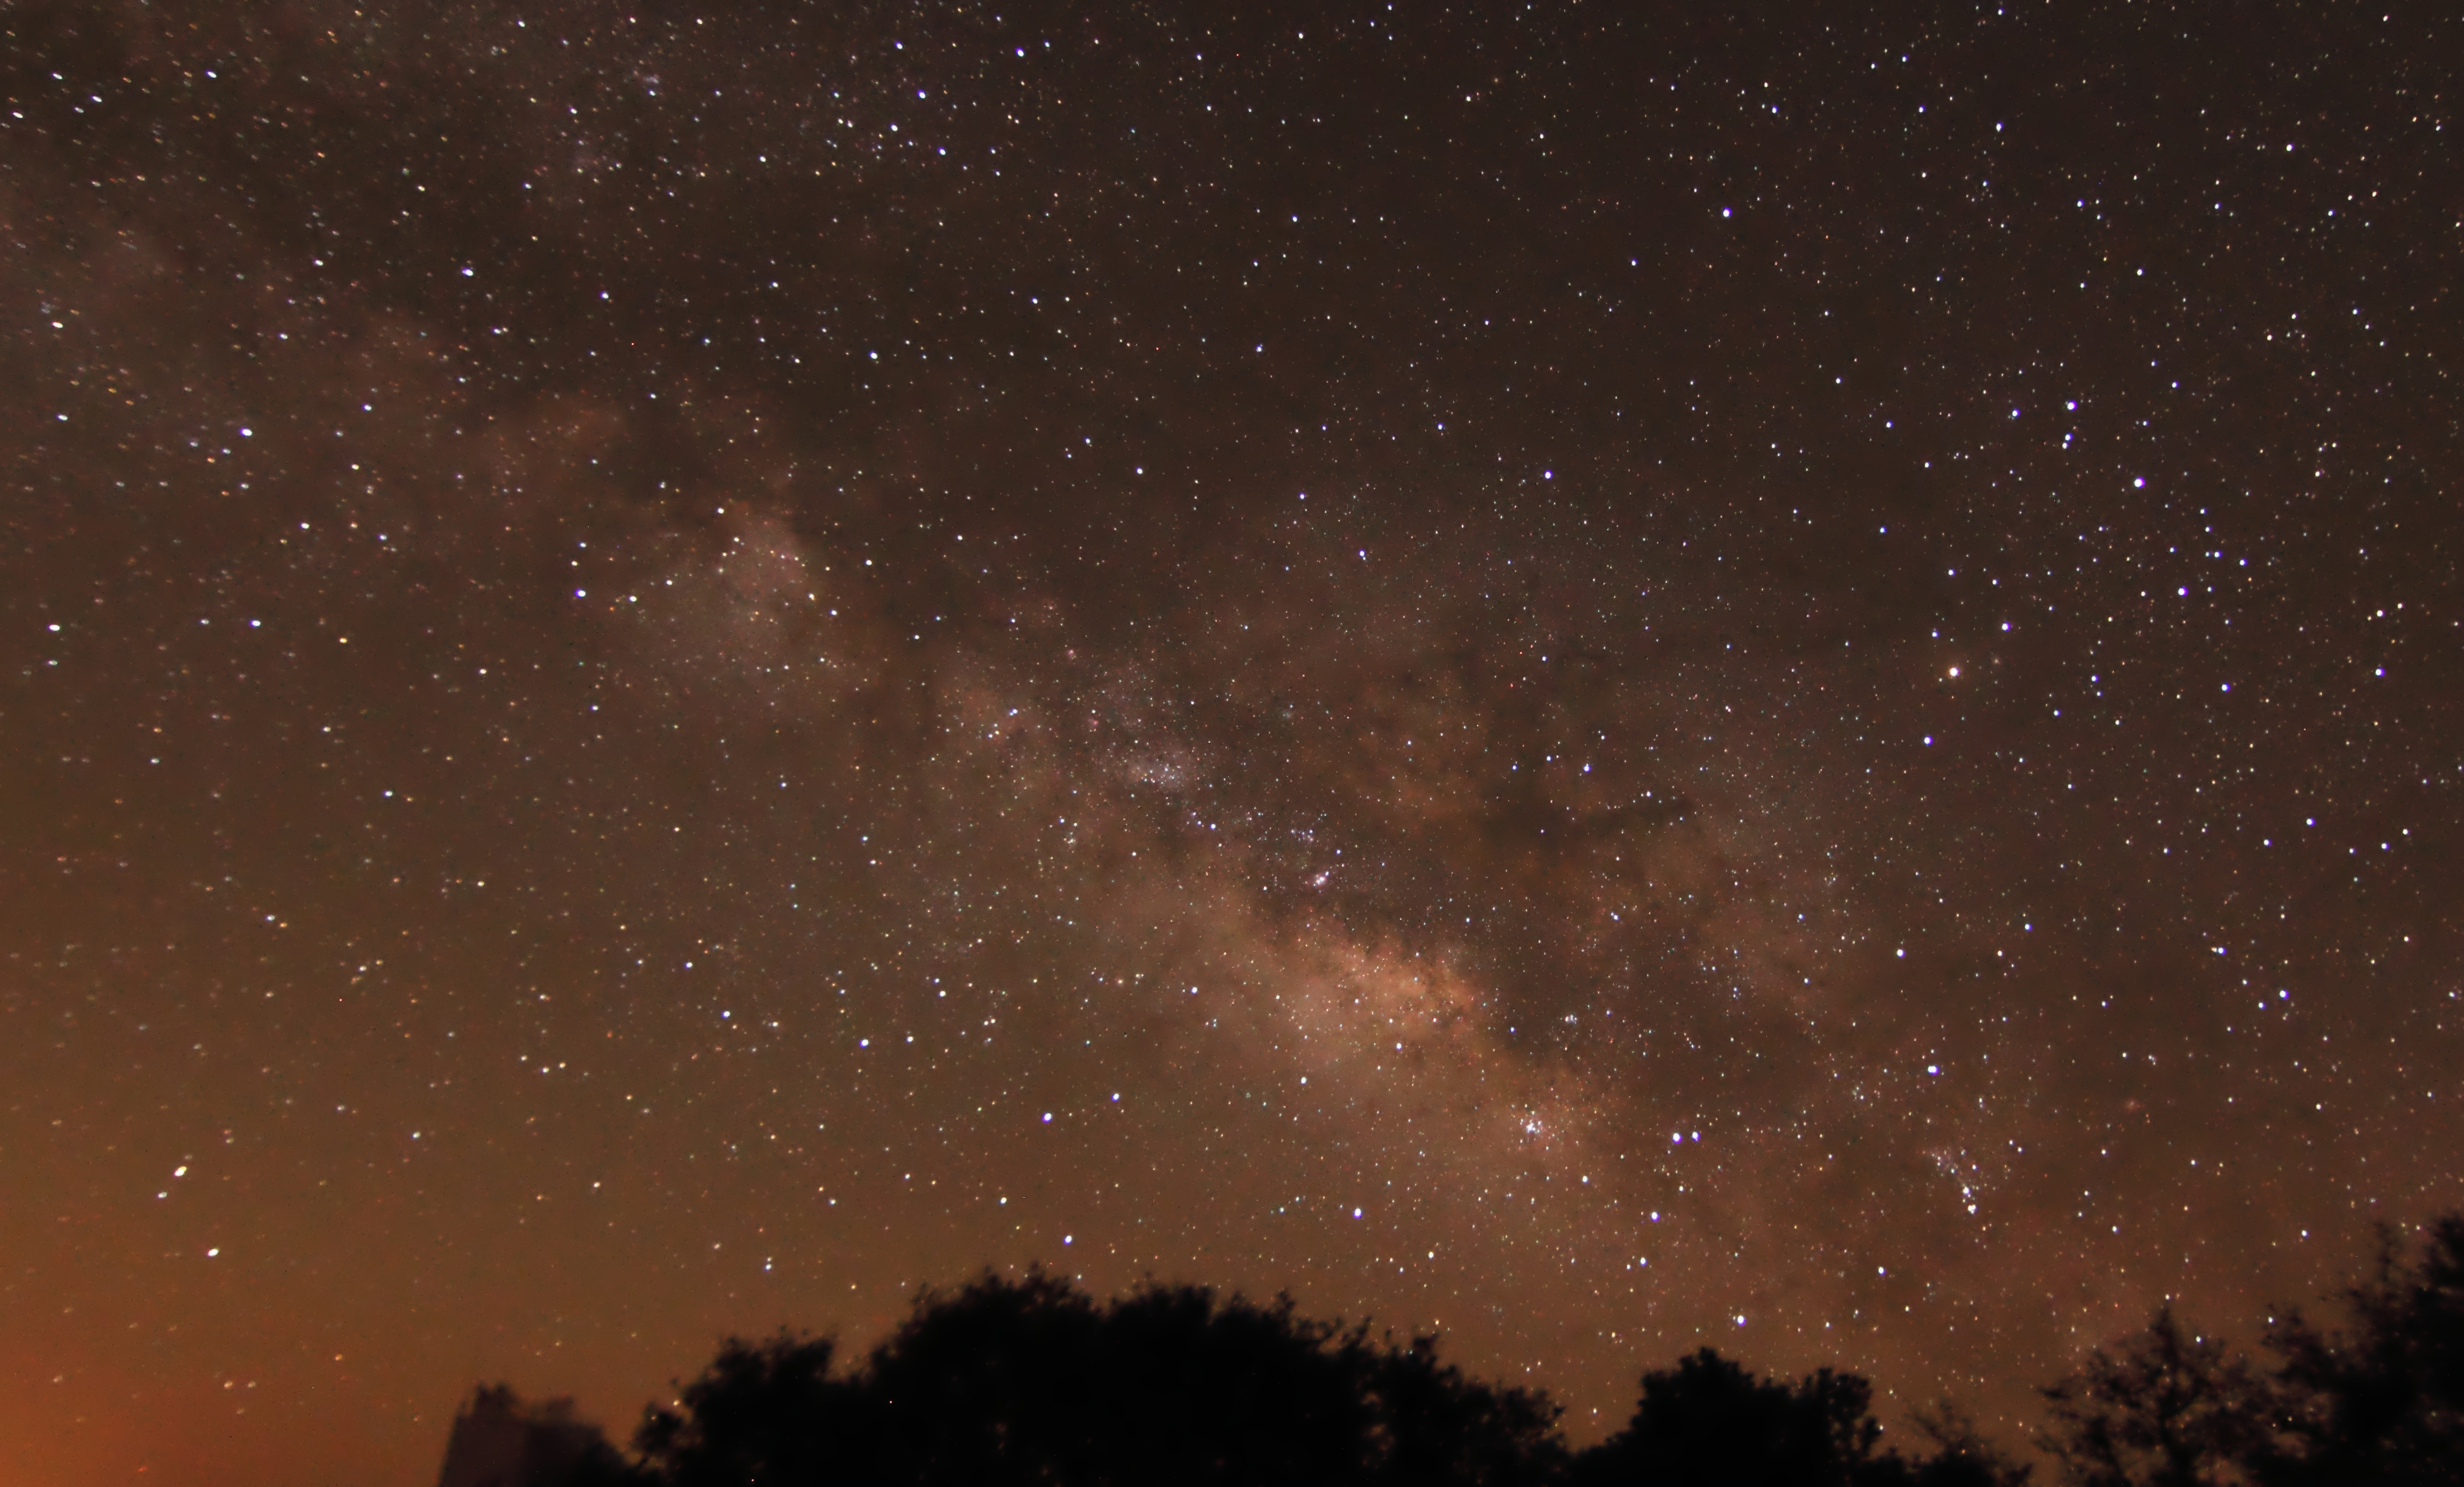
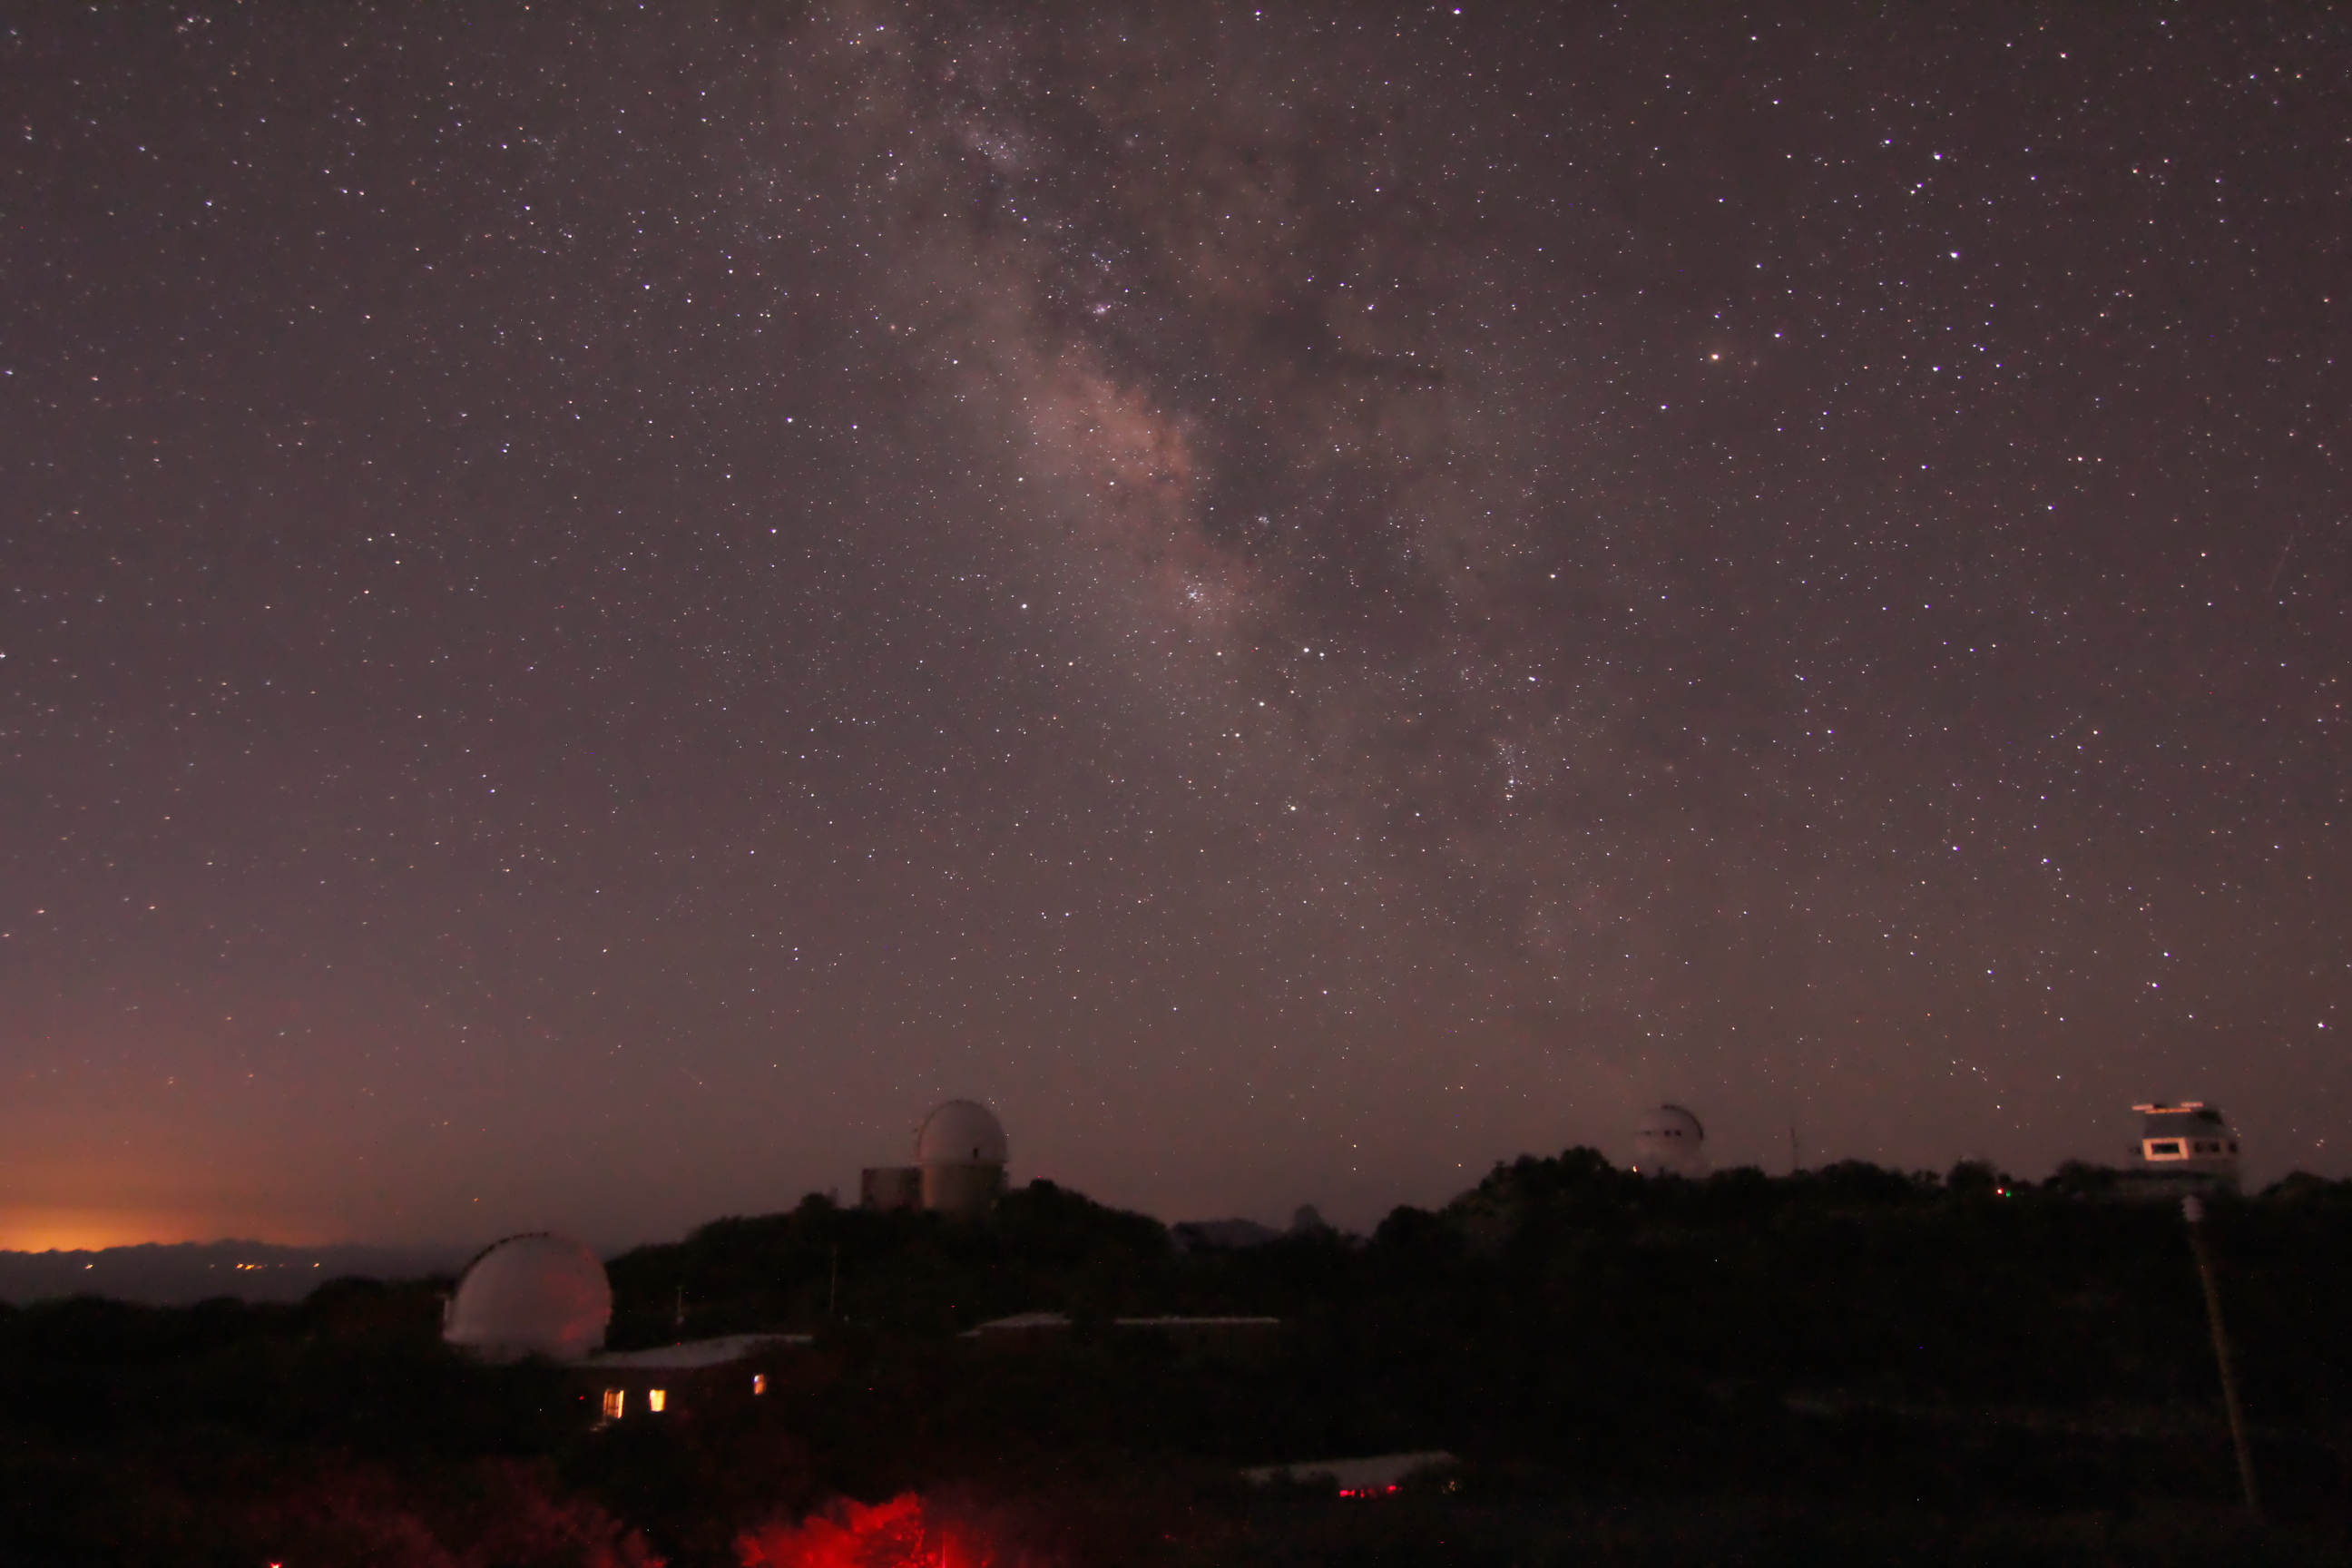
Near the end of the night, I got Sagittarius and the Milky Way passing through it. Same settings as above.
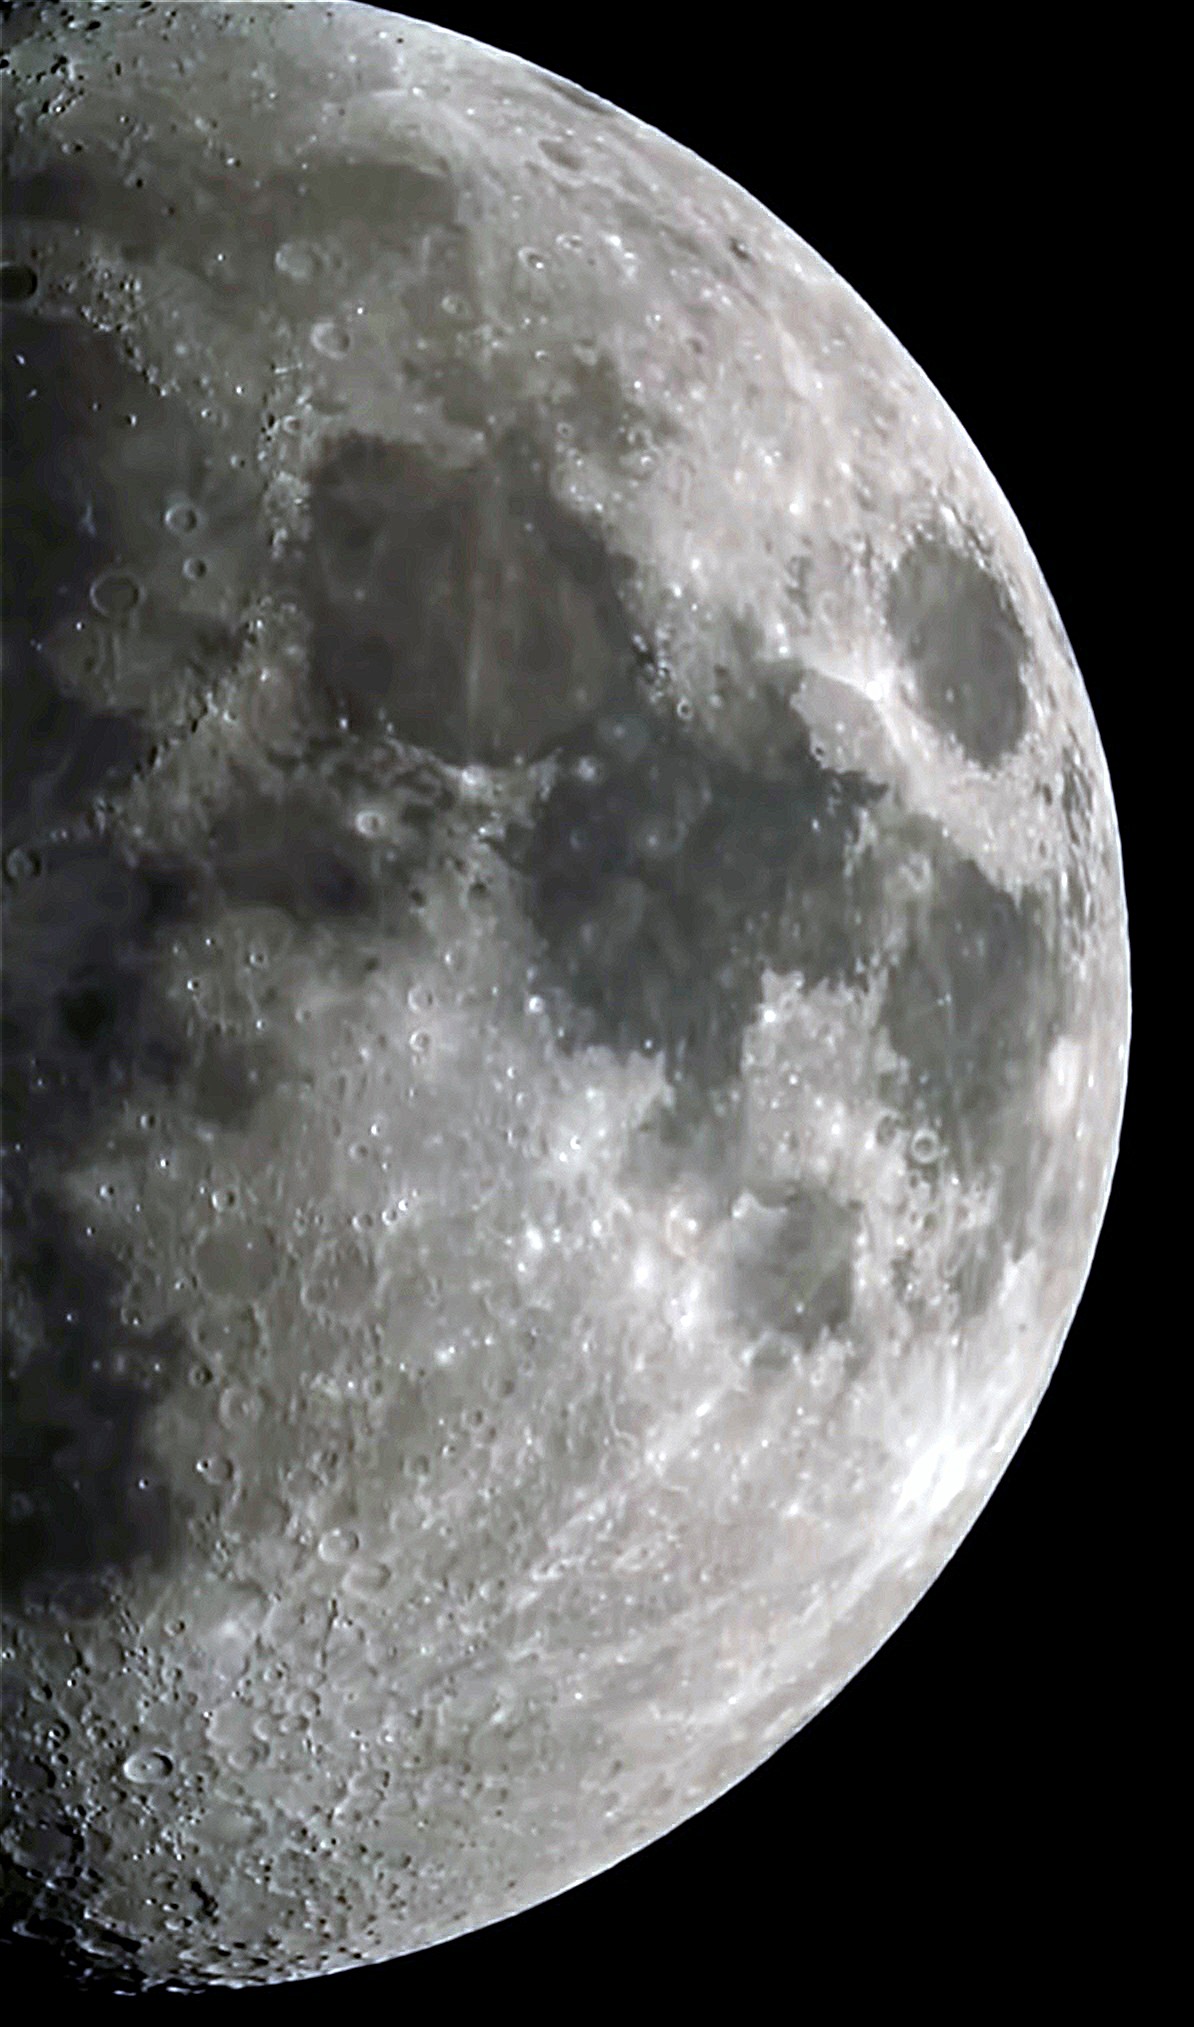
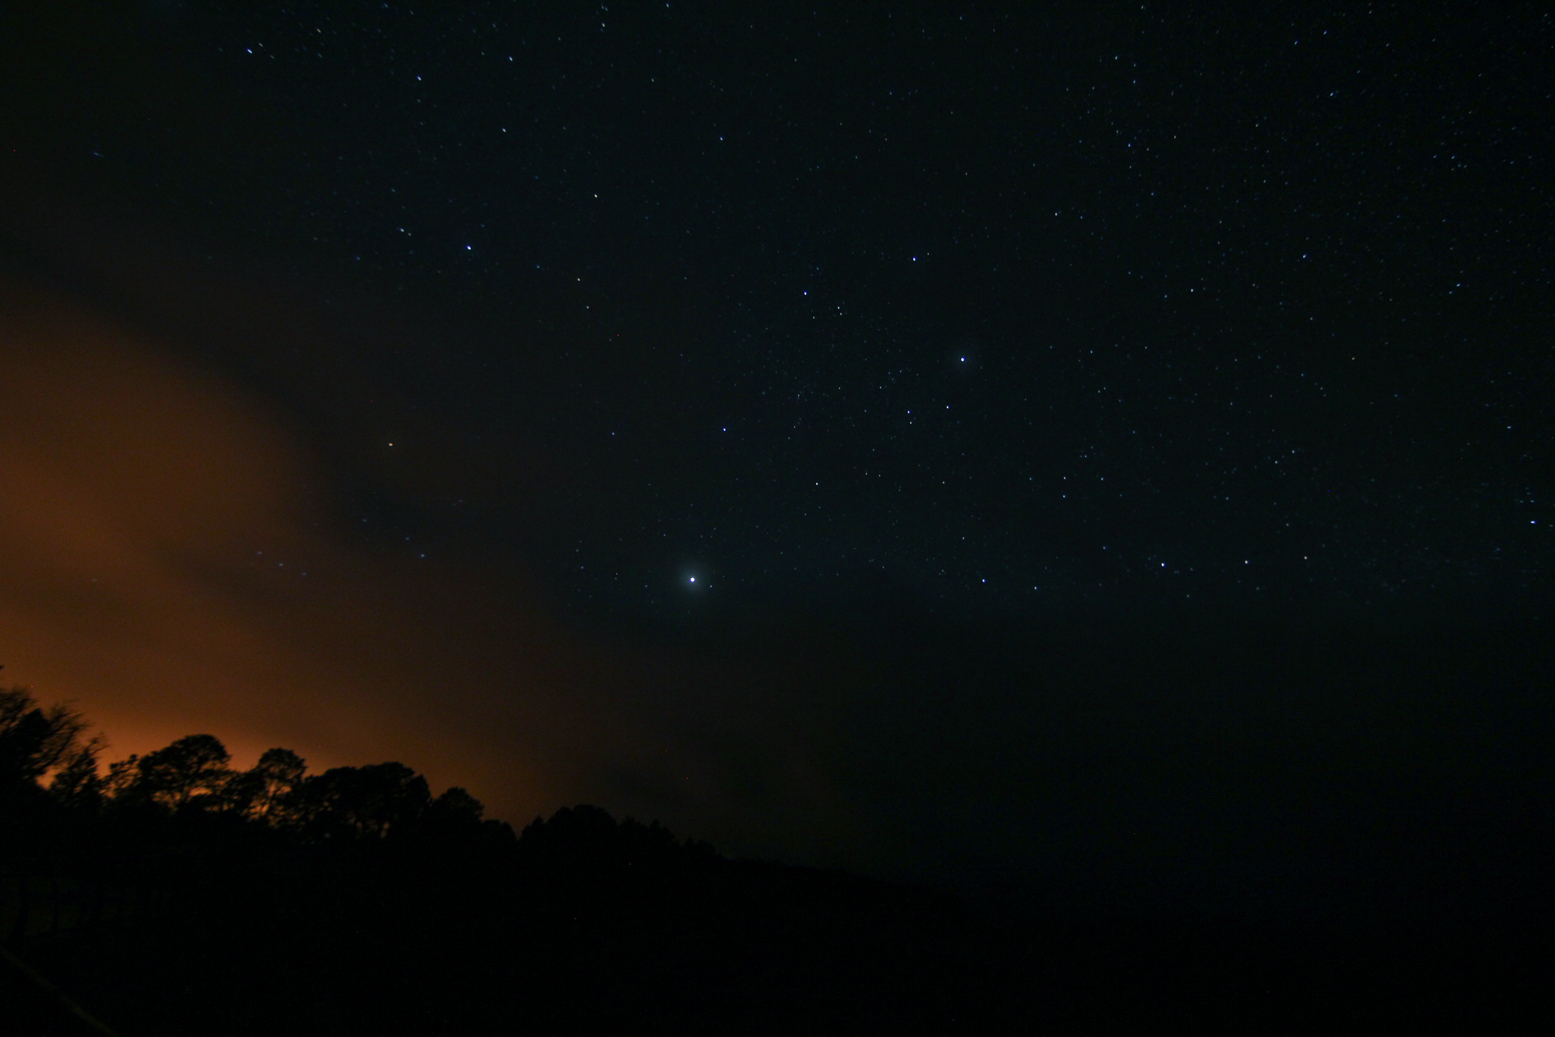
The moon rose around 4 AM and Mercury rose around 5 AM. I got them both in this shot with my 50mm (ISO 800, 3.2 seconds).
Those were all the unguided shots I took. Next onto those I got with the Astrotrac.
Arizona Trip Part 6, Kitt Peak Non-Astro Pics
After our Picacho Peak hike, we made our way to Kitt Peak National Observatory, about 50 miles west of Tucson. A friend tried out their Advanced Observing Program about ten years ago and highly recommended it. The basics are that for $700 you get to spend the night at Kitt Peak and use either their 16″ RC or their 20″ RC most of the night. You have a guide who is there to operate the telescope and facilitate your every need. If you
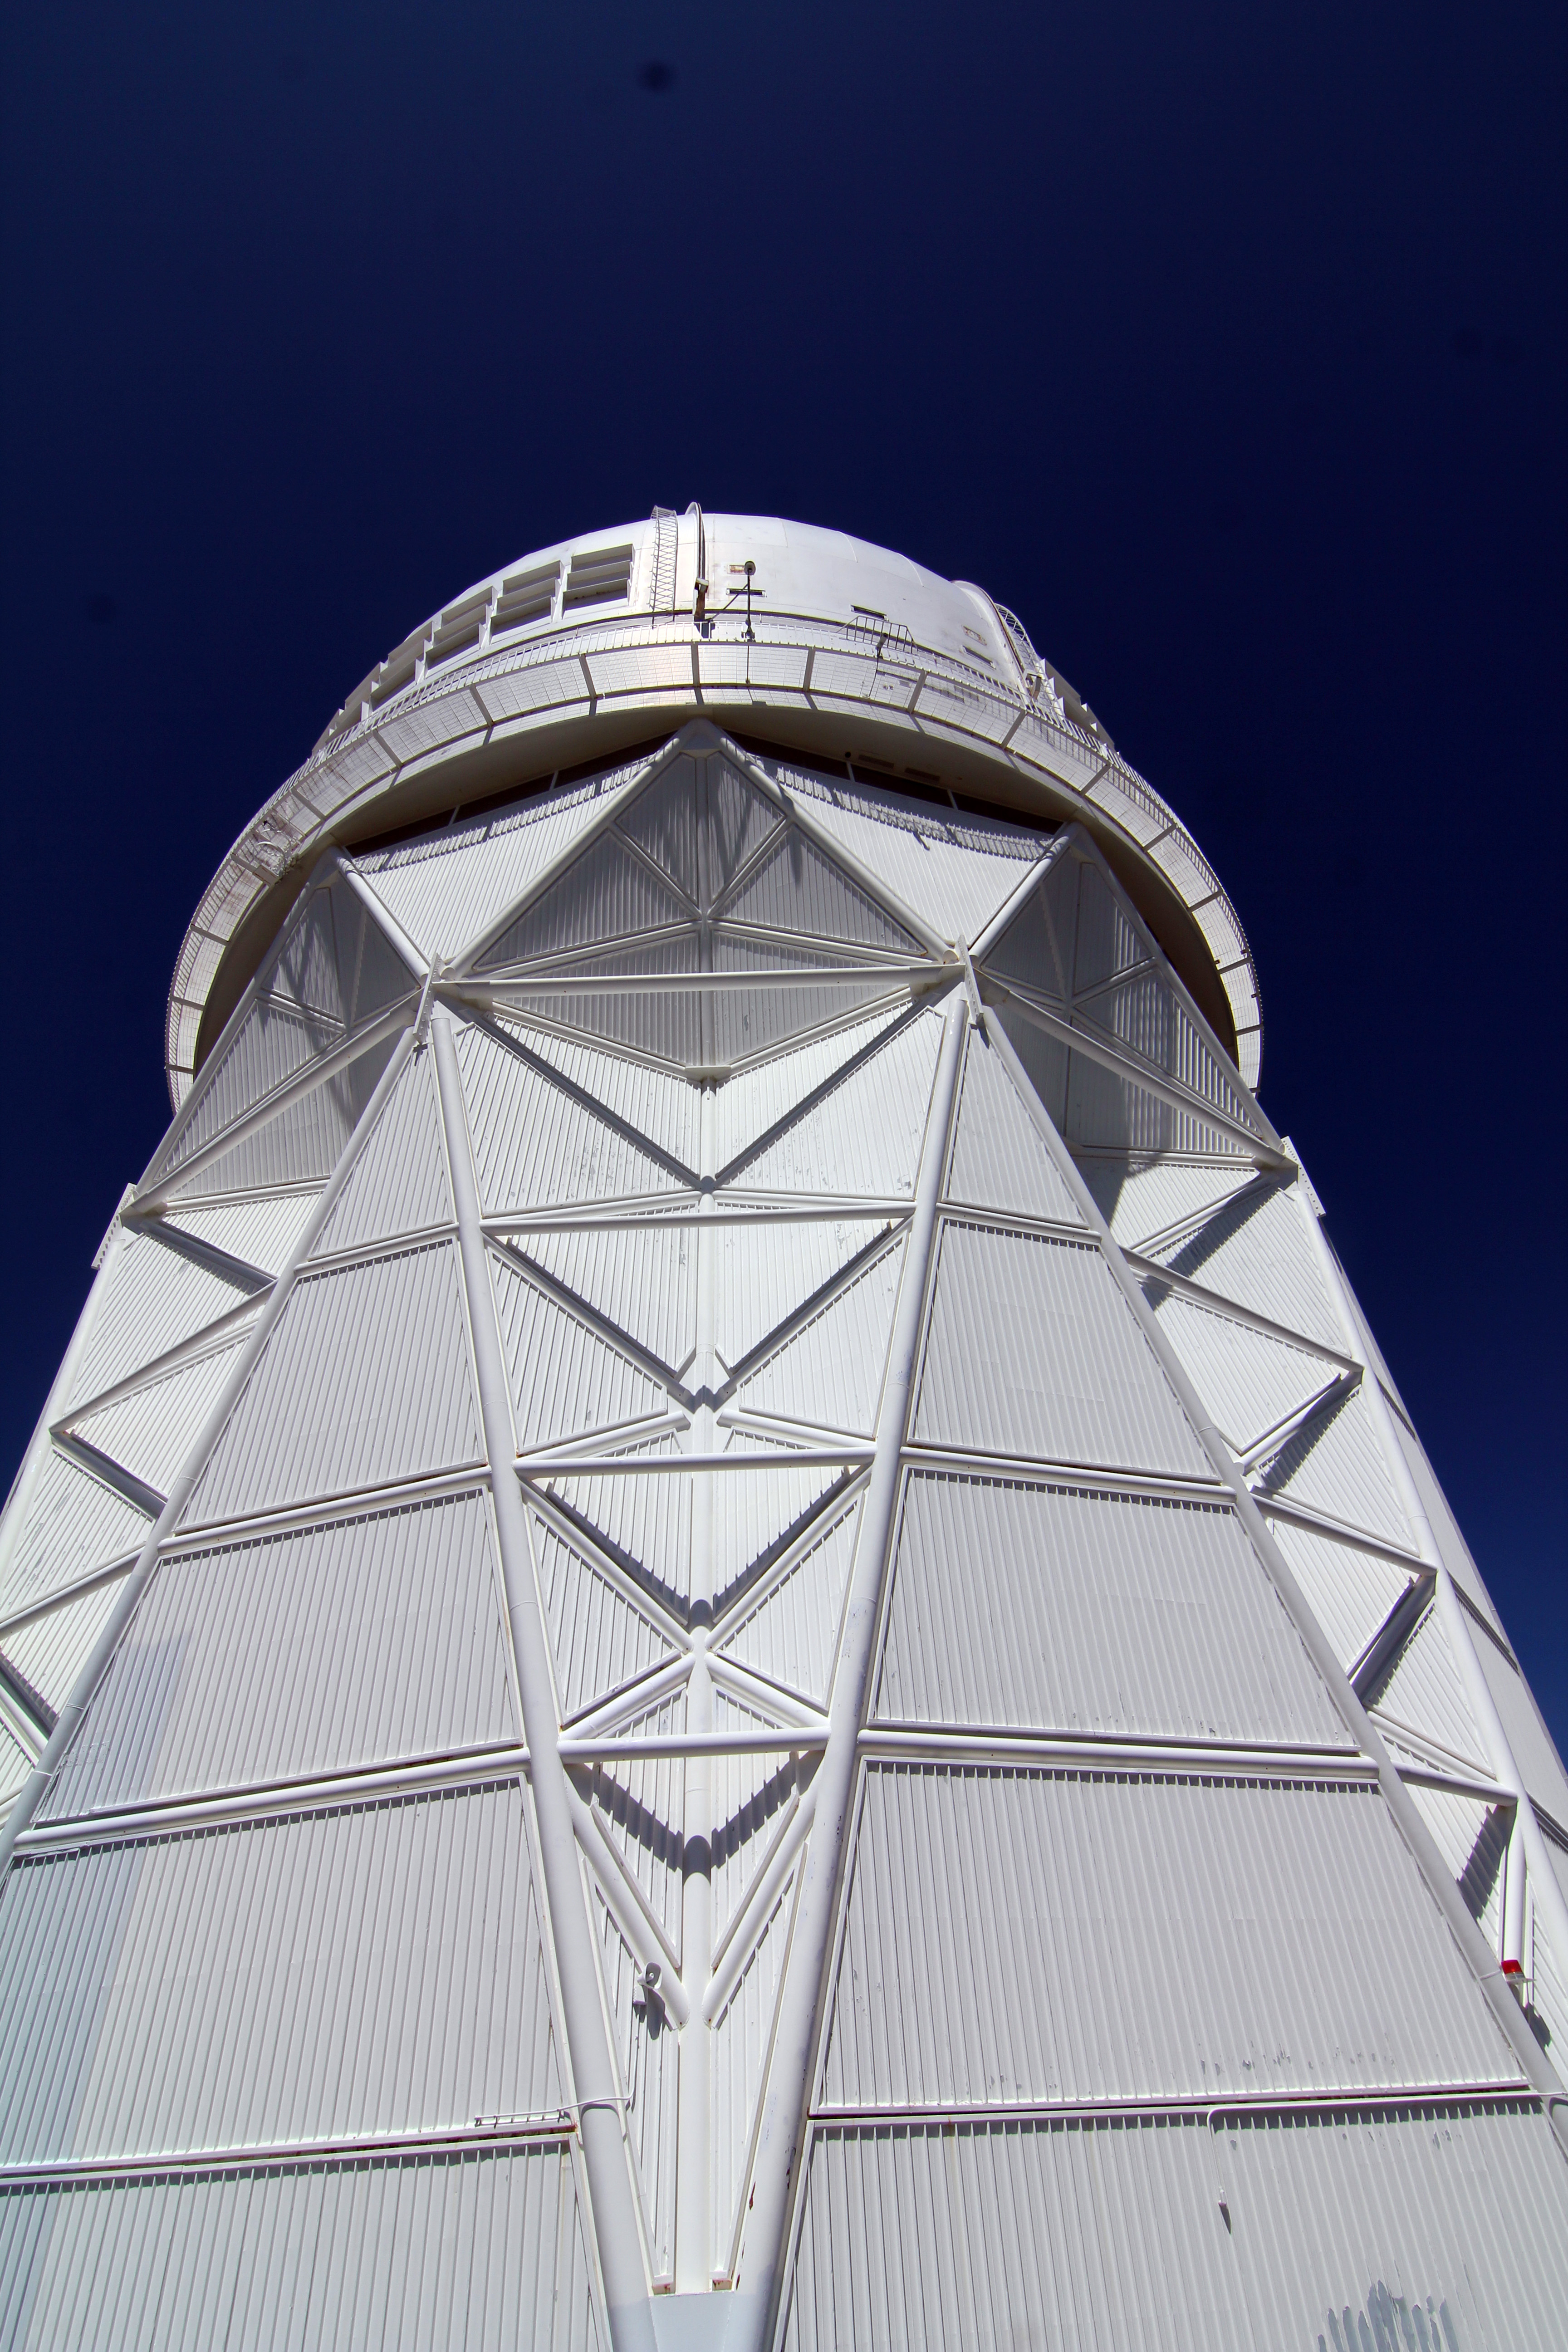
are experienced, you can bring an observing list. Otherwise, the guide will know some good things to look at. Visual observing and photographic observing are possible. You are allowed to use your own camera, but they just got some Canon 60DAs which work amazingly well. They also have webcams for planetary imaging and CCD cameras. I’d point out the “finder scopes” on these RCs are very nice refractors. The 16″ has a 140mm TEC and the 20″ has a 106mm Takahashi FSQ. From sunset until a little while past twilight, the Nightly Observing Program (NOP) is running. This is a free event, open to the public, and is similar to what you’d get at any telescope, only under better skies.
The mountain actually closes for the night, to keep car headlights away from their pristine skies so room and board are provided in the $700 AOP package.
My first attempt at an AOP was in July 2007, when I was in Tucson for other purposes. Unfortunately, the monsoon season was getting ready to start and the skies were mostly cloudy all week long. When I completed my PhD in 2009, my parents gave me an AOP as a graduation present. I was not able to cash in on this until October 2011, when my brother and I spent the night. It stayed clear until about 3 AM when clouds rolled in. Earlier this year, I decided to do another AOP, around six months after my first one, so that I could see the other half of the sky. They recommend you book two months in advance. One thing they tell you is to plan to spend more than just one night in the area so that your trip isn’t a complete waste if there are clouds that night. You don’t have to pay the full price if there is a cancellation because of weather, however, in 2007, I was told the choice was up to me, and if they guide comes up to the mountain, you have to pay, regardless. In addition, they will try to make accommodations in case a different night looks more promising.
That happened with my AOP this time around. I was originally going to observe on Sunday night, but the weather forecast was making me nervous. Throughout the week, the National Weather Service was predicting partly cloudy skies. I’ve learned that “partly cloudy” can mean anything from completely clear to completely overcast. A few
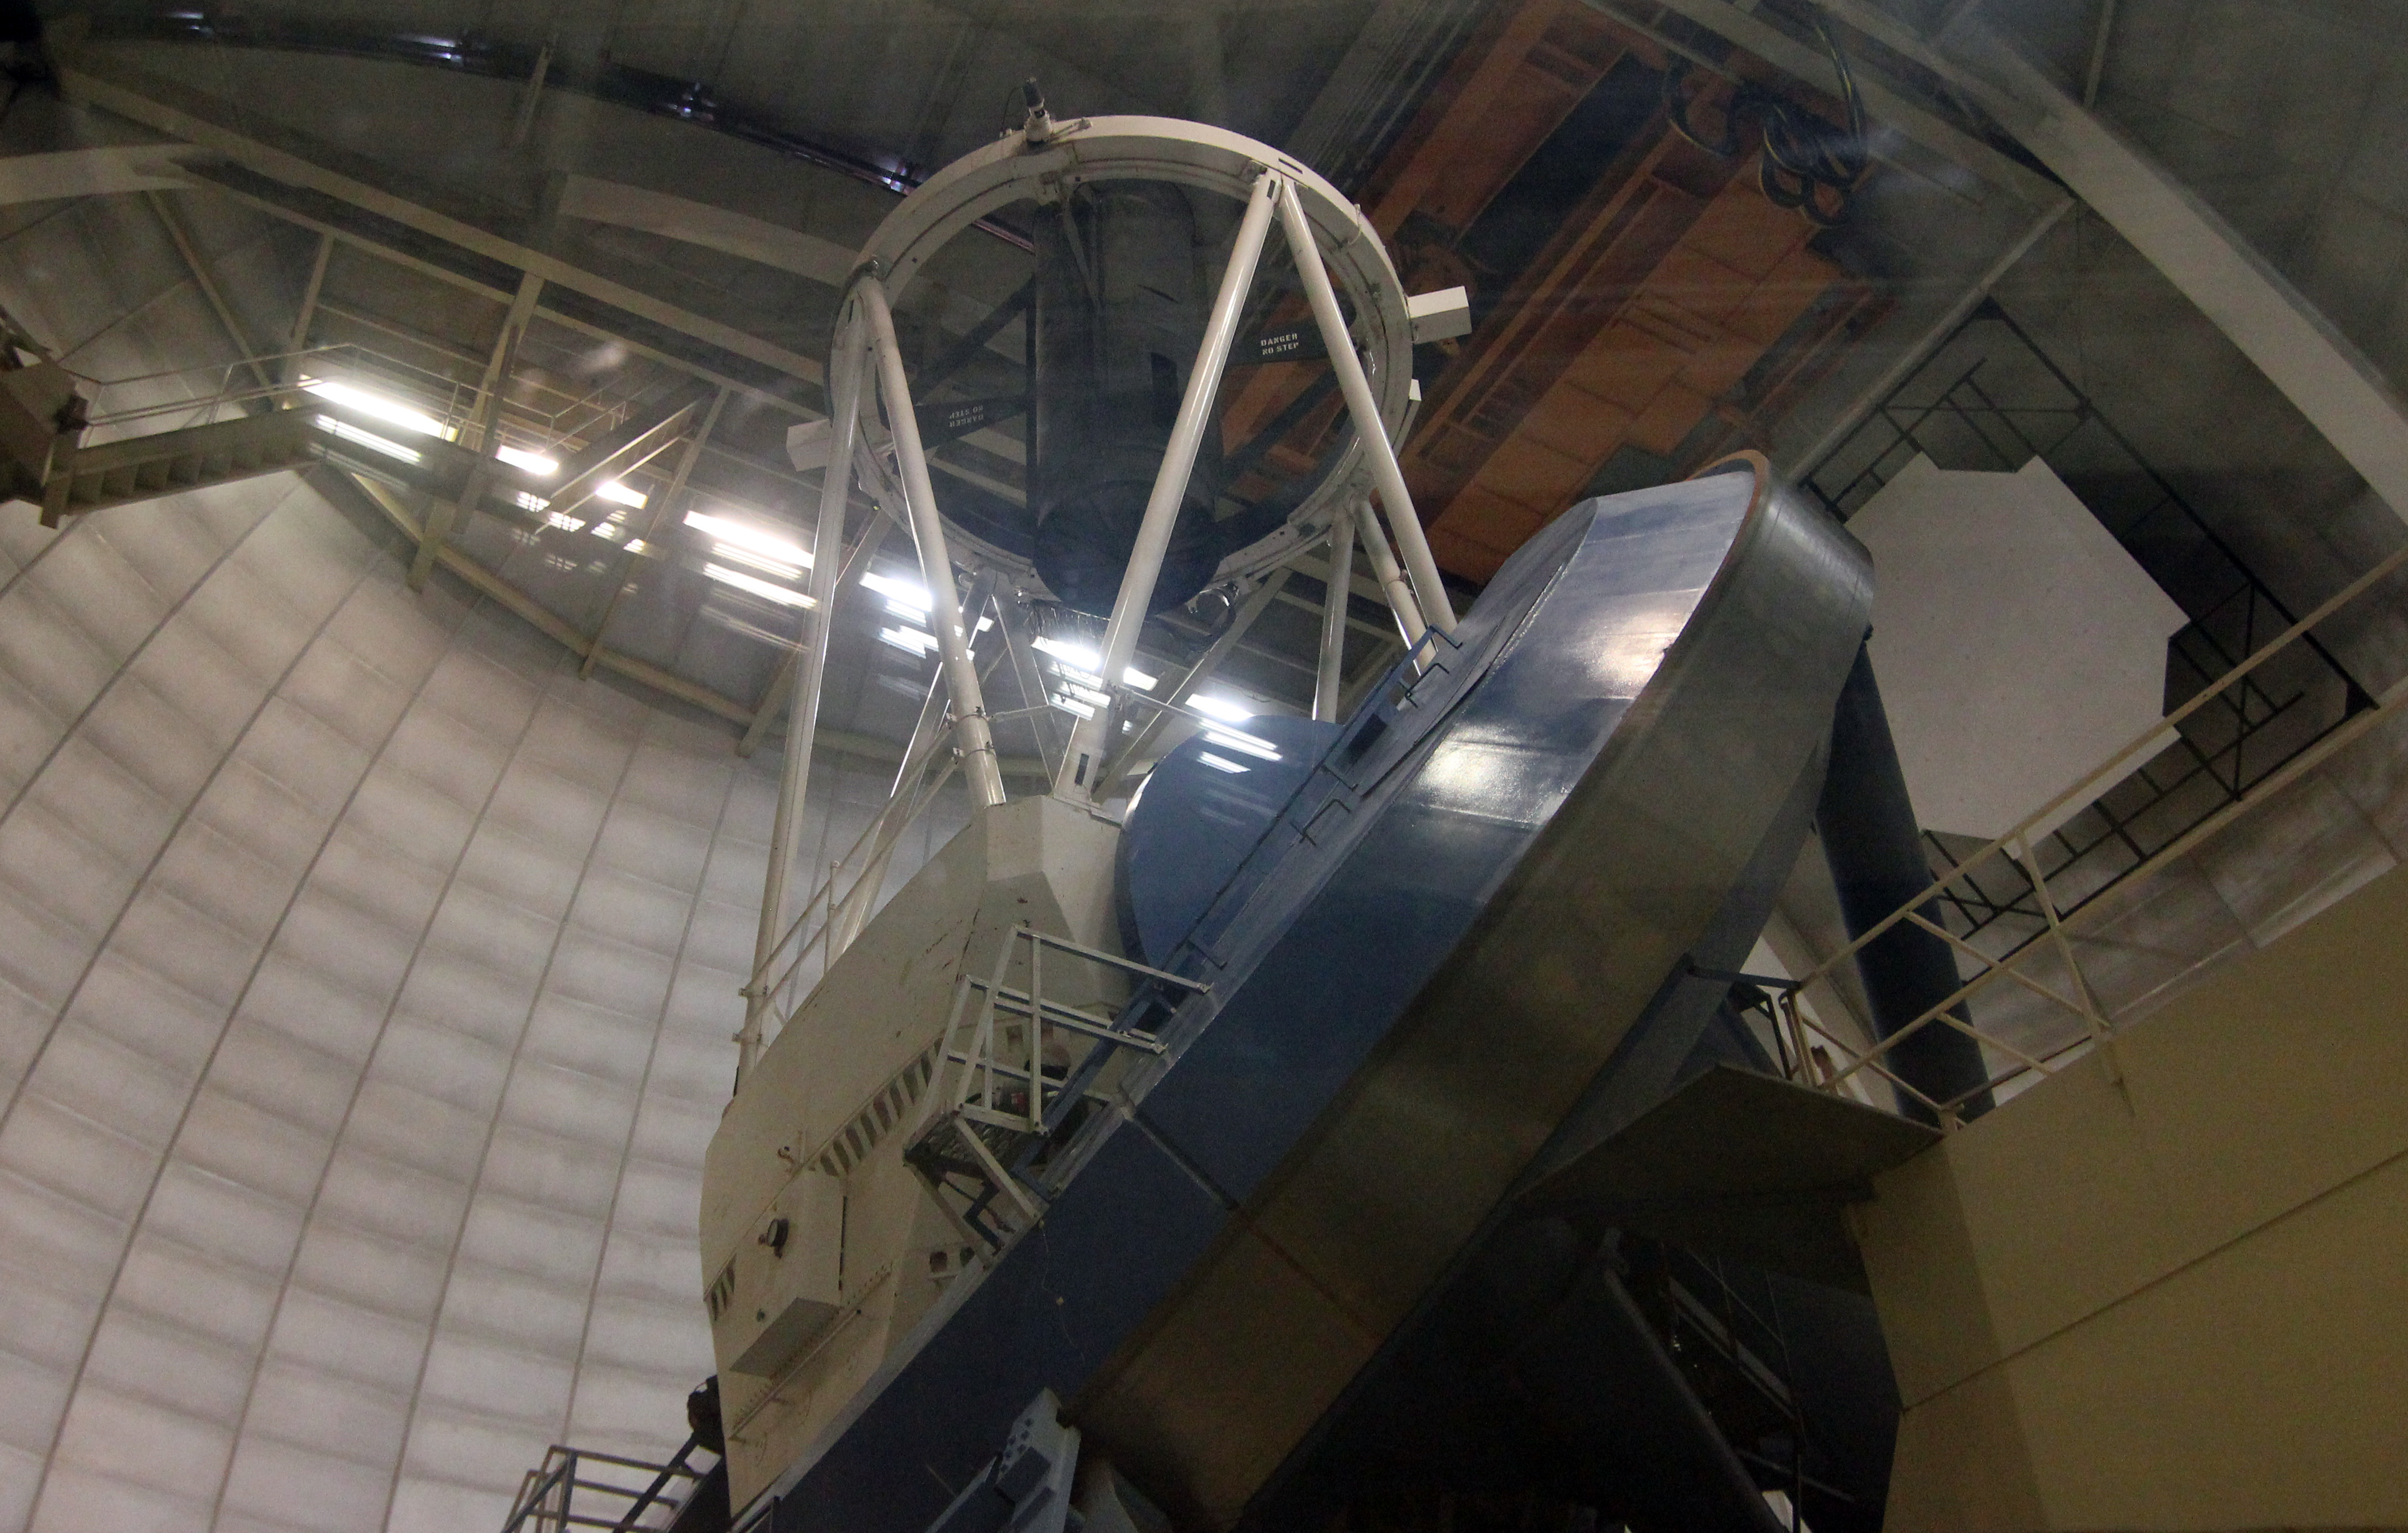
days in advance, I called the program coordinator and asked if I could switch to Saturday night, which had more promising weather. Within a few hours, she was able to call my original guide, and get the night switched. It ended up working out better for the guide anyway. Then Saturday morning, I got a call from our guide. He said, “I have some potentially bad news. It turns out the 16″ you were going to use is booked tonight. Would you be willing to use the 20″?” Of course I would! Now, to be honest, I was planning on imaging through the refractor anyway, and that meant switching from a TEK to a Takahashi, an awesome trade.
We raced from Picacho Peak to the mountain, arriving at the base around 3:30.

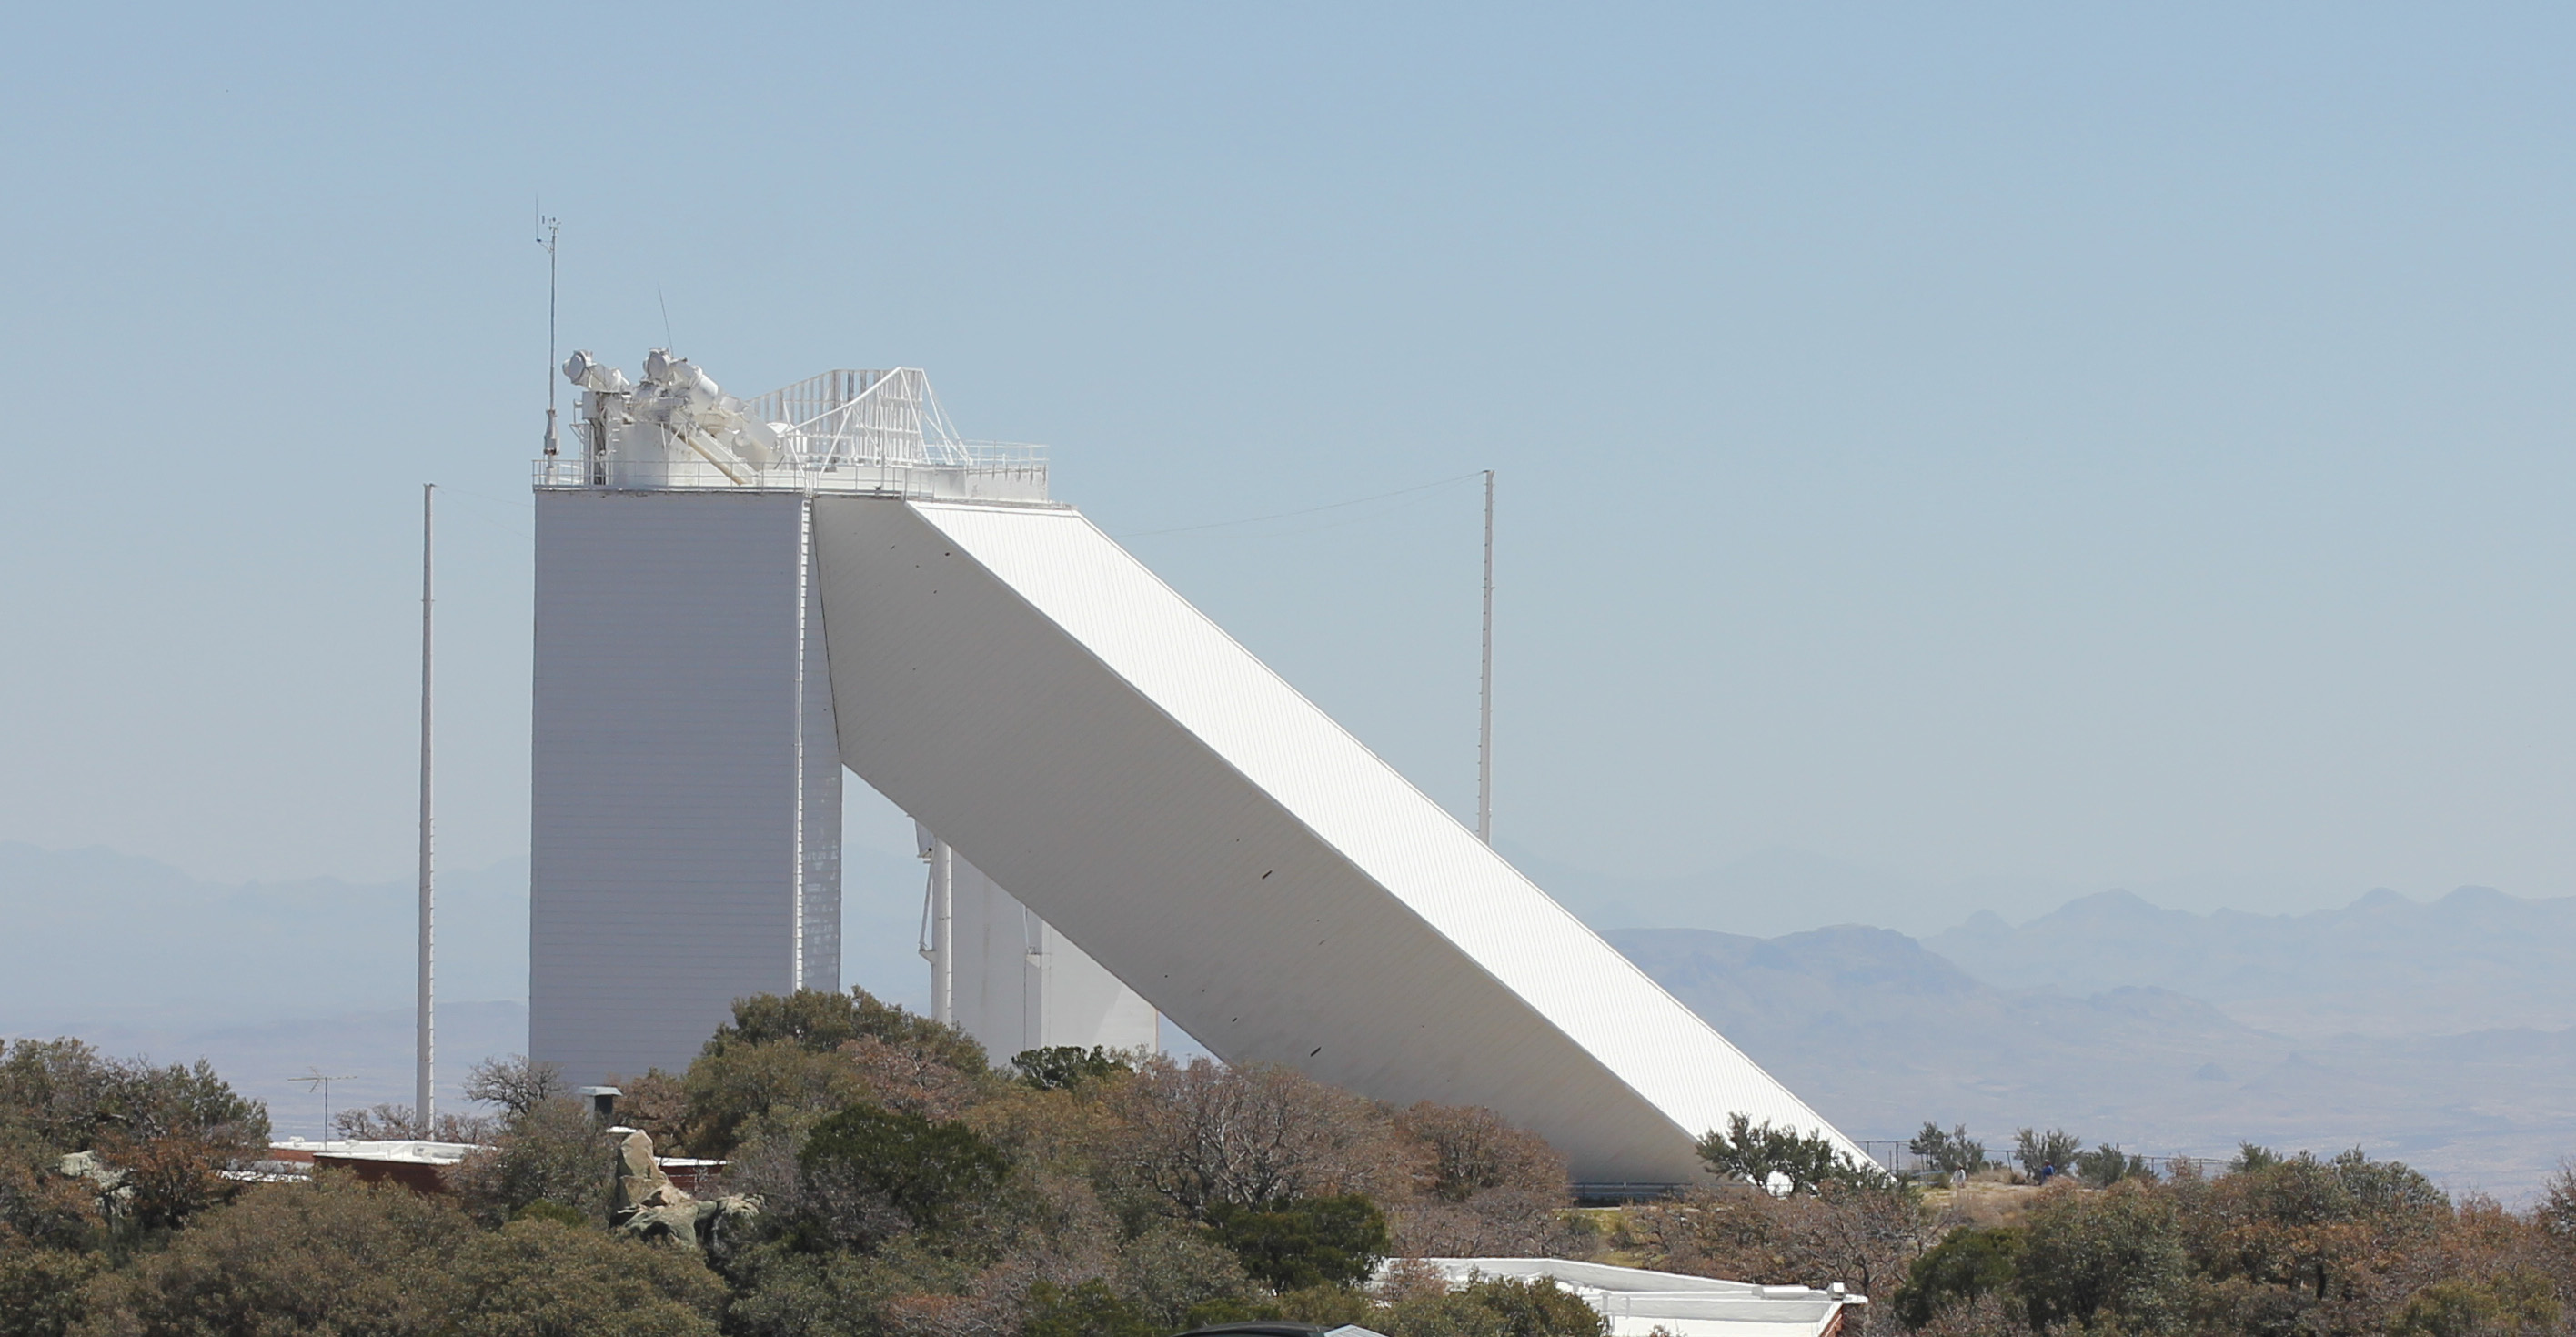
It was about a 20 minute drive to the top, with breathtaking views, including the telescopes. We checked in, had dinner in the cafeteria there, and waited for the AOP to start. I’ll blog about that part of the night in great detail later, but the punchline is that I was up until about 6 AM and got some awesome views. The next day, we woke up around 10 AM and toured some of the larger scopes on the mountain. The first one is the solar scope, which is actually dug into the mountain.
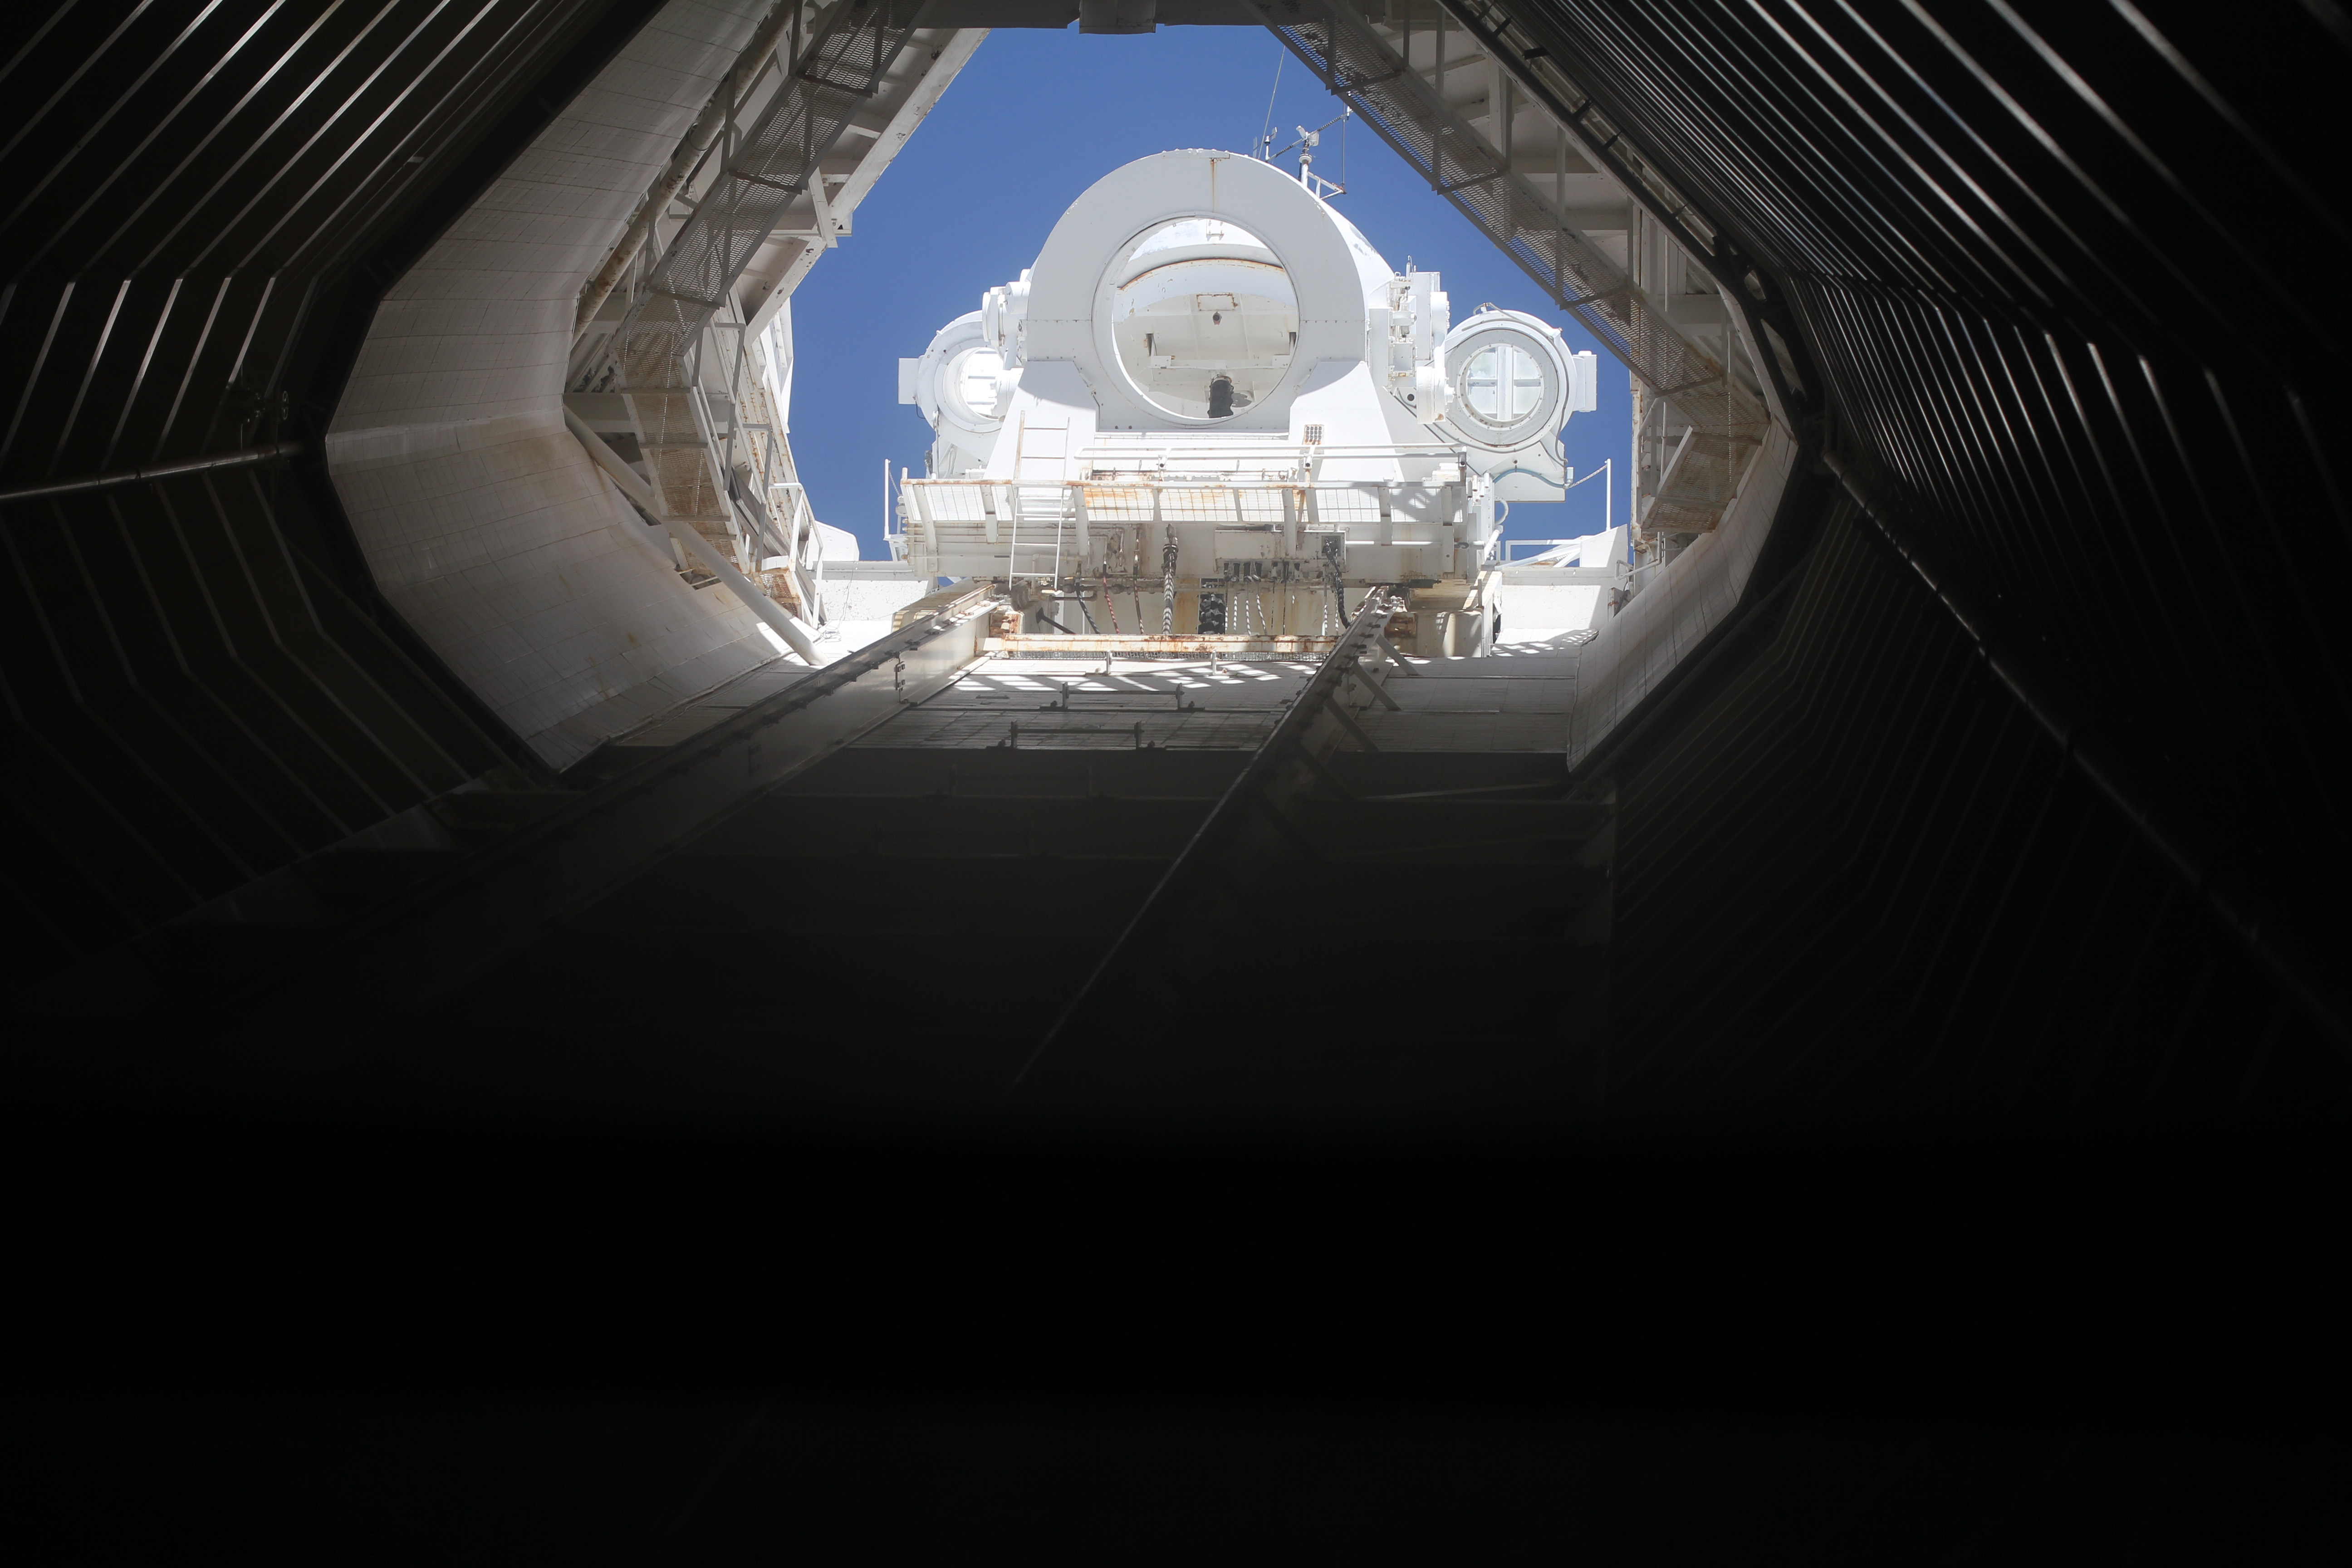
Nearby, there’s also the 2.1 meter telescope.
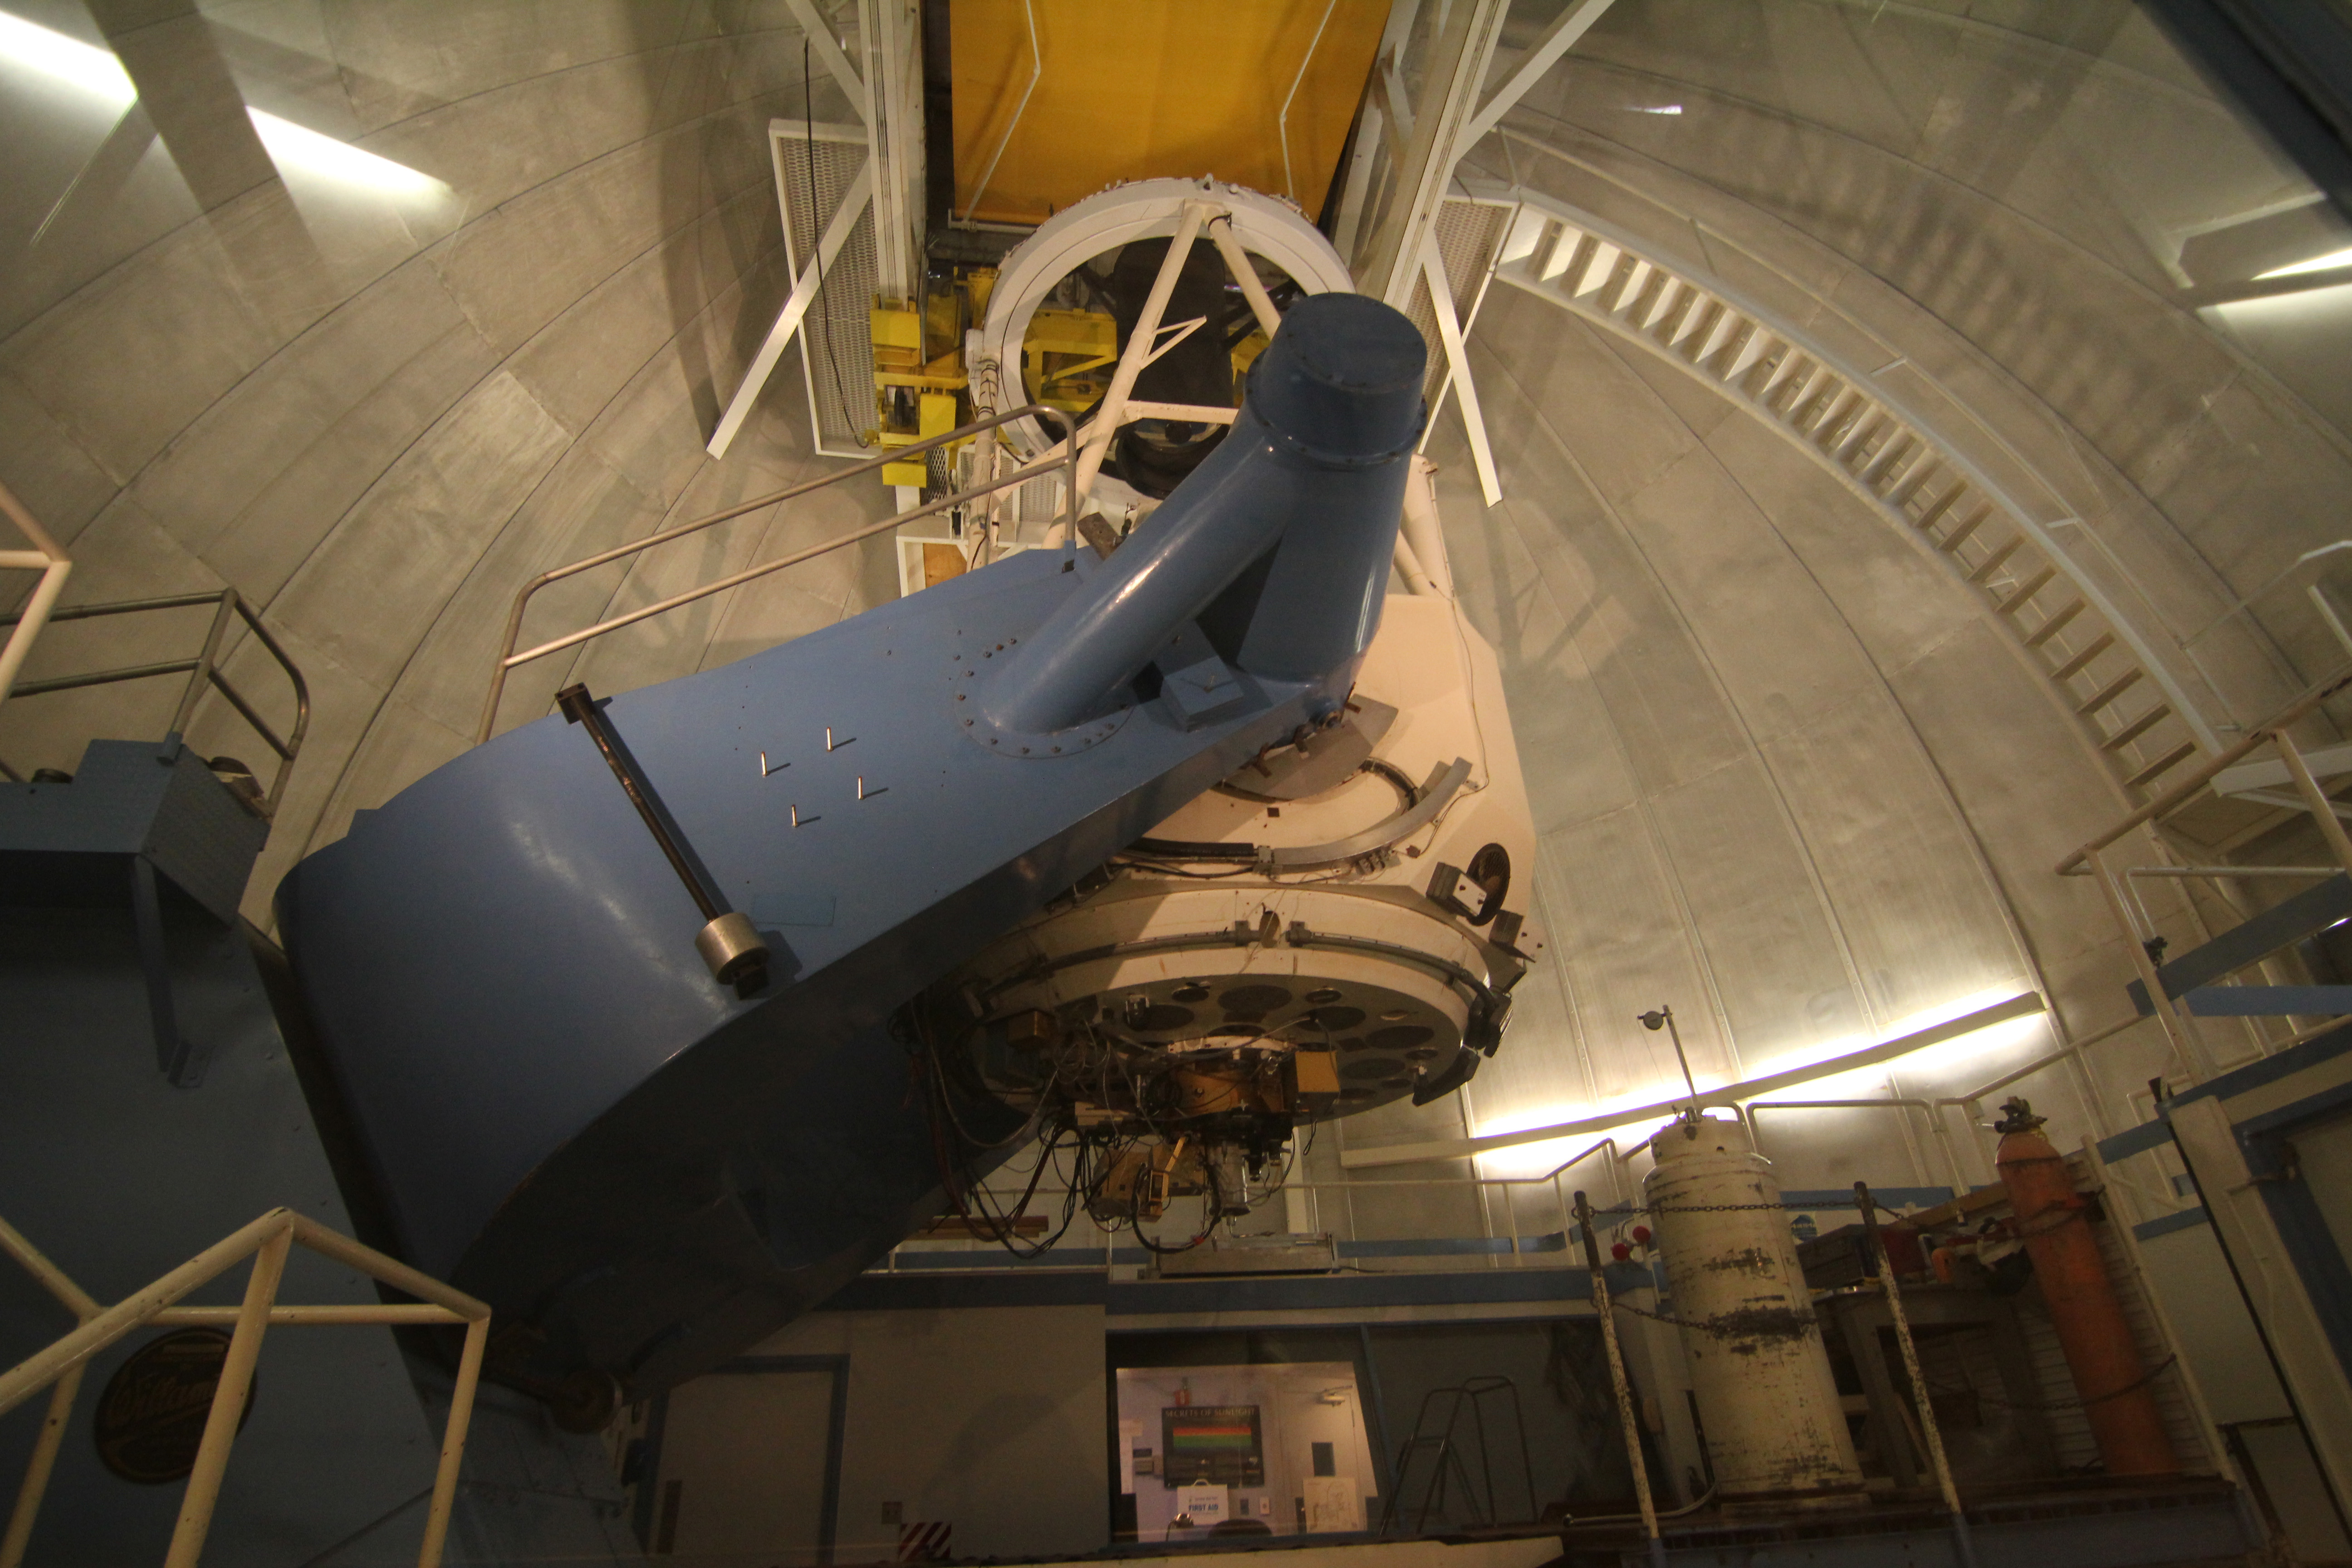
On the way out, there’s the 4.3m Mayall telescope. At one time, it was the second largest working telescope in the world. It’s at just about the highest point on the mountain, so the views are spectacular.
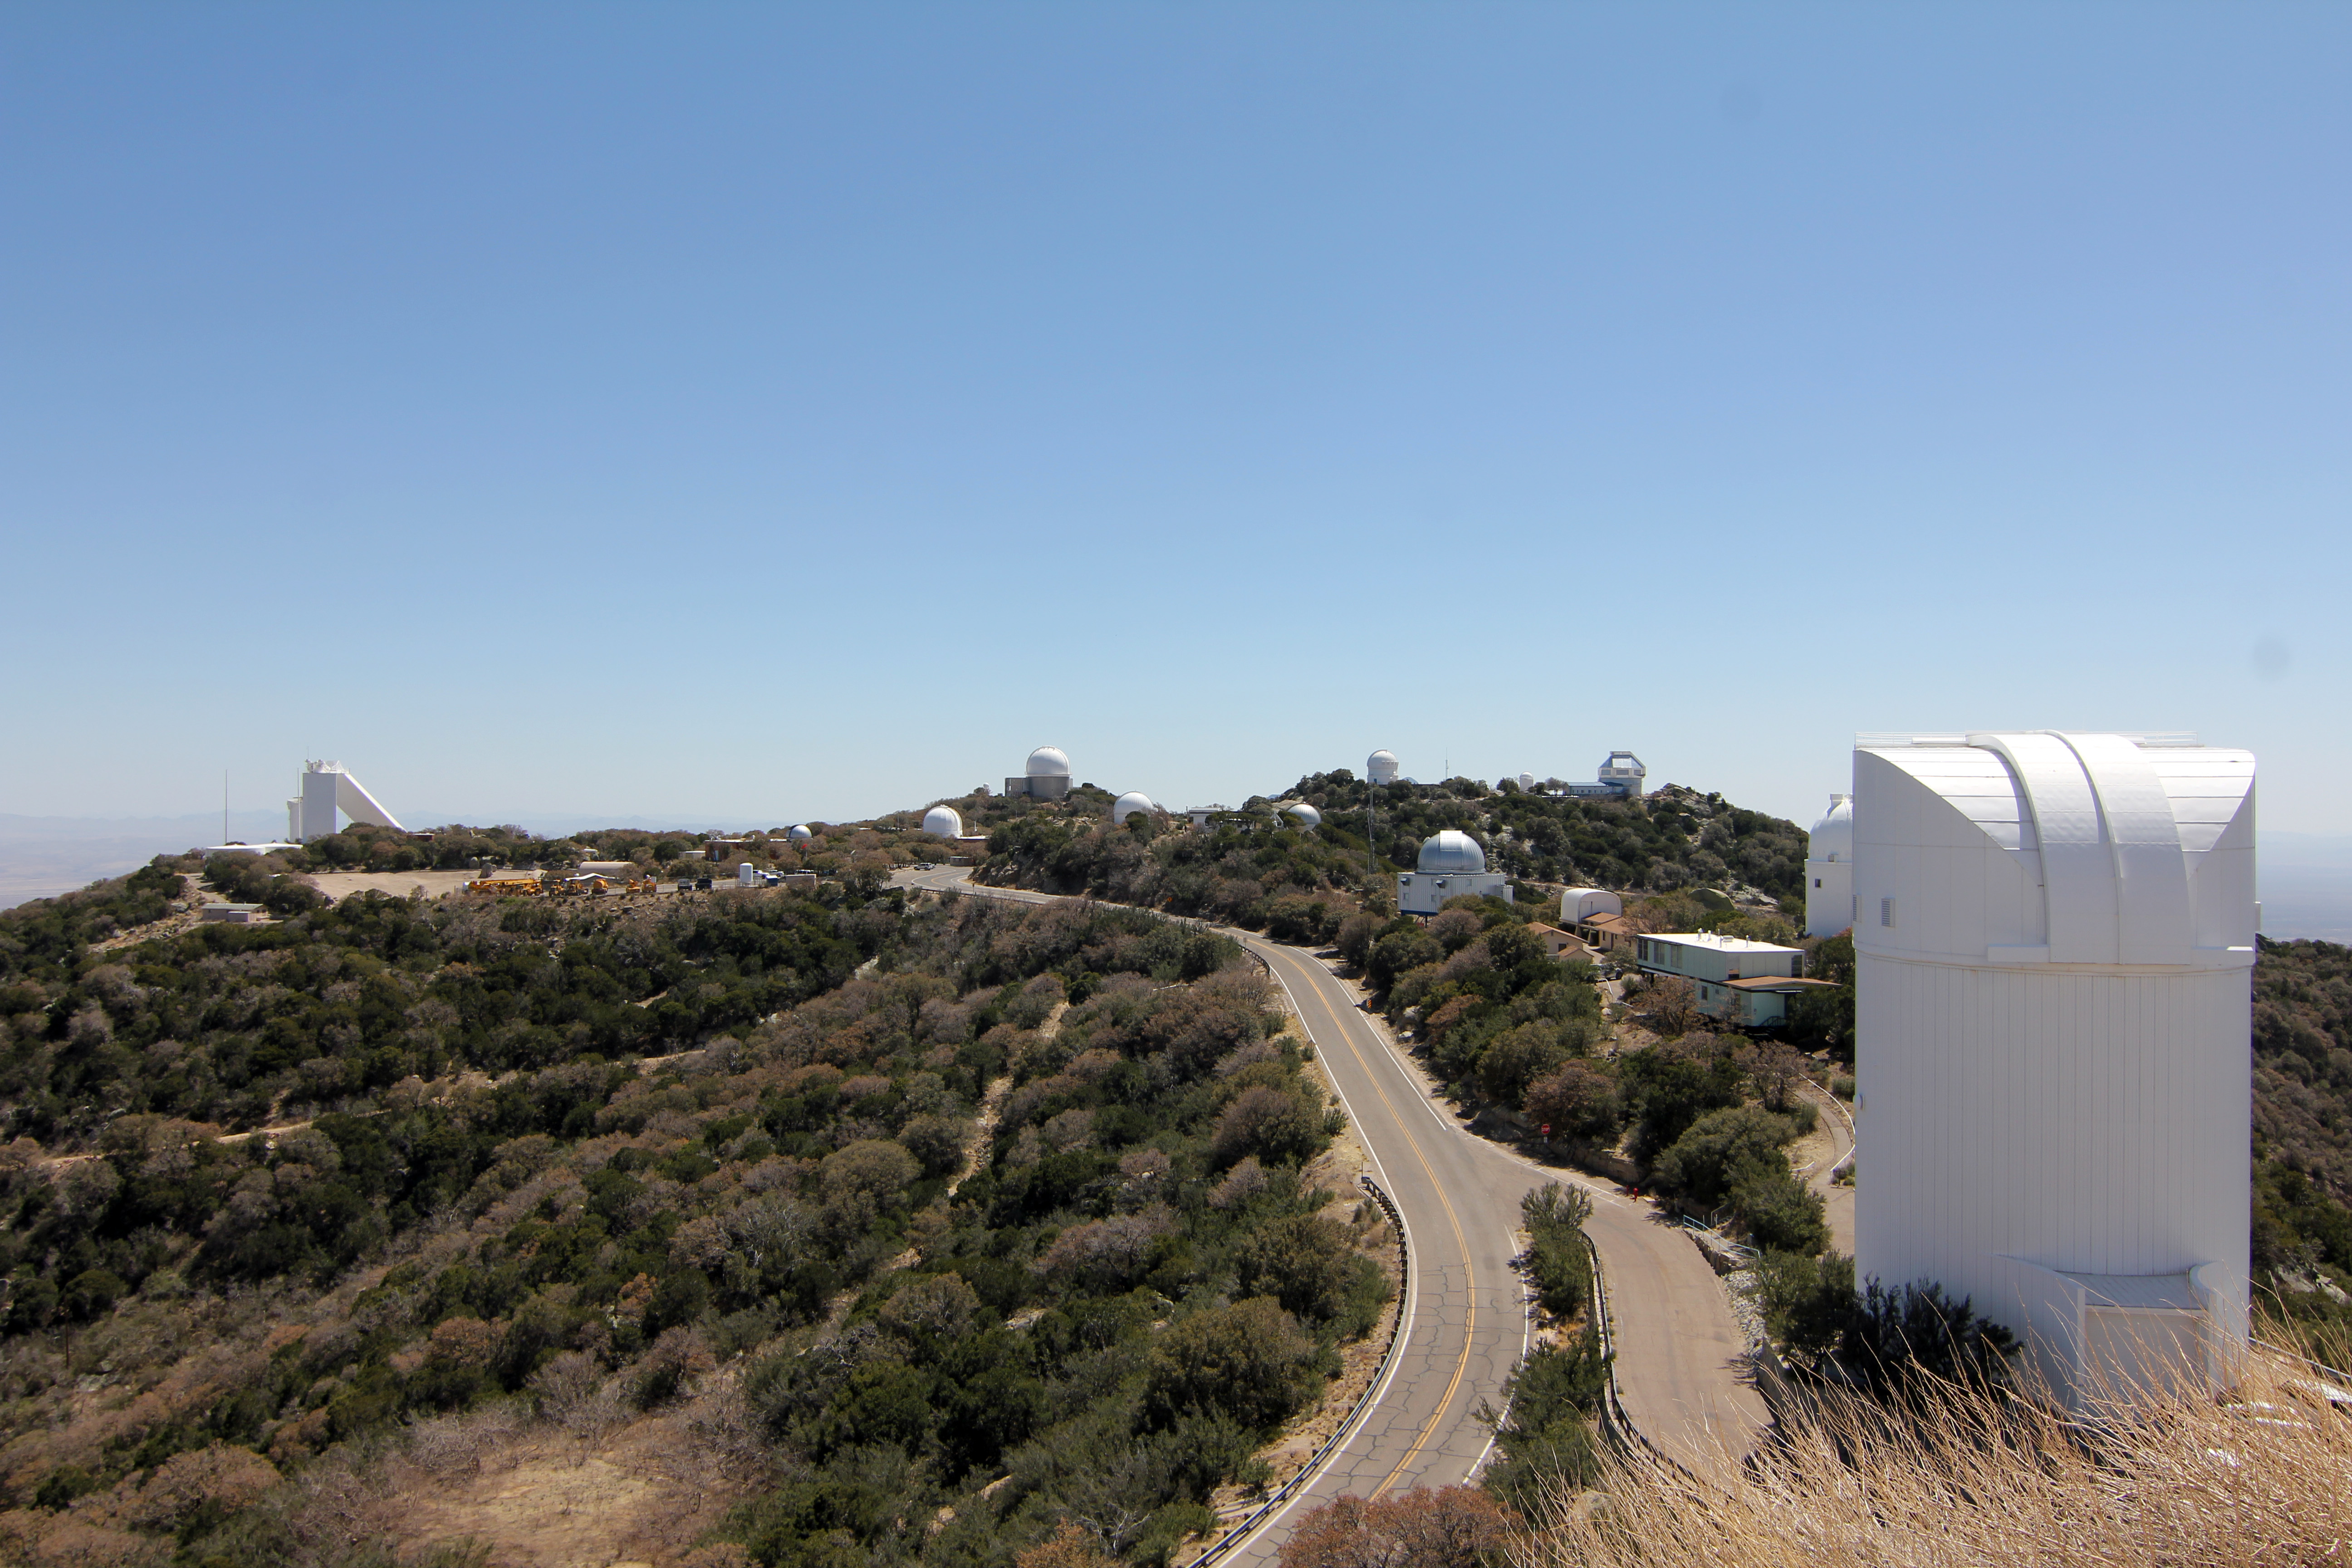
The drive down is pretty, and a little disappointing that you are leaving one of the best sites in the world for astronomy.
Next up, the astropics!
Arizona Trip Part 5, Miscellaneous.
Here’s some other random things we saw.
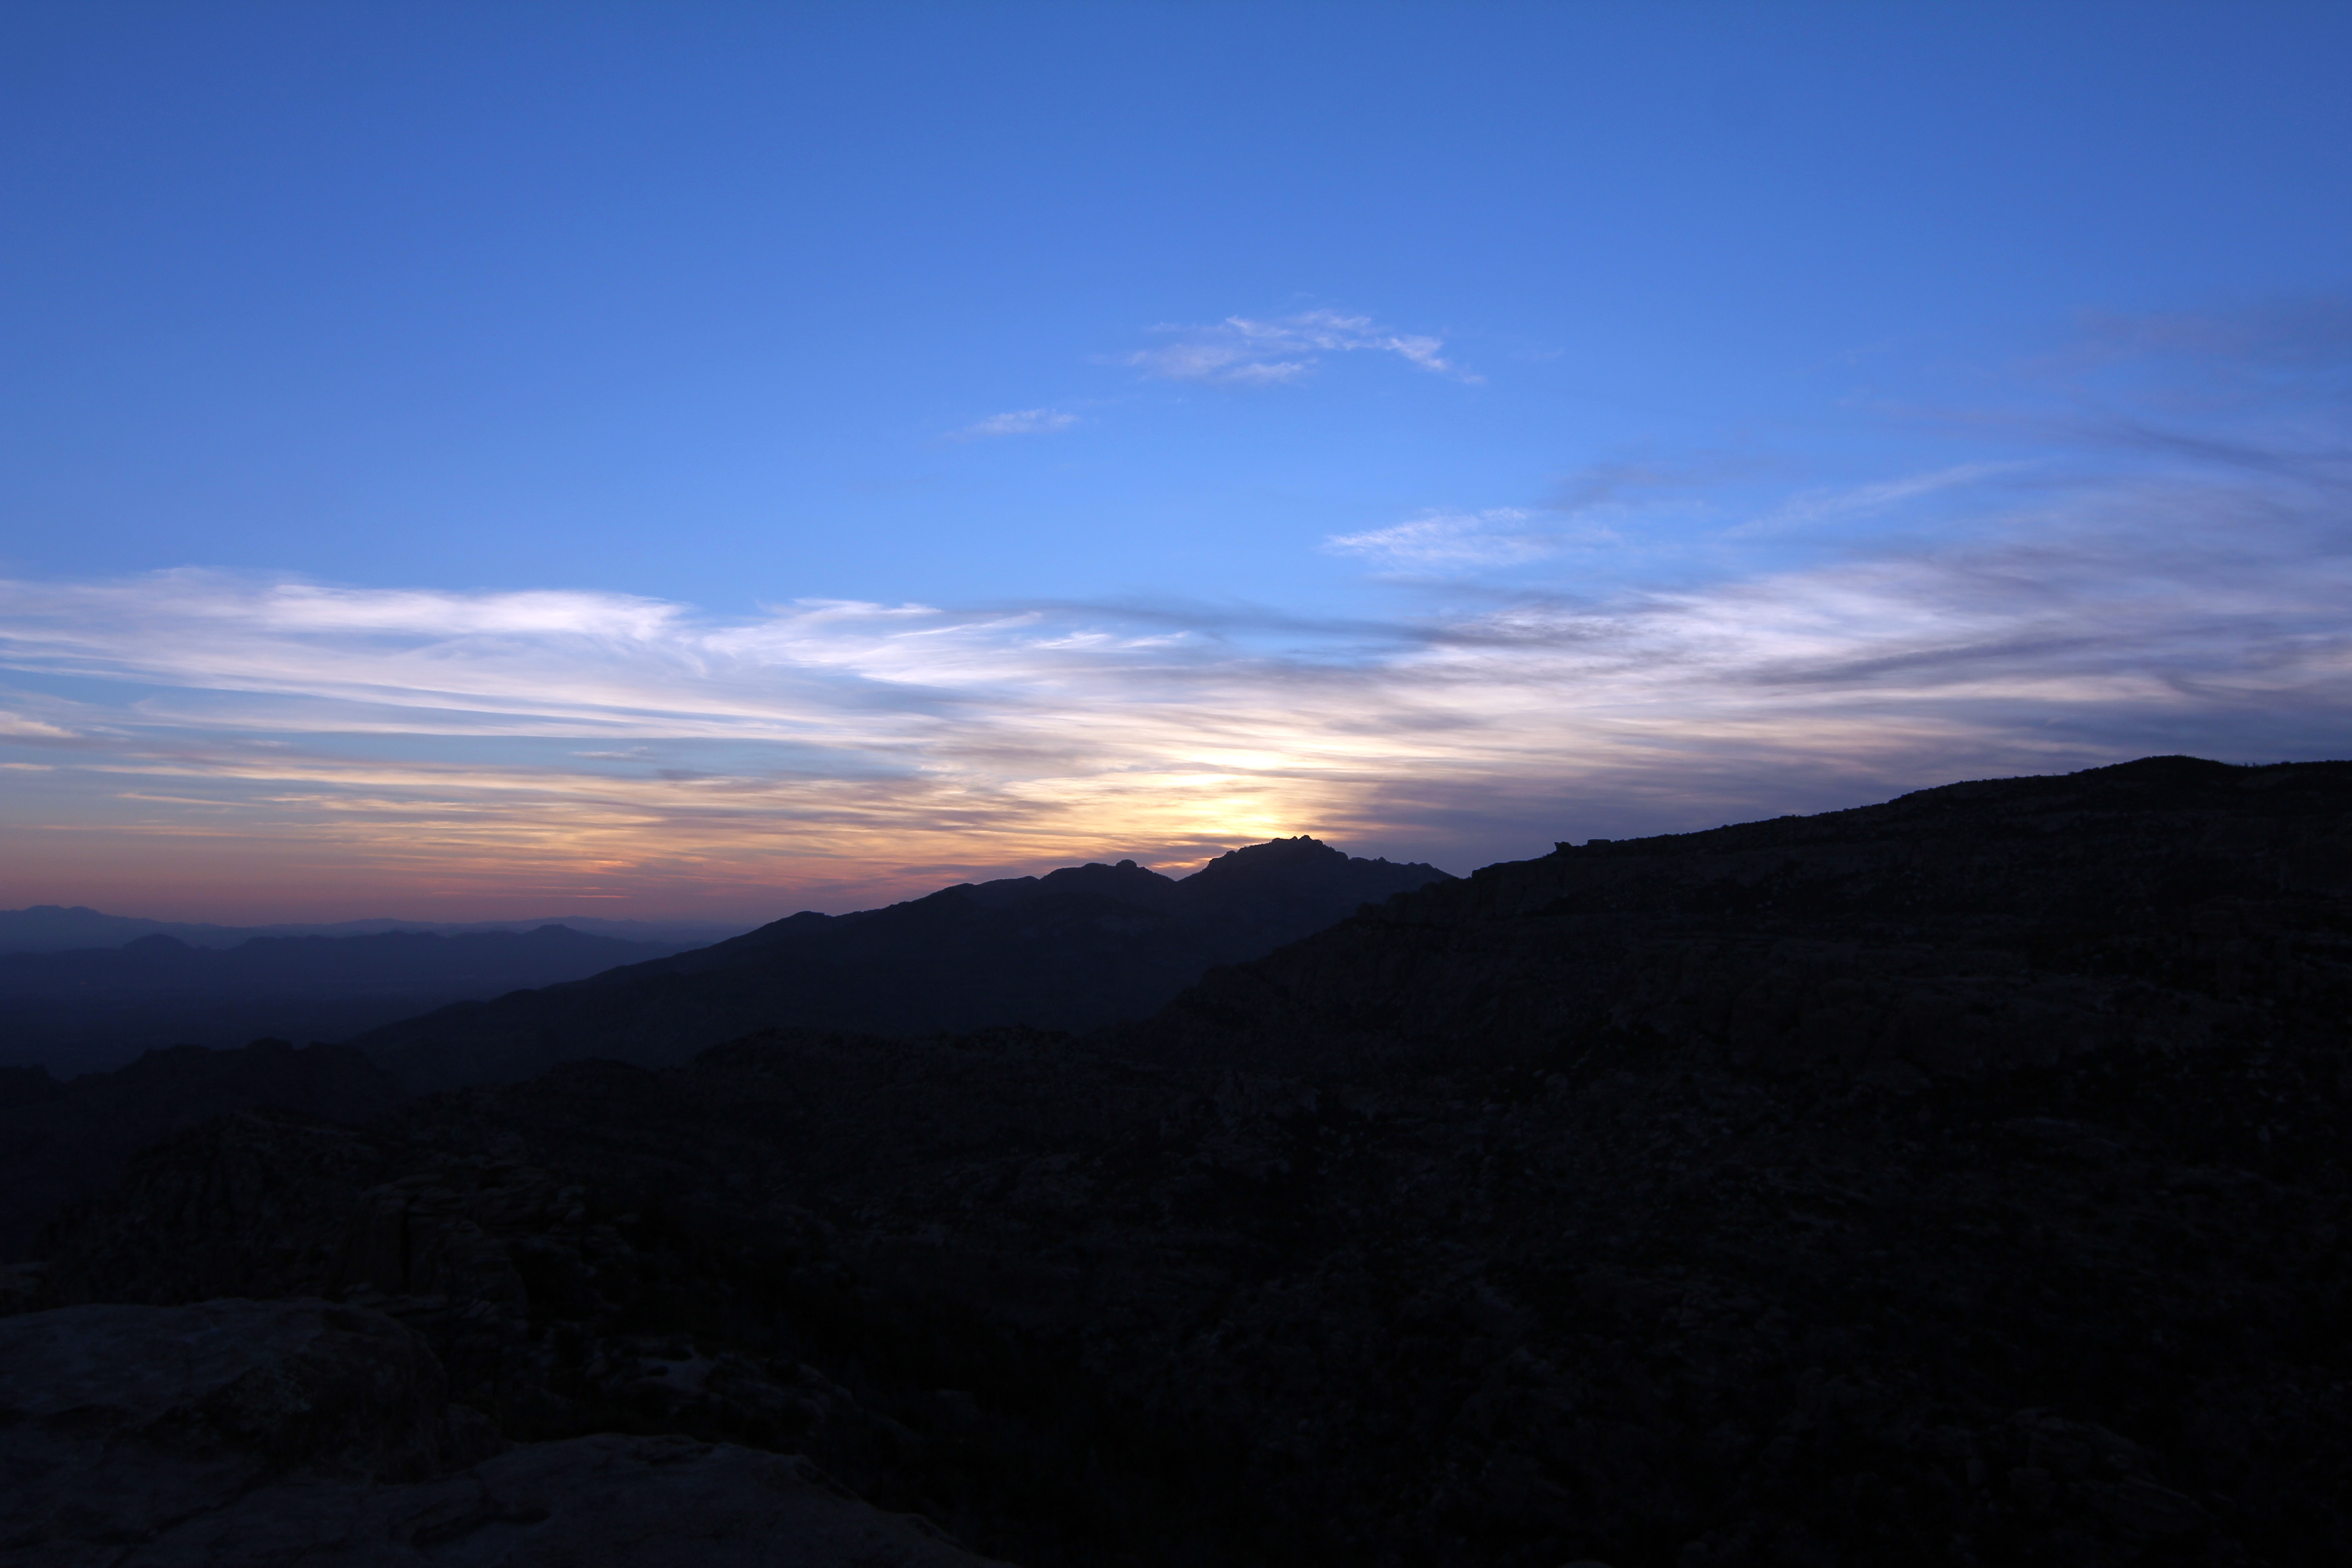
We watched the sunset from Windy Point about halfway up Mt Lemmon.
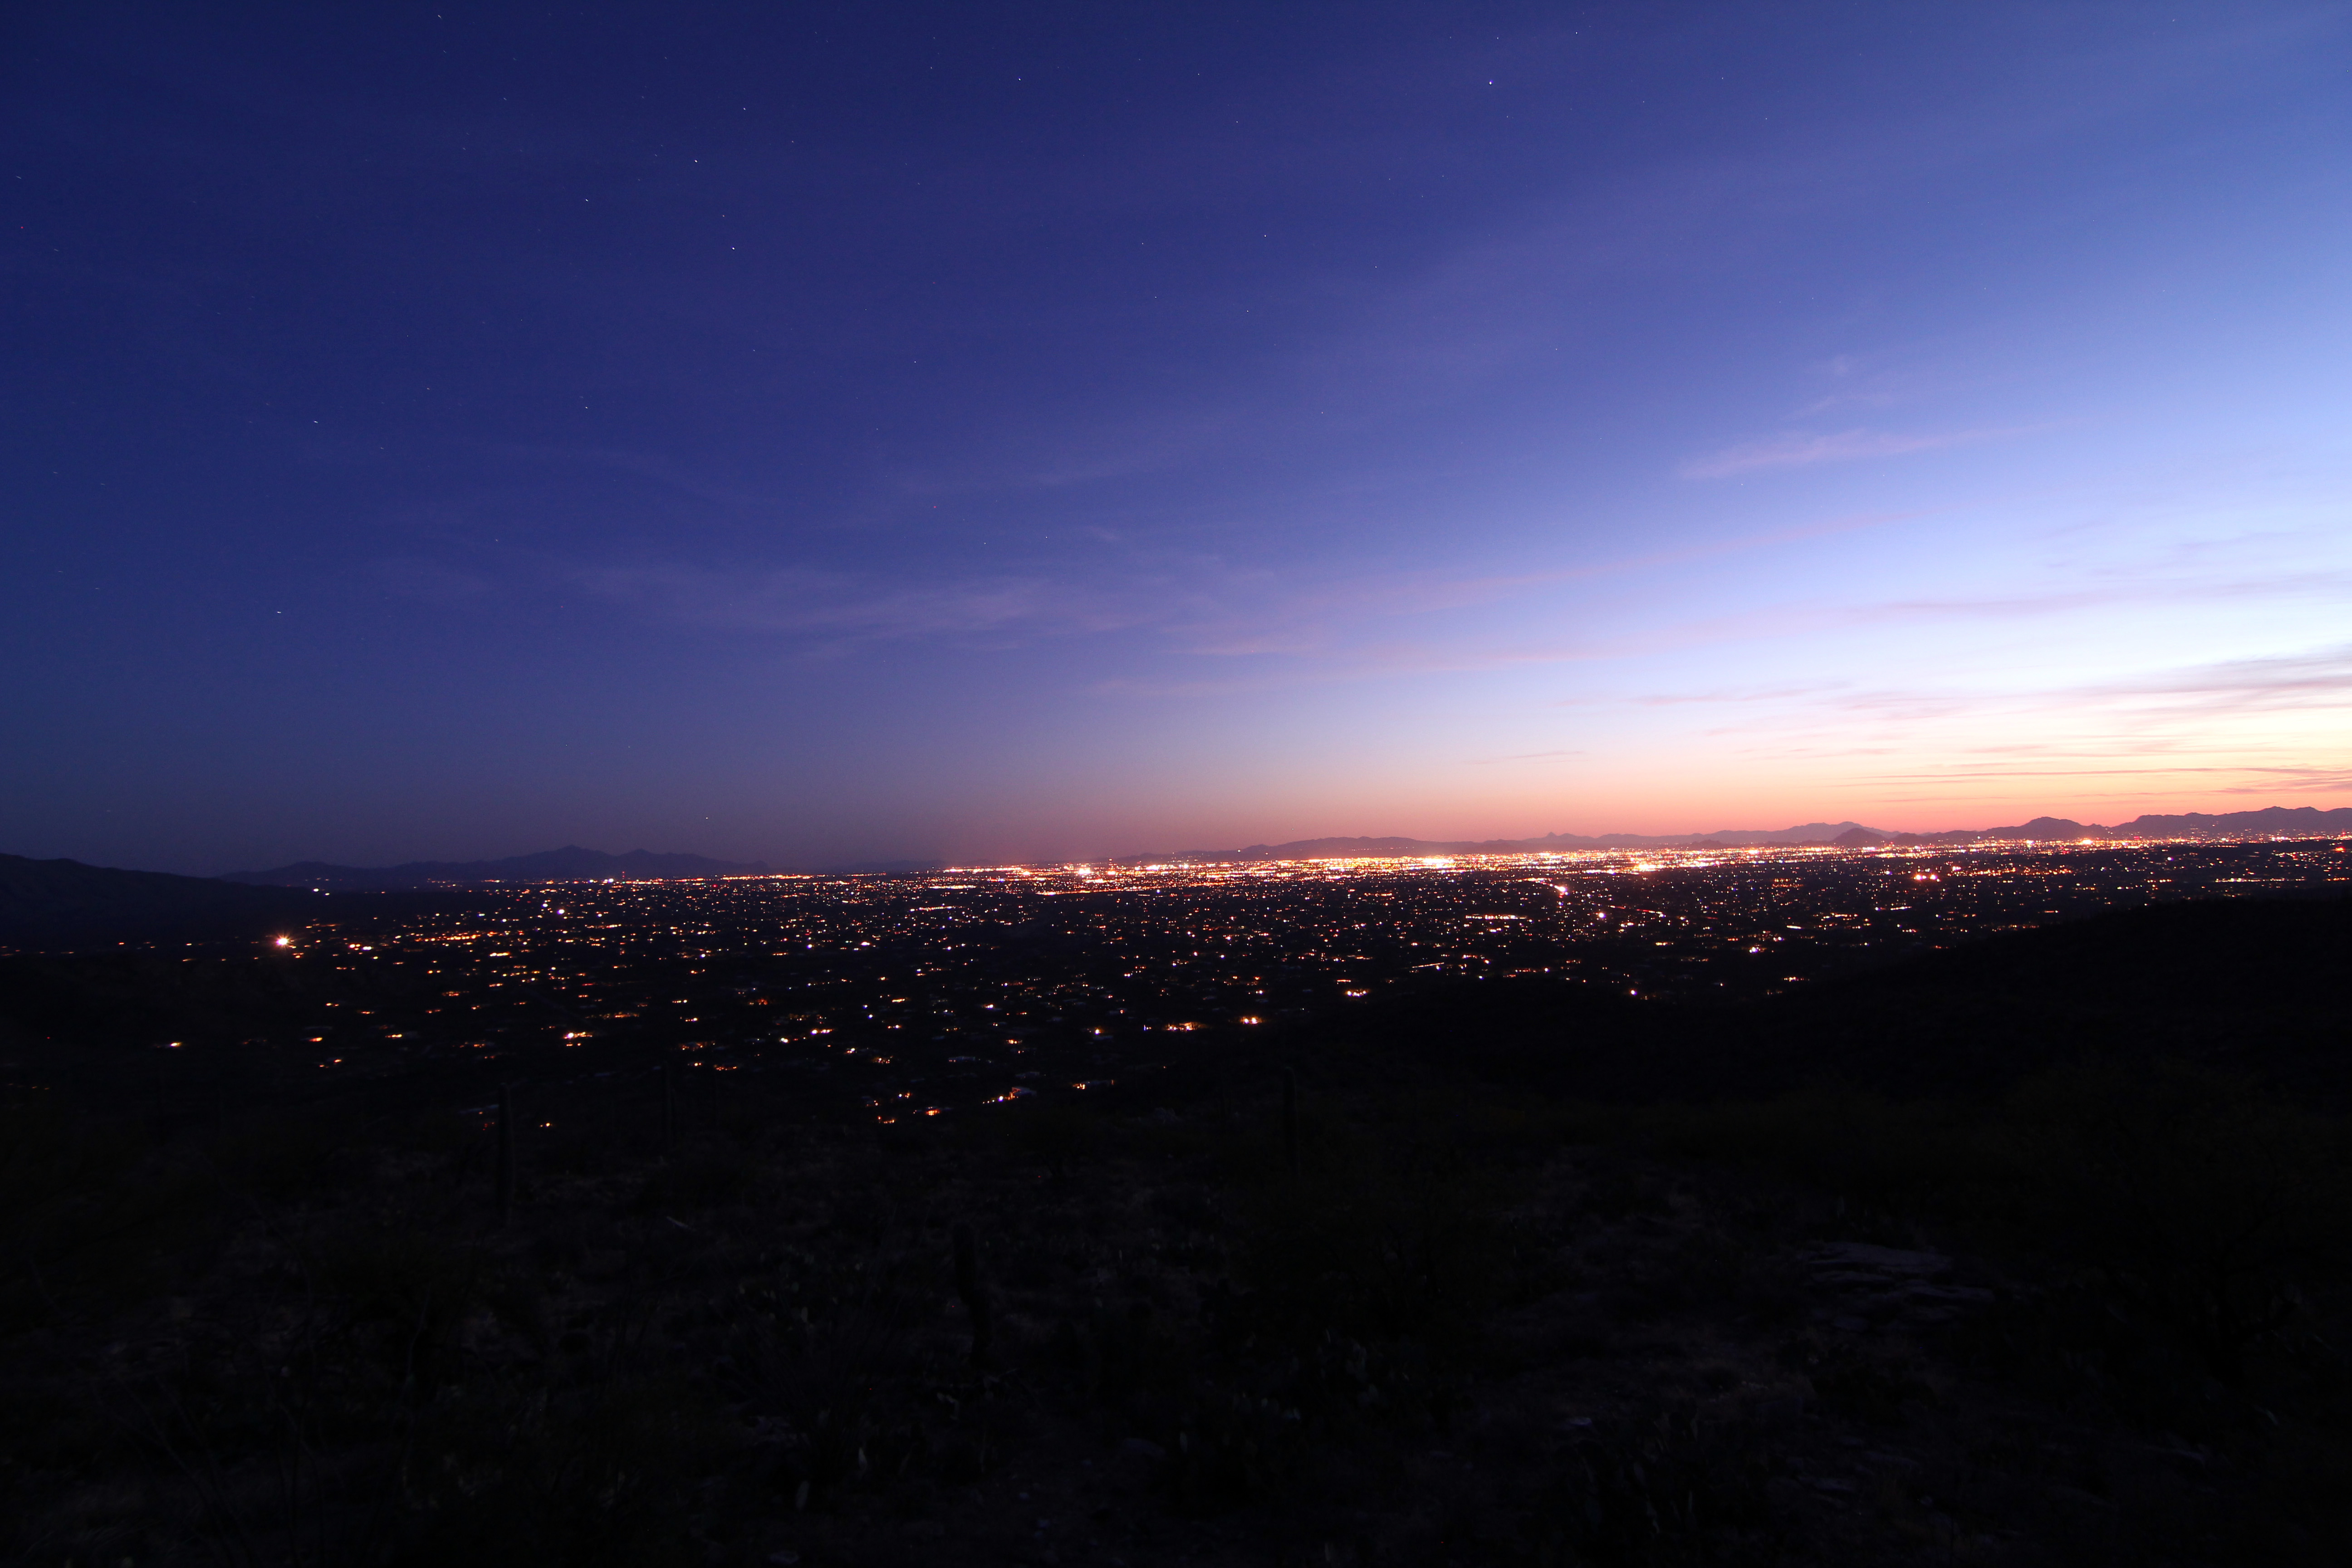
On the way down, we saw the Tucson lights:
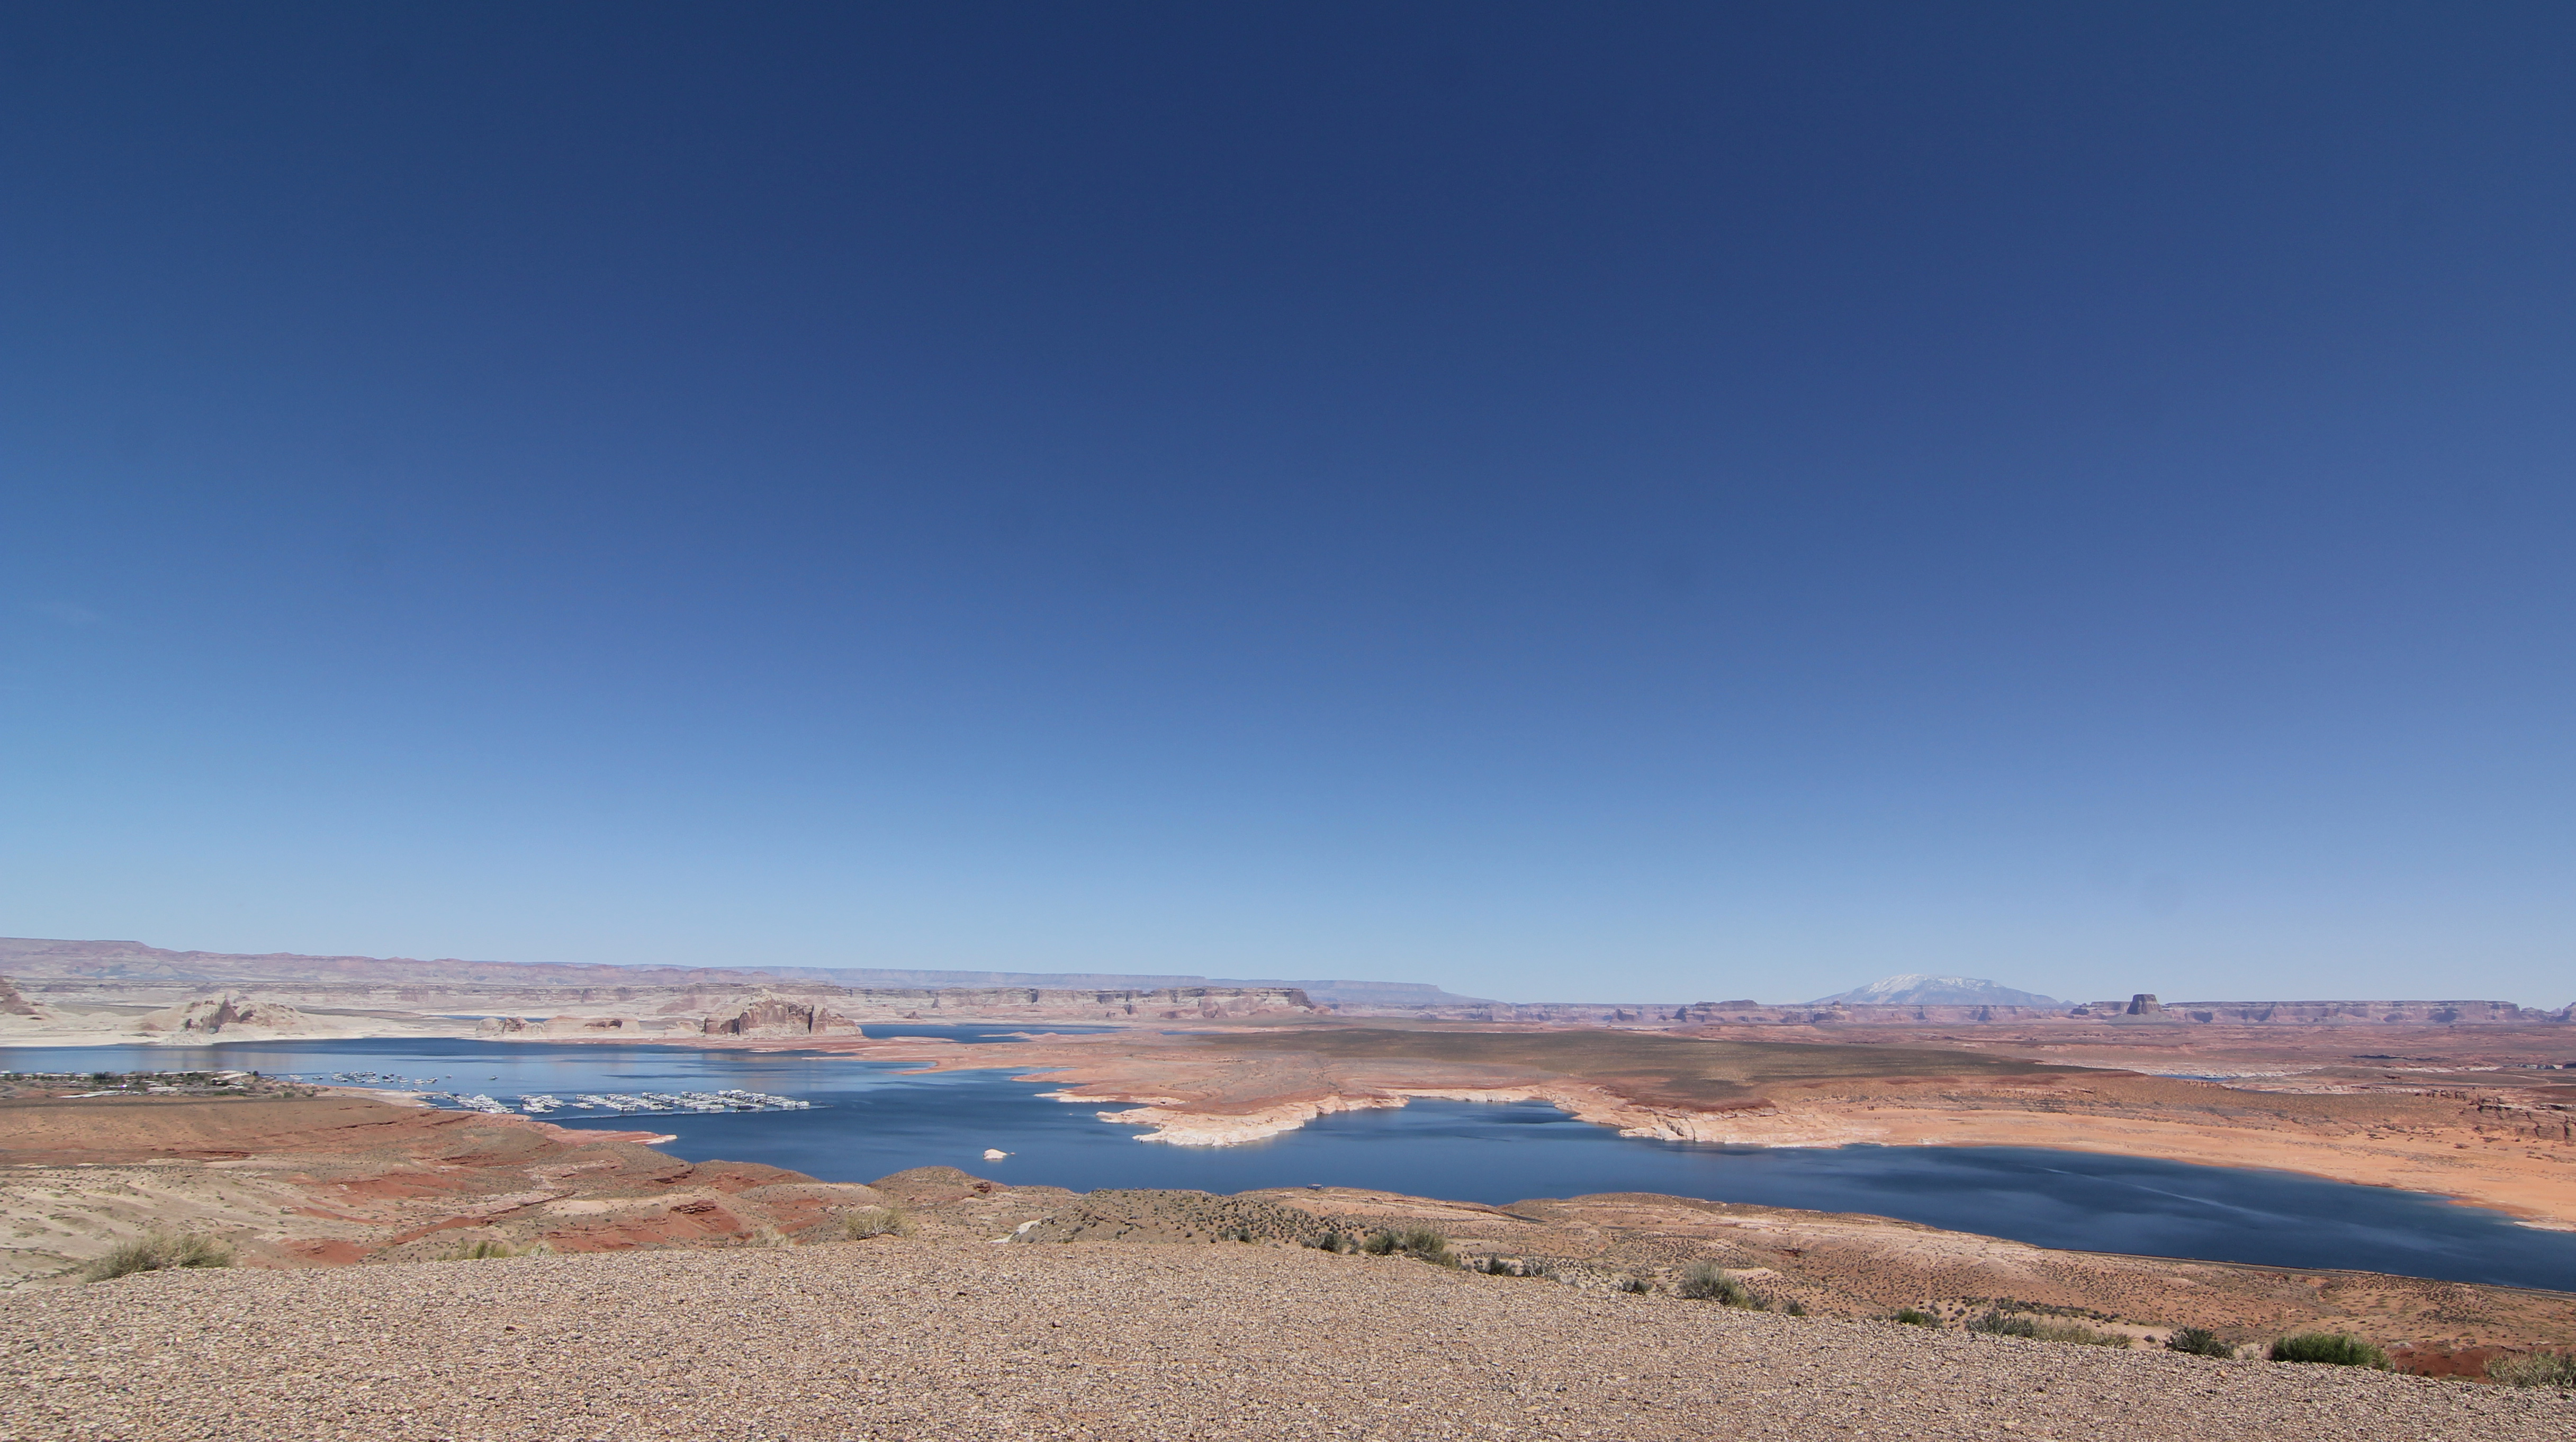
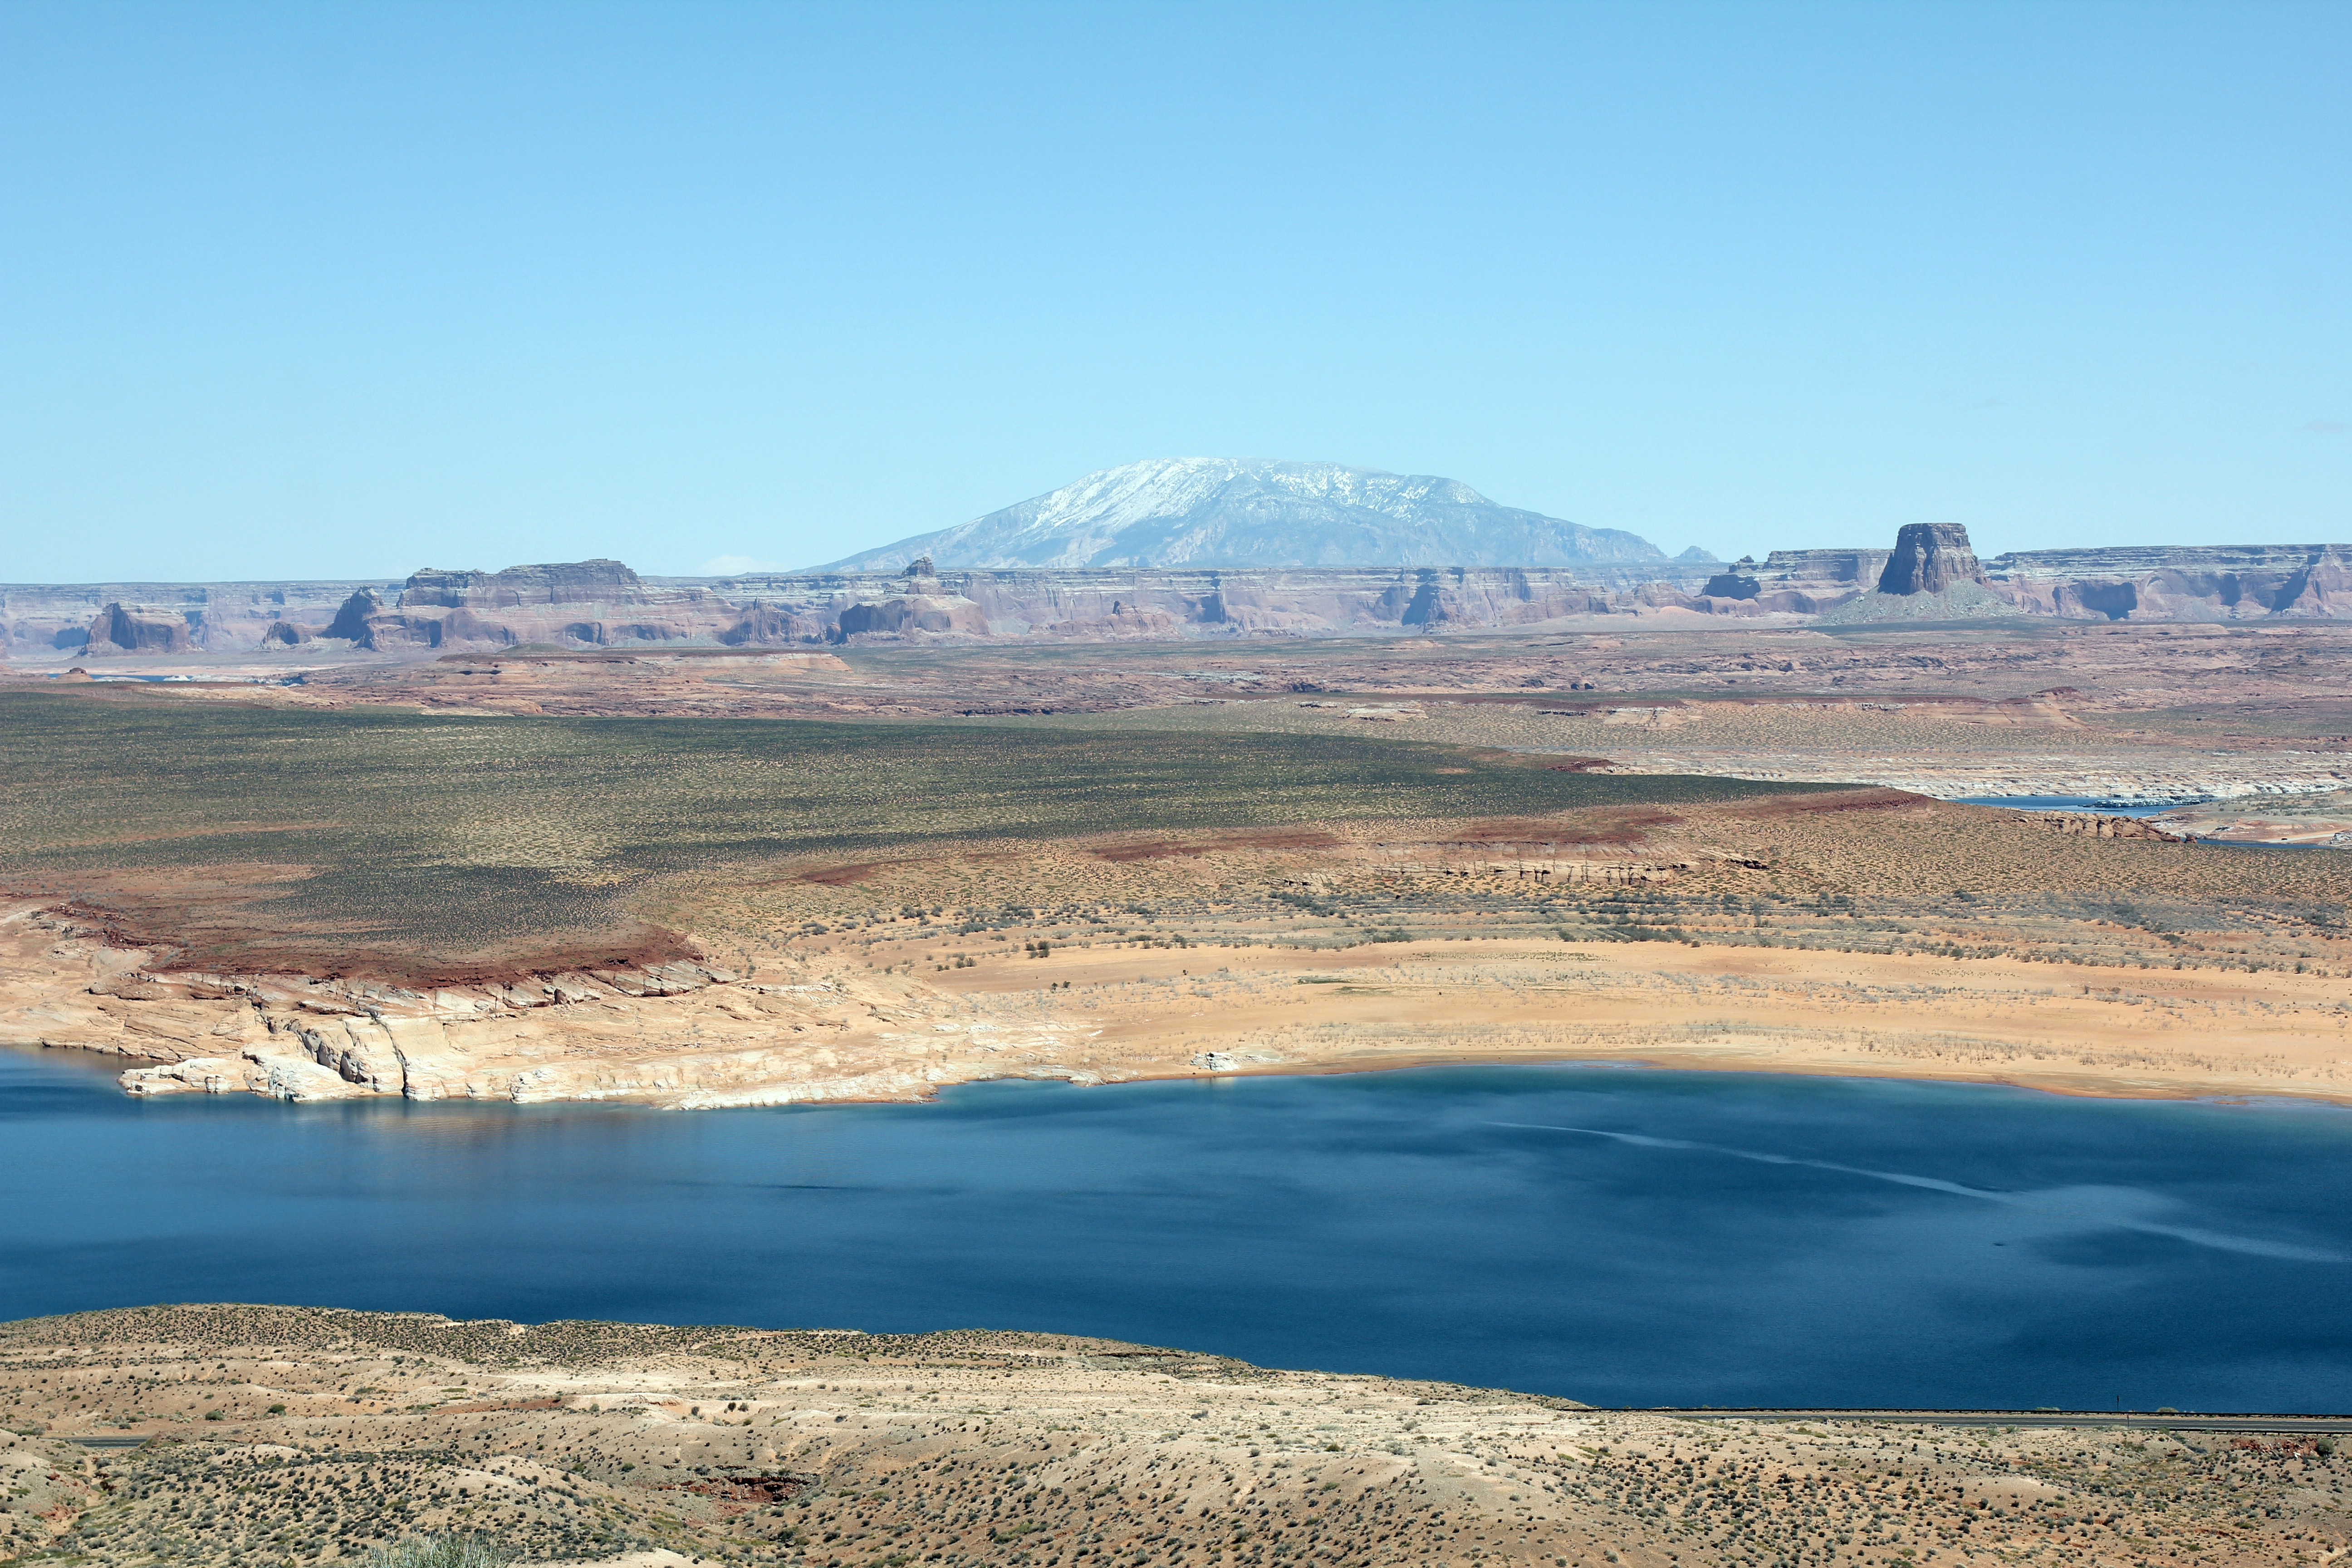
We saw Lake Powell.
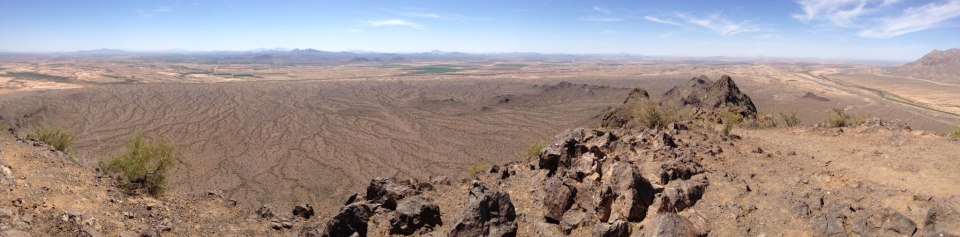
I also took a panaroma with my T2i. This is the “small” version (you can click it). For the large version (90 MP), click here.

We barely made it to Meteor Crater in time to take some pictures, too:

Up next, non-astro photos from Kitt Peak.
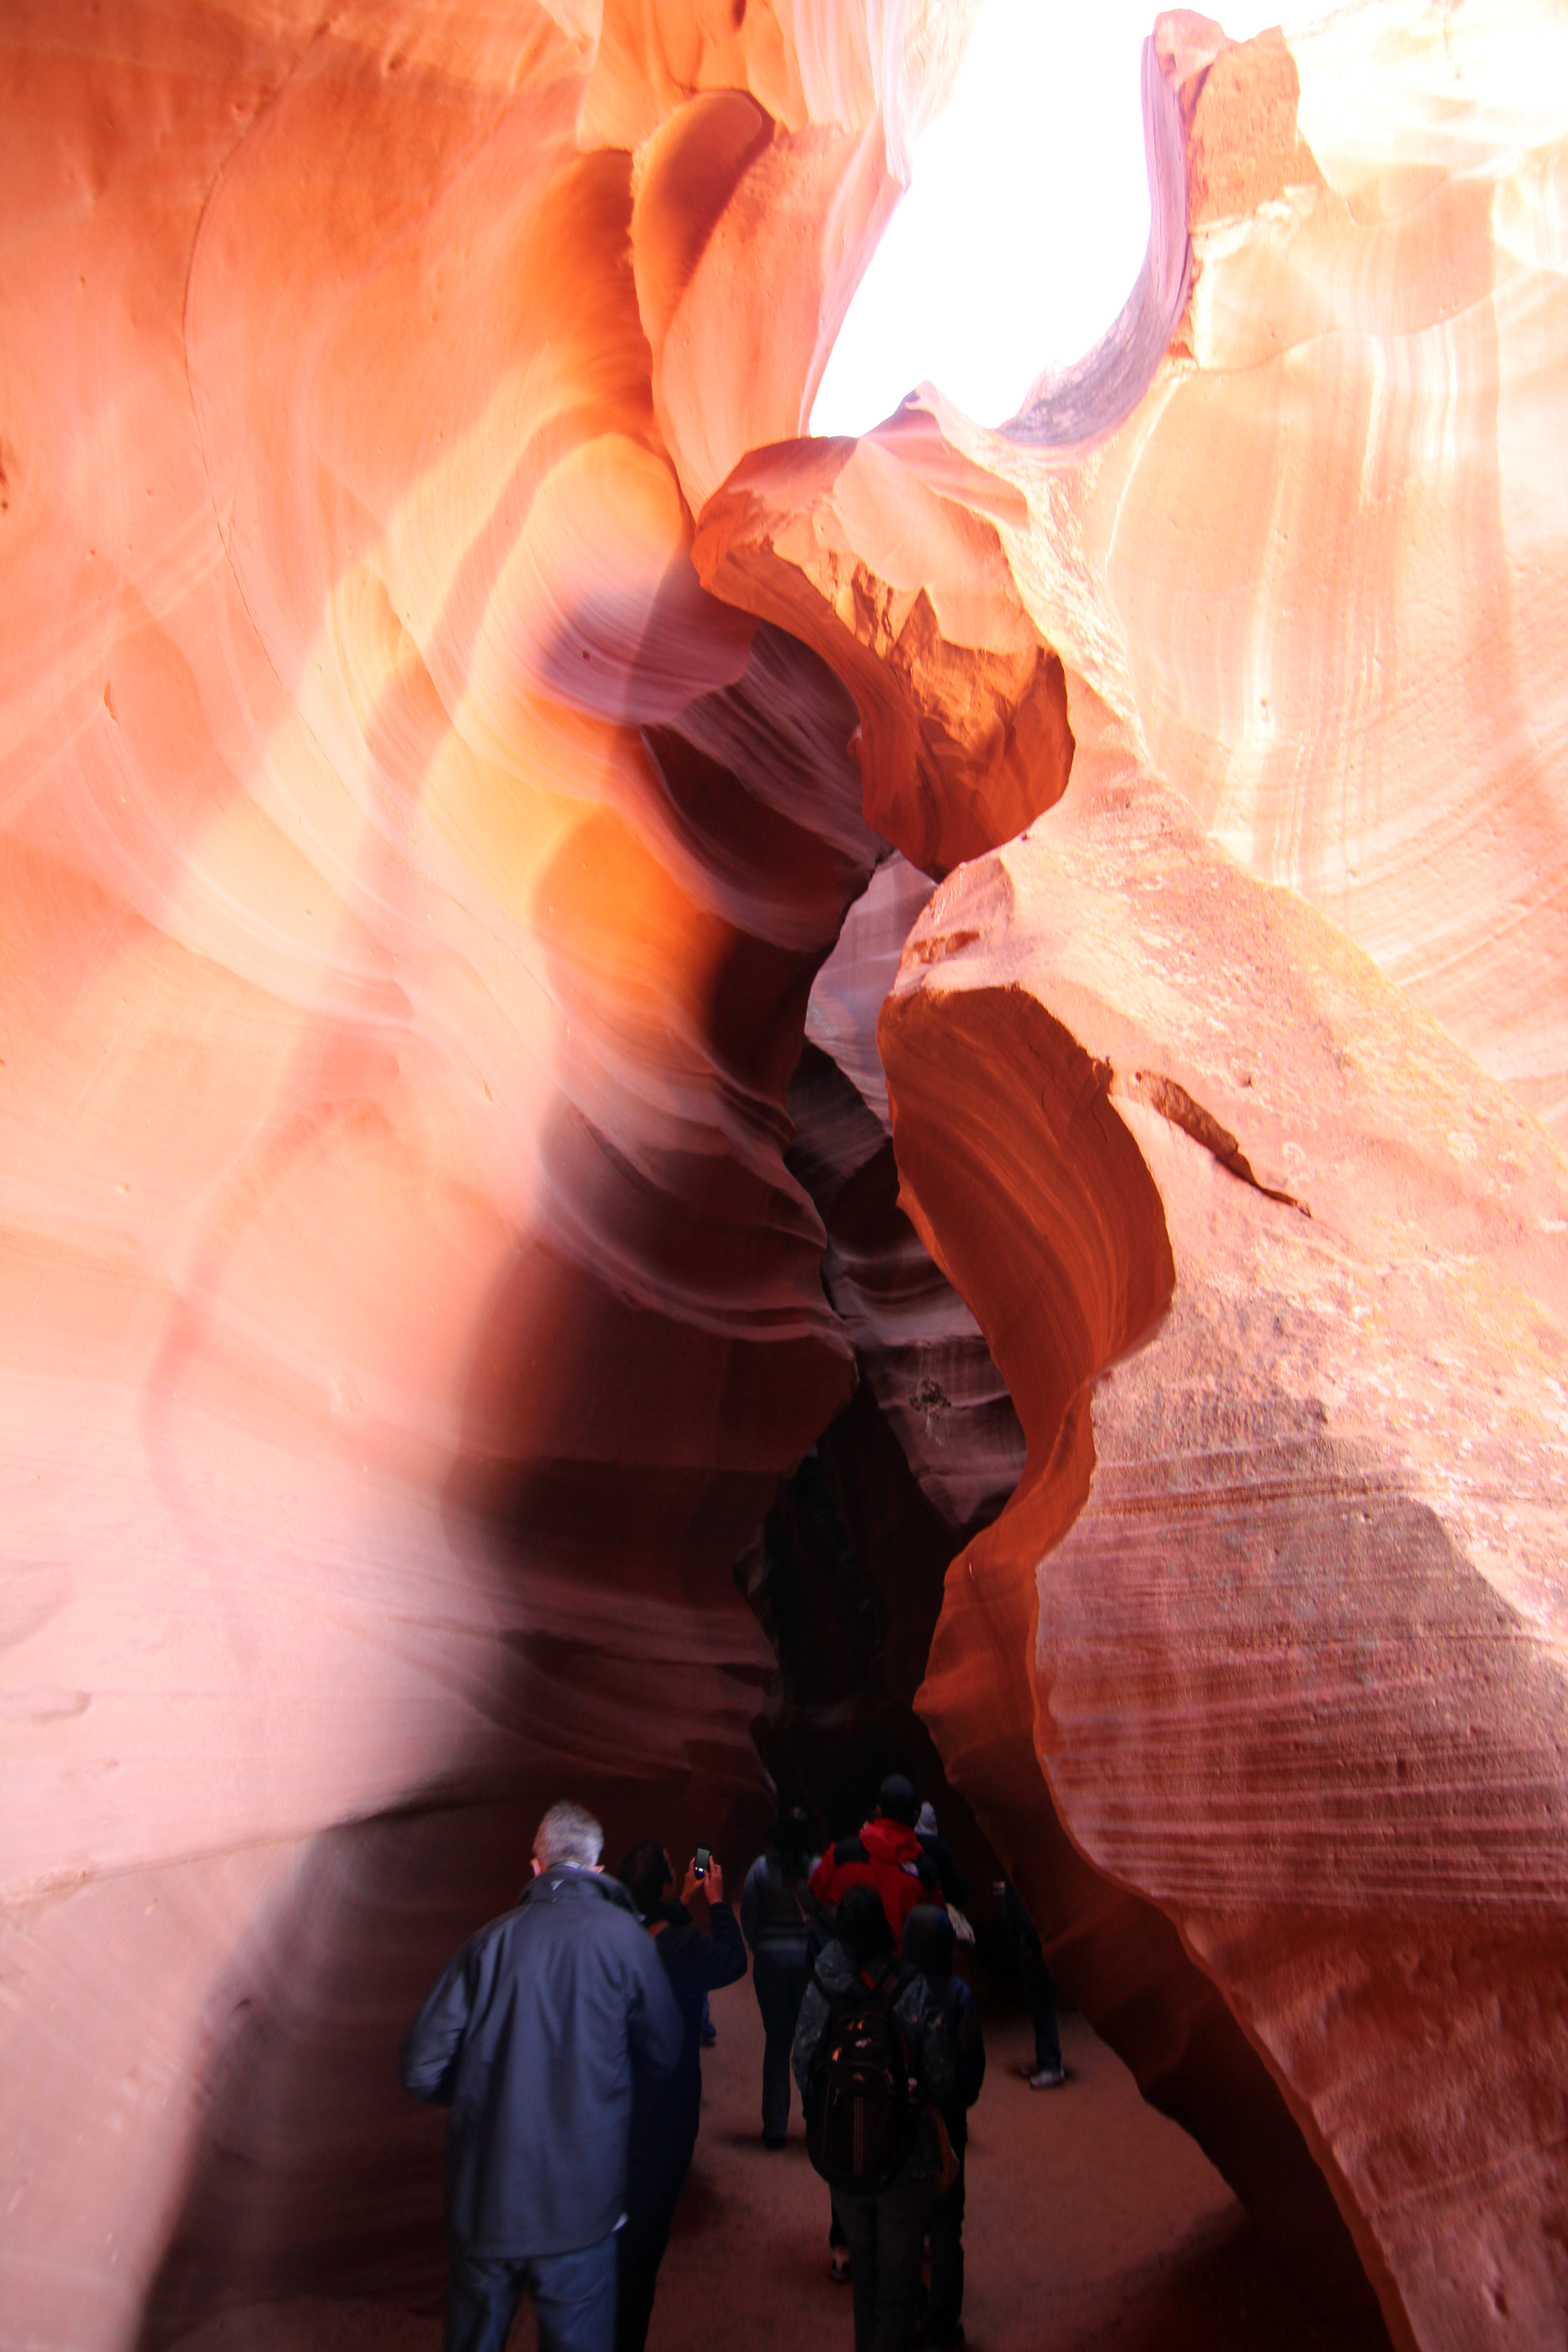
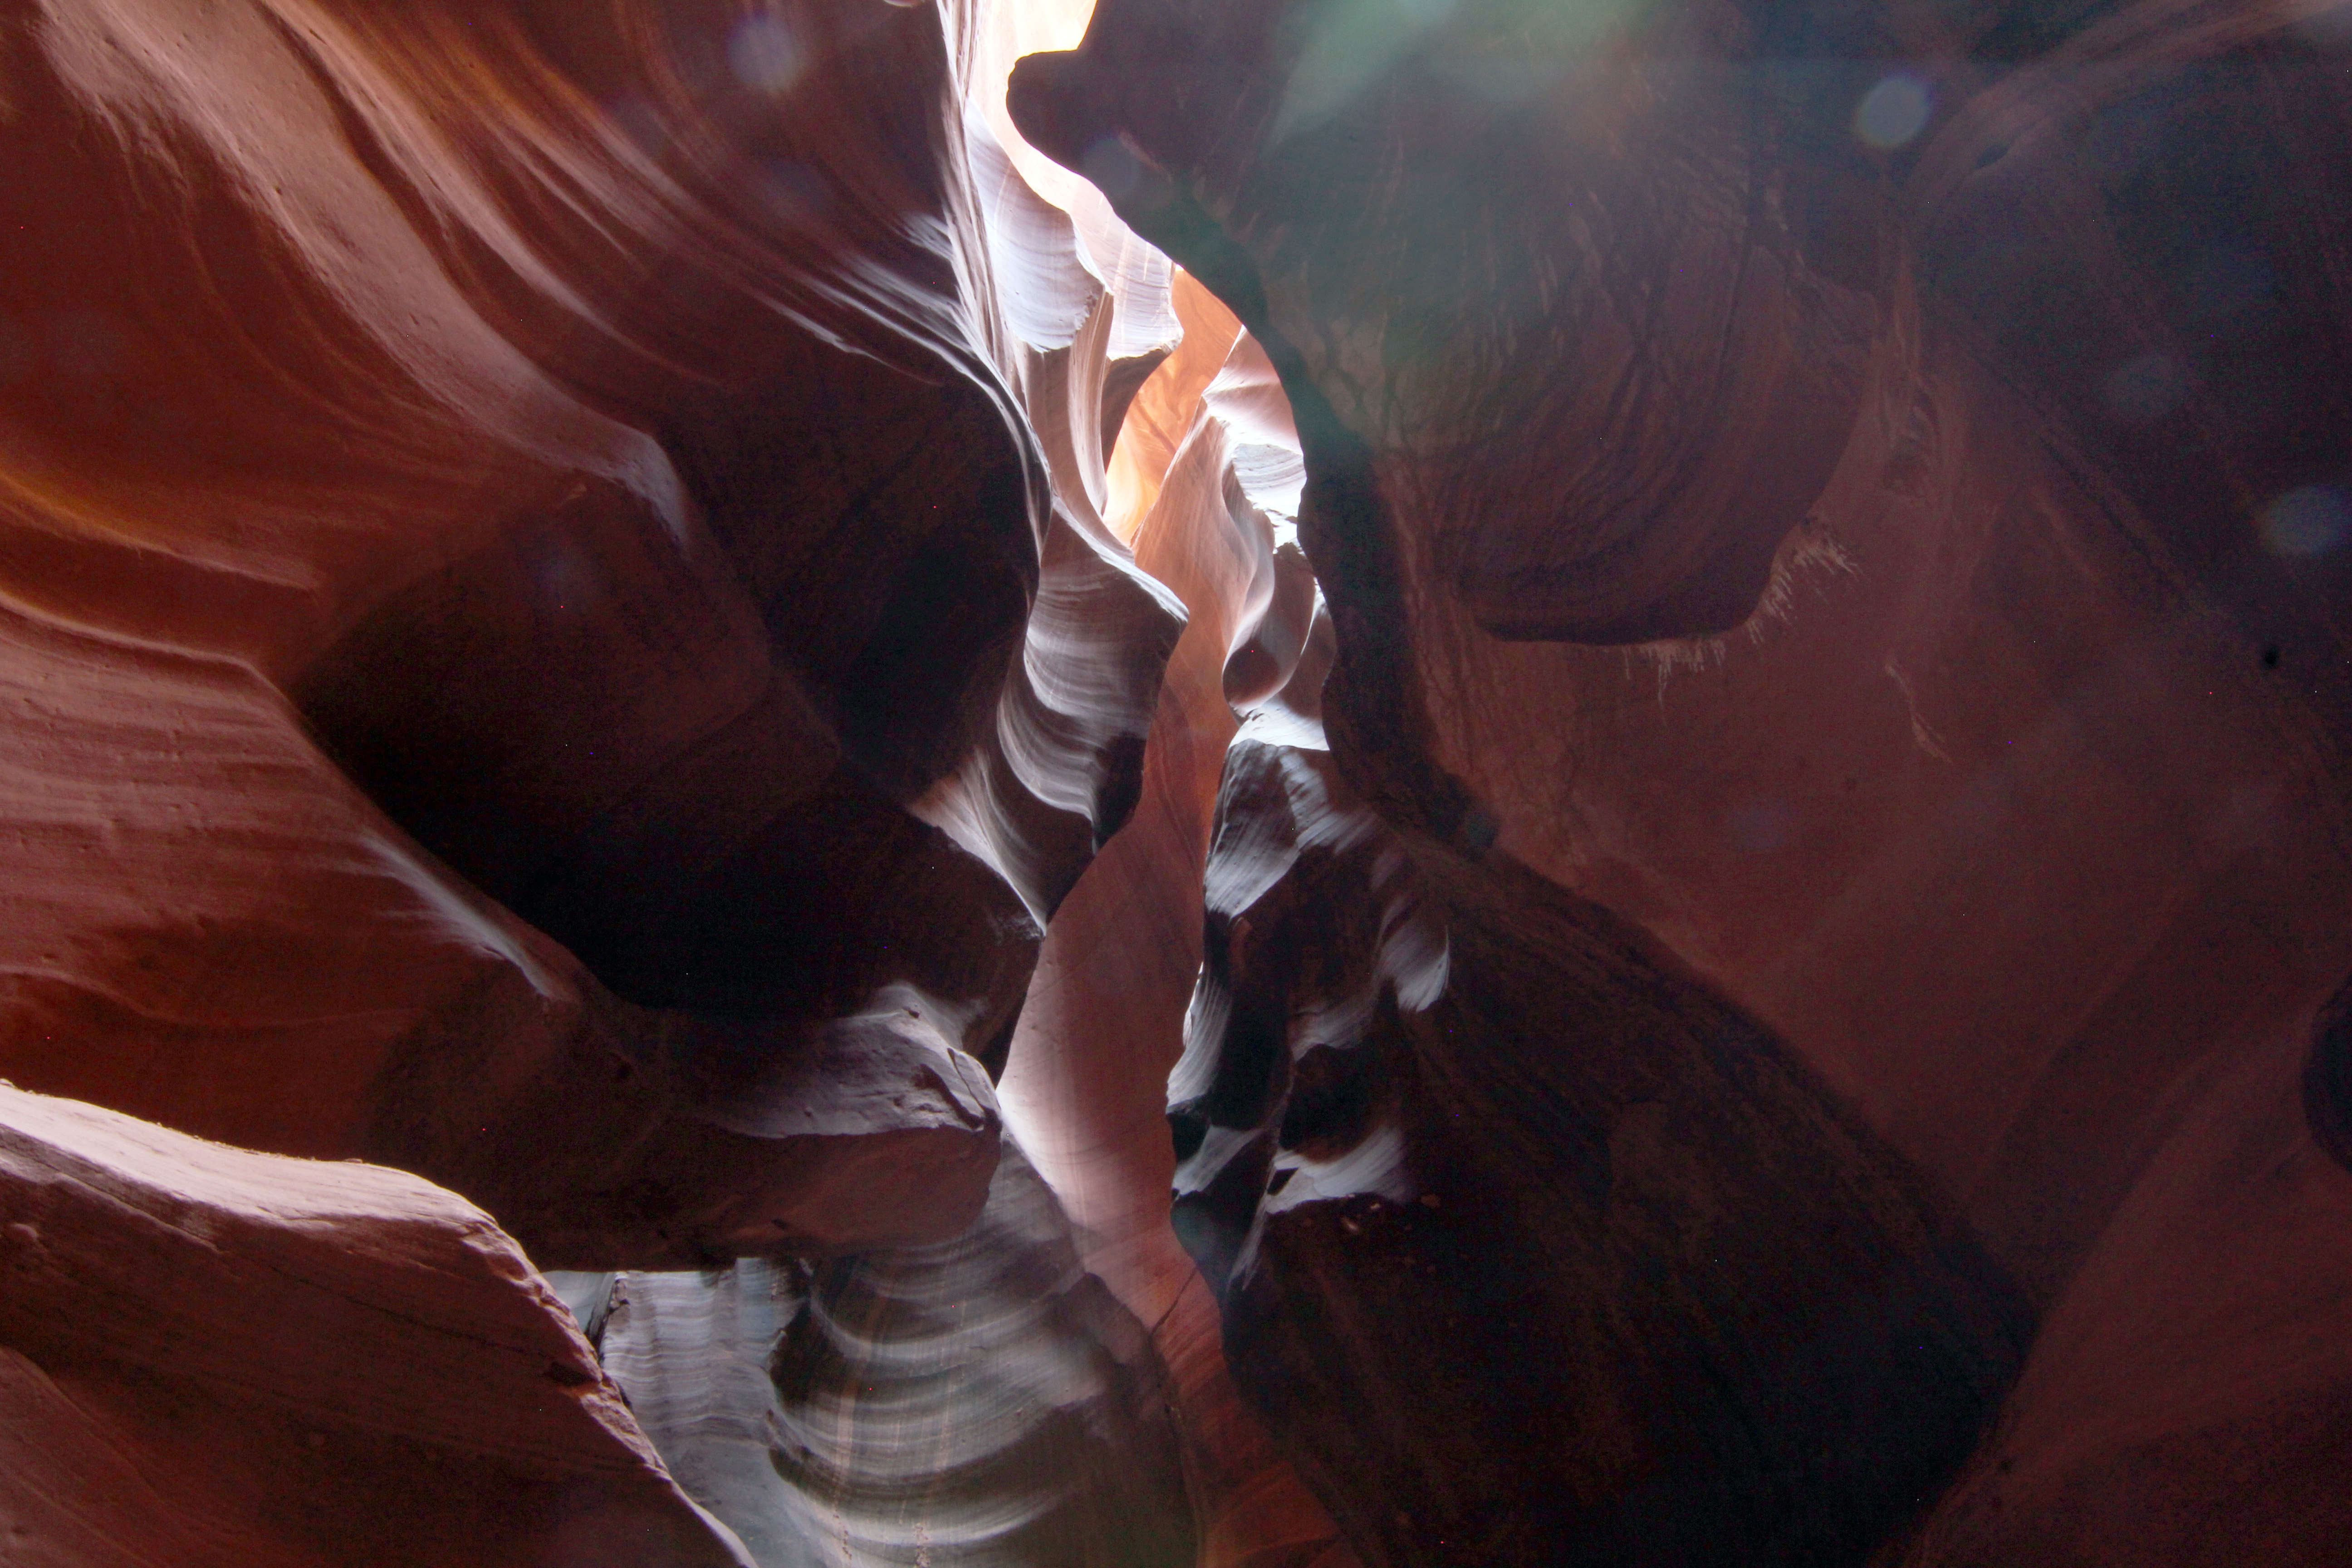
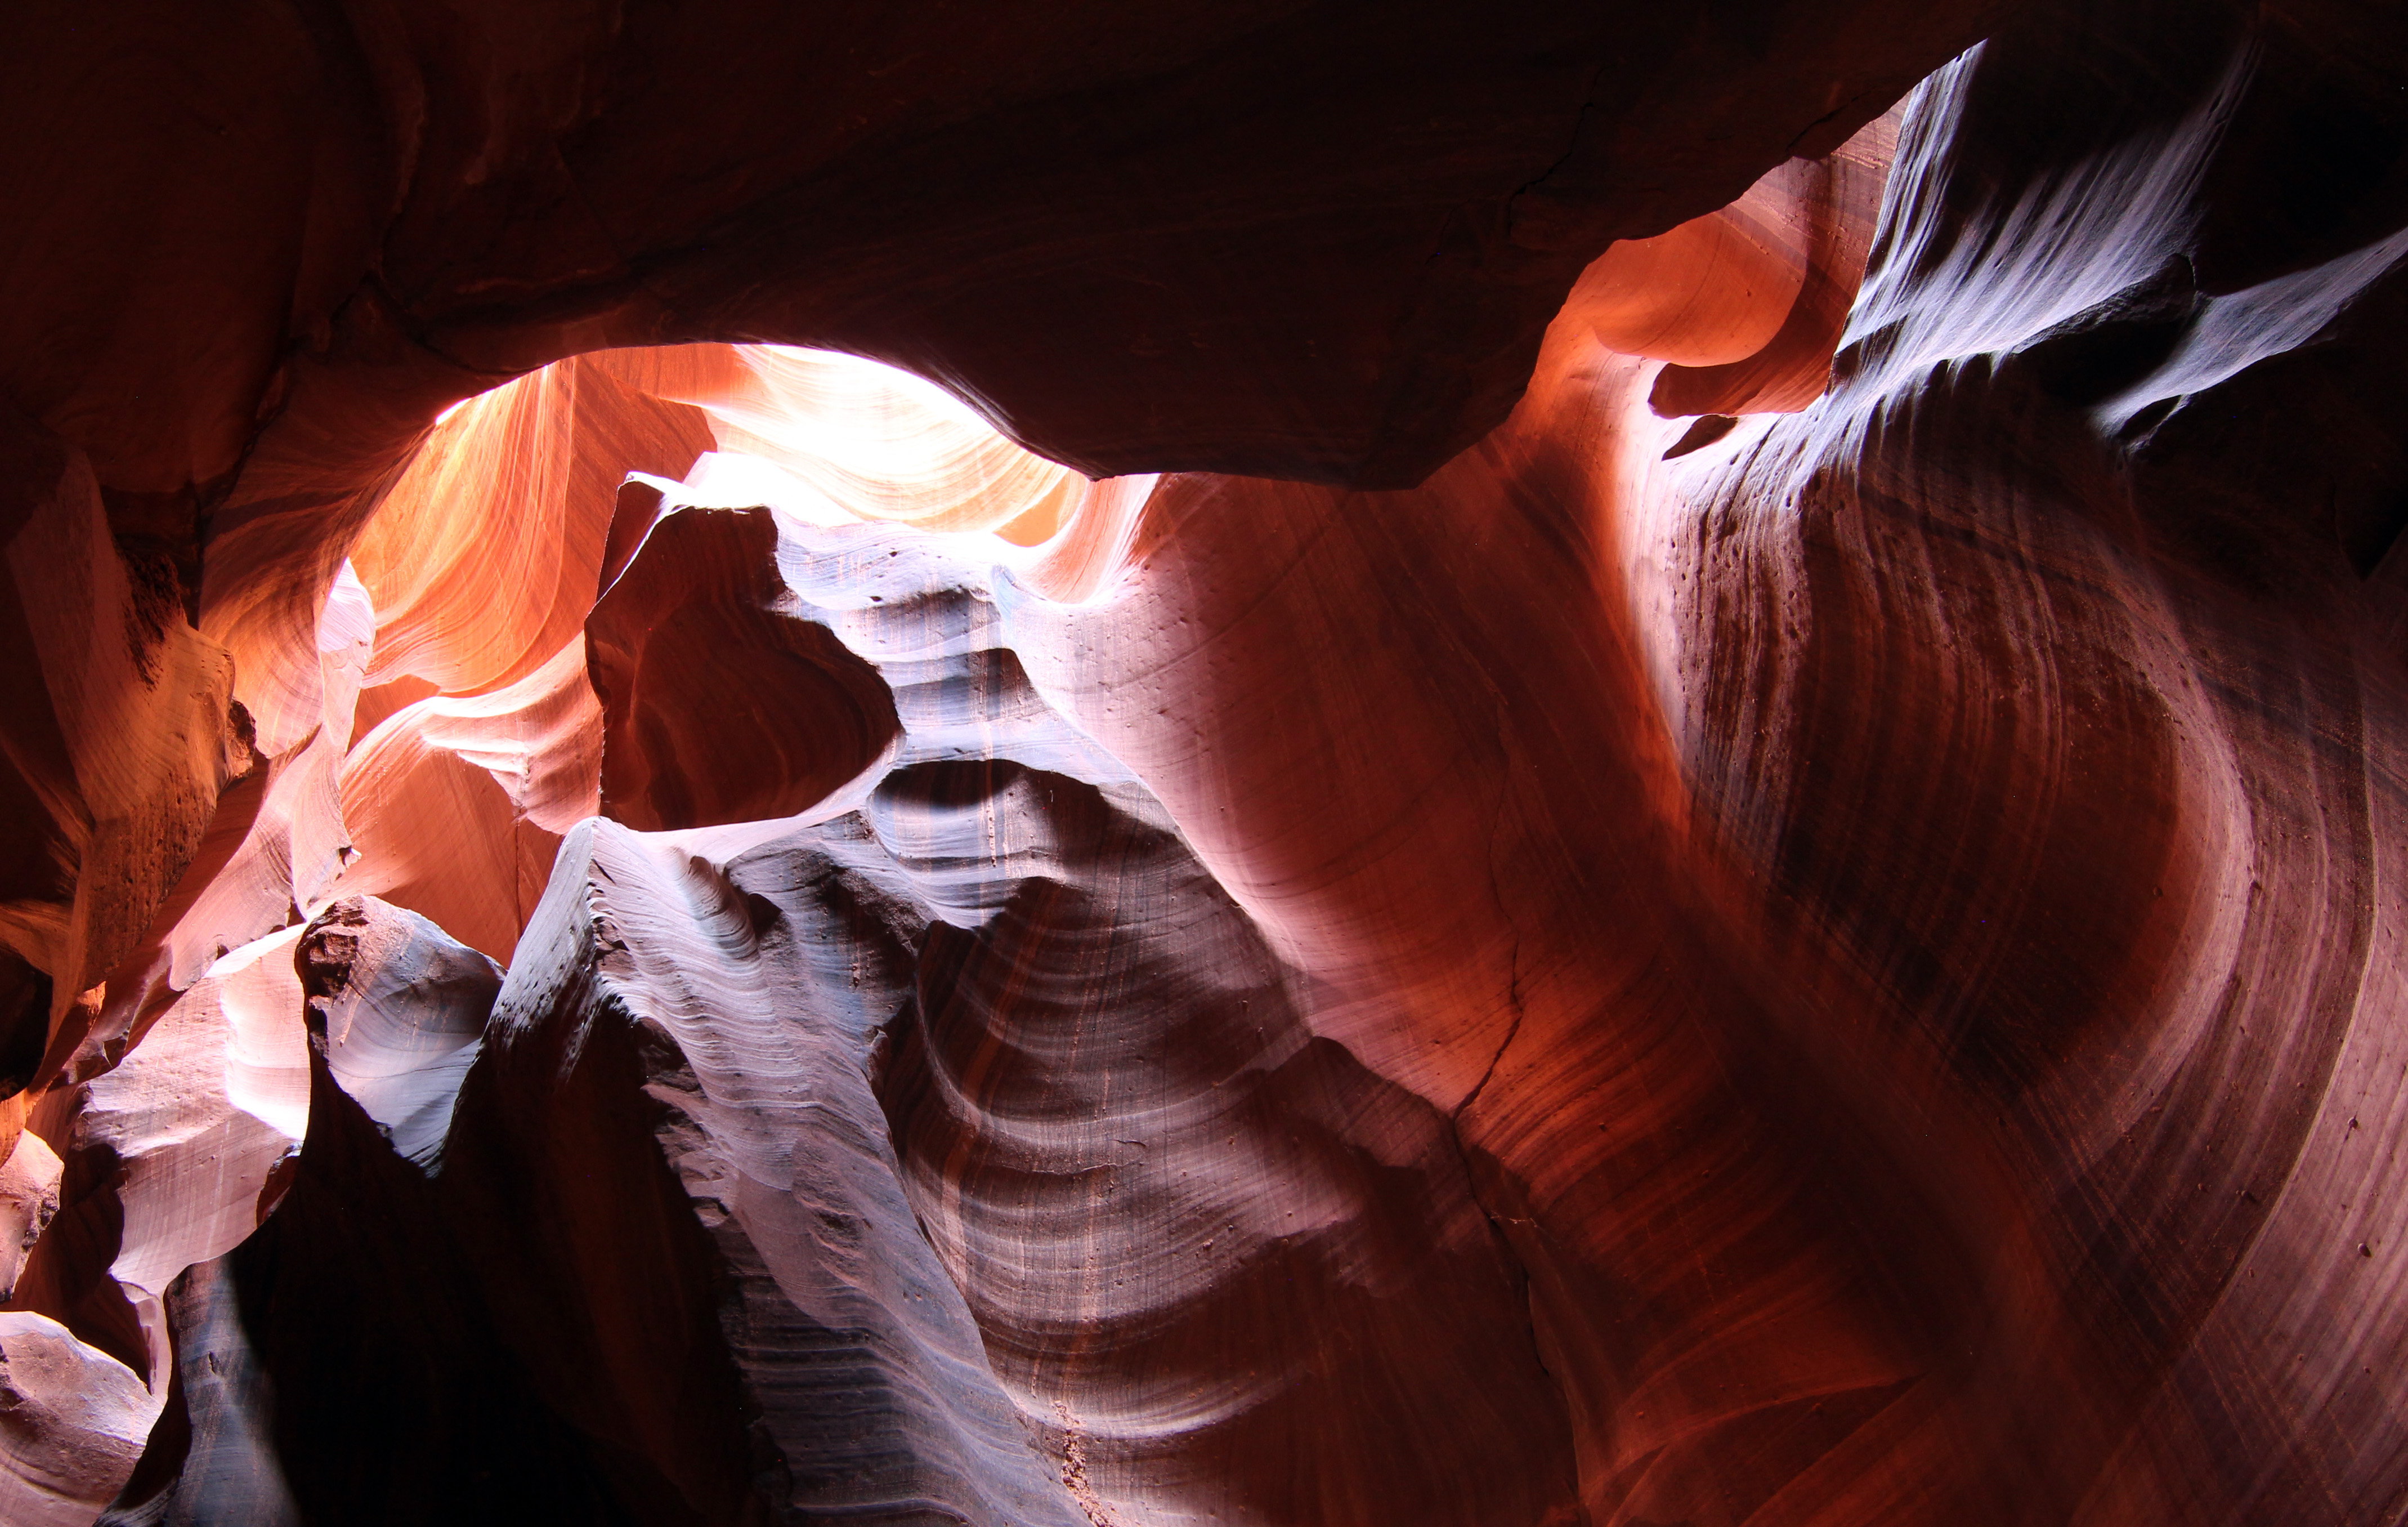
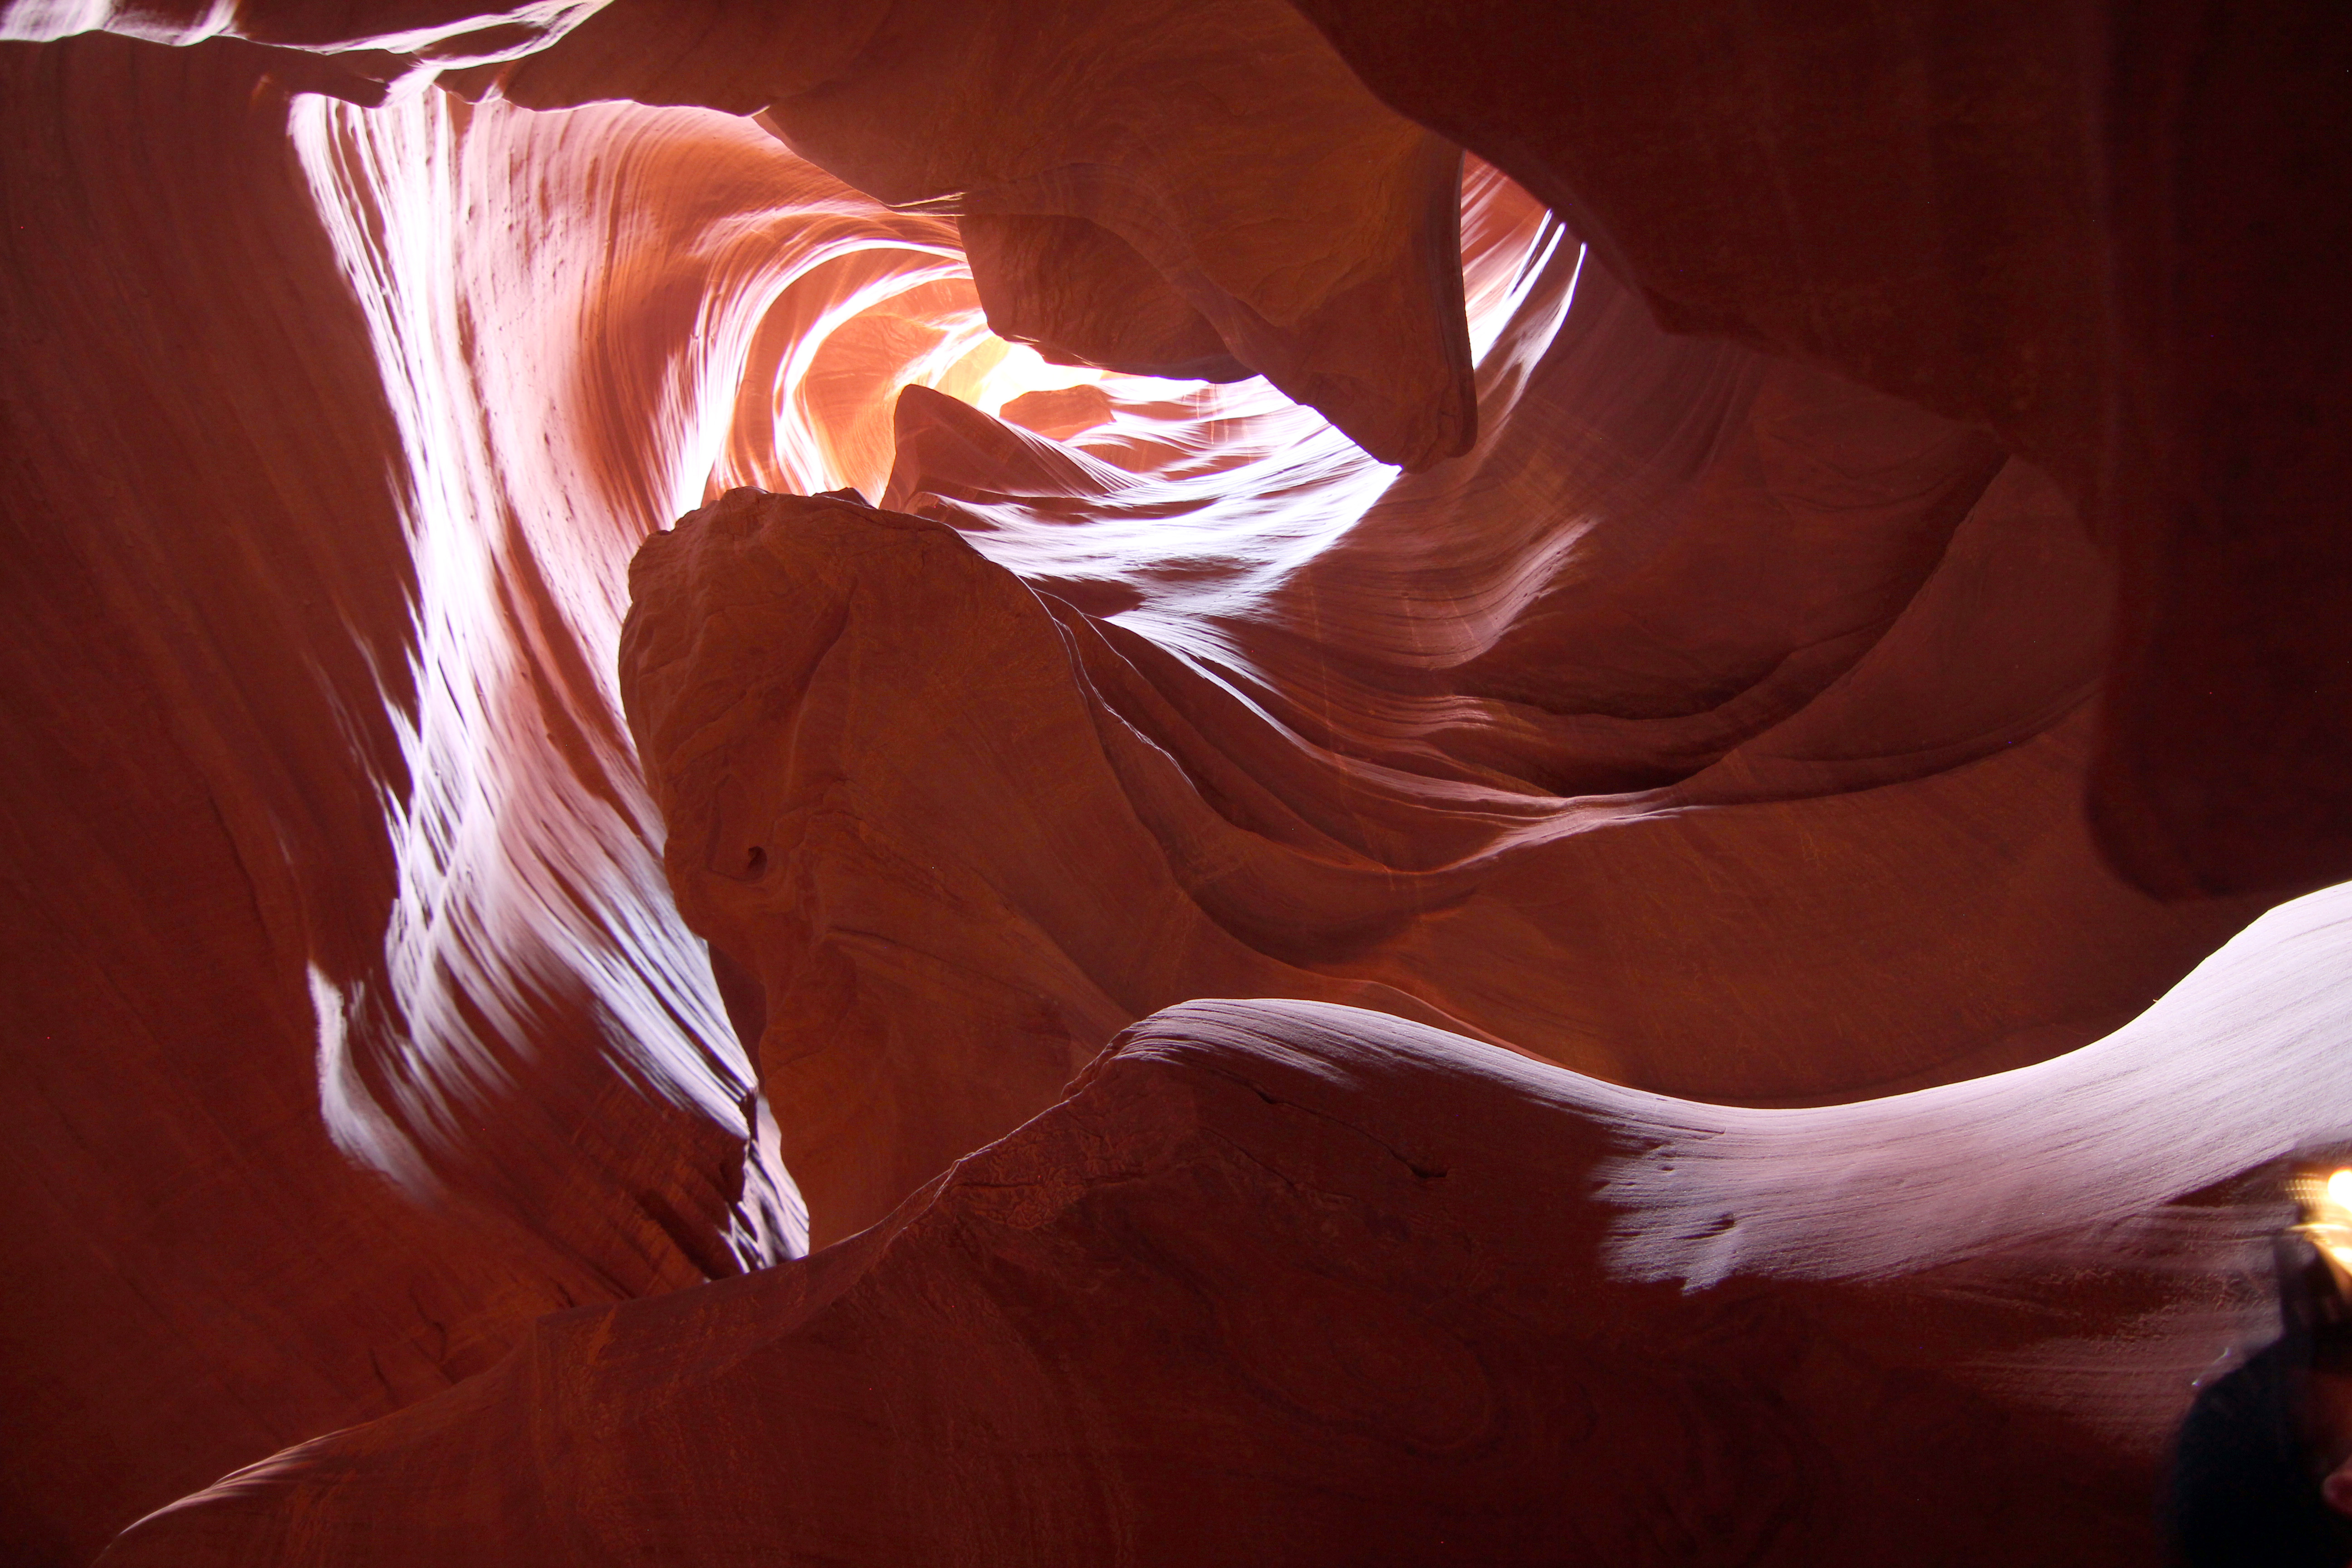
Arizona Trip Part 4, Antelope Canyon
After our day at the Grand Canyon, we made our way to Page, AZ to see Antelope Canyon, one of the best slot canyons in the country. Interestingly enough, they don’t allow people in if it’s been raining anywhere nearby, because this is where the rainwater empties. Some of the better pictures below (click for hi-res).
Arizona Trip Part 3, Red Rock
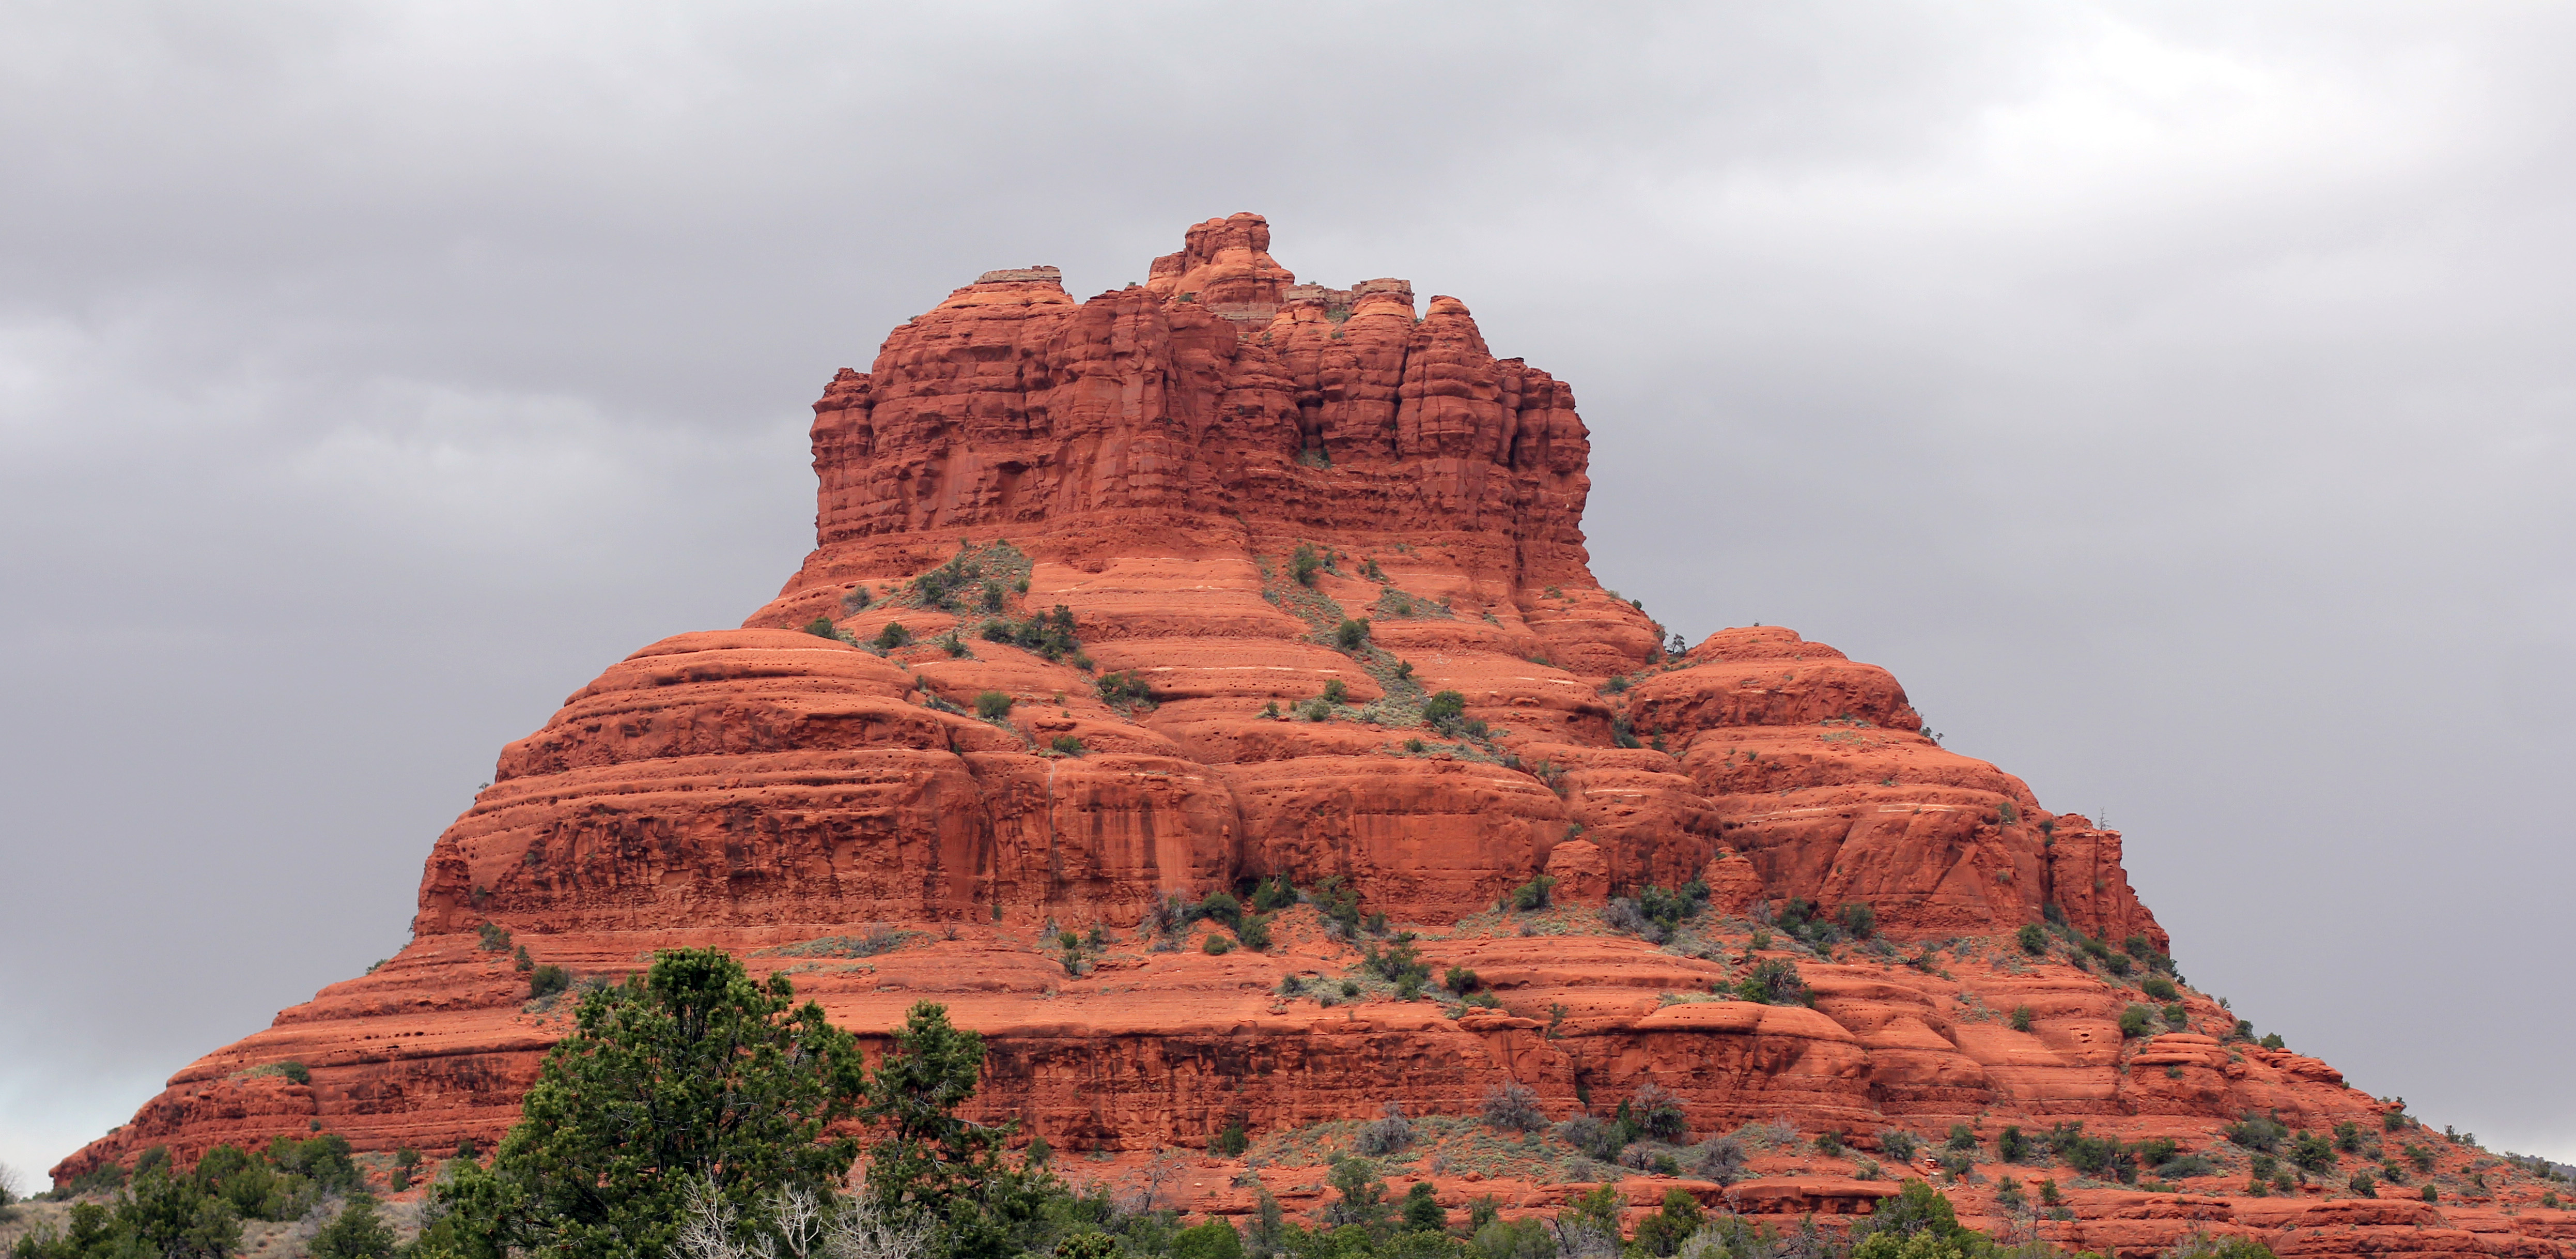
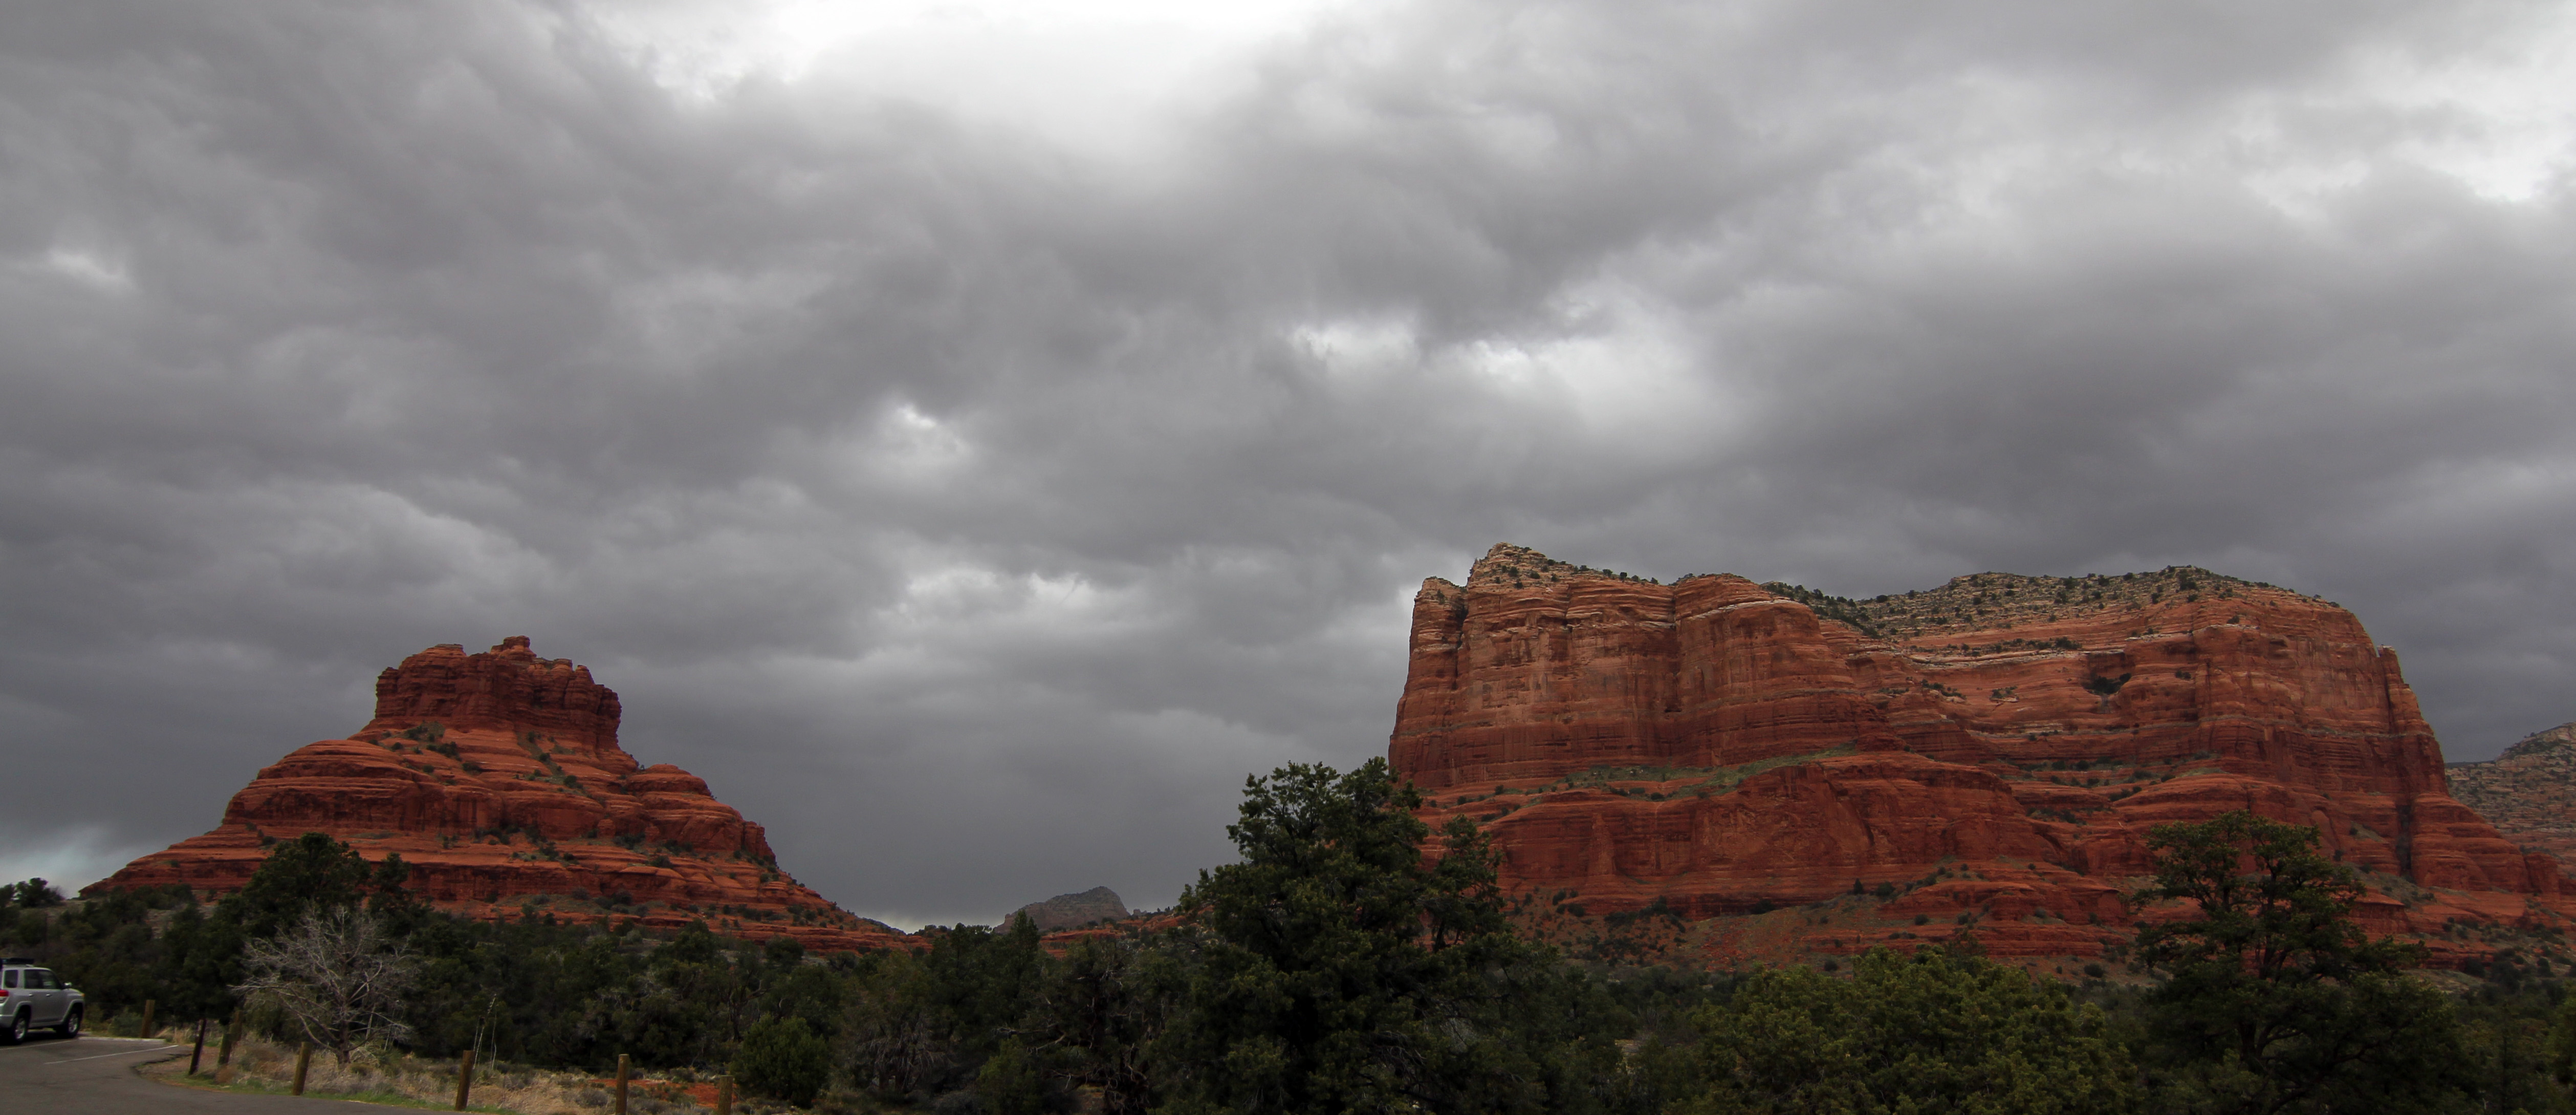
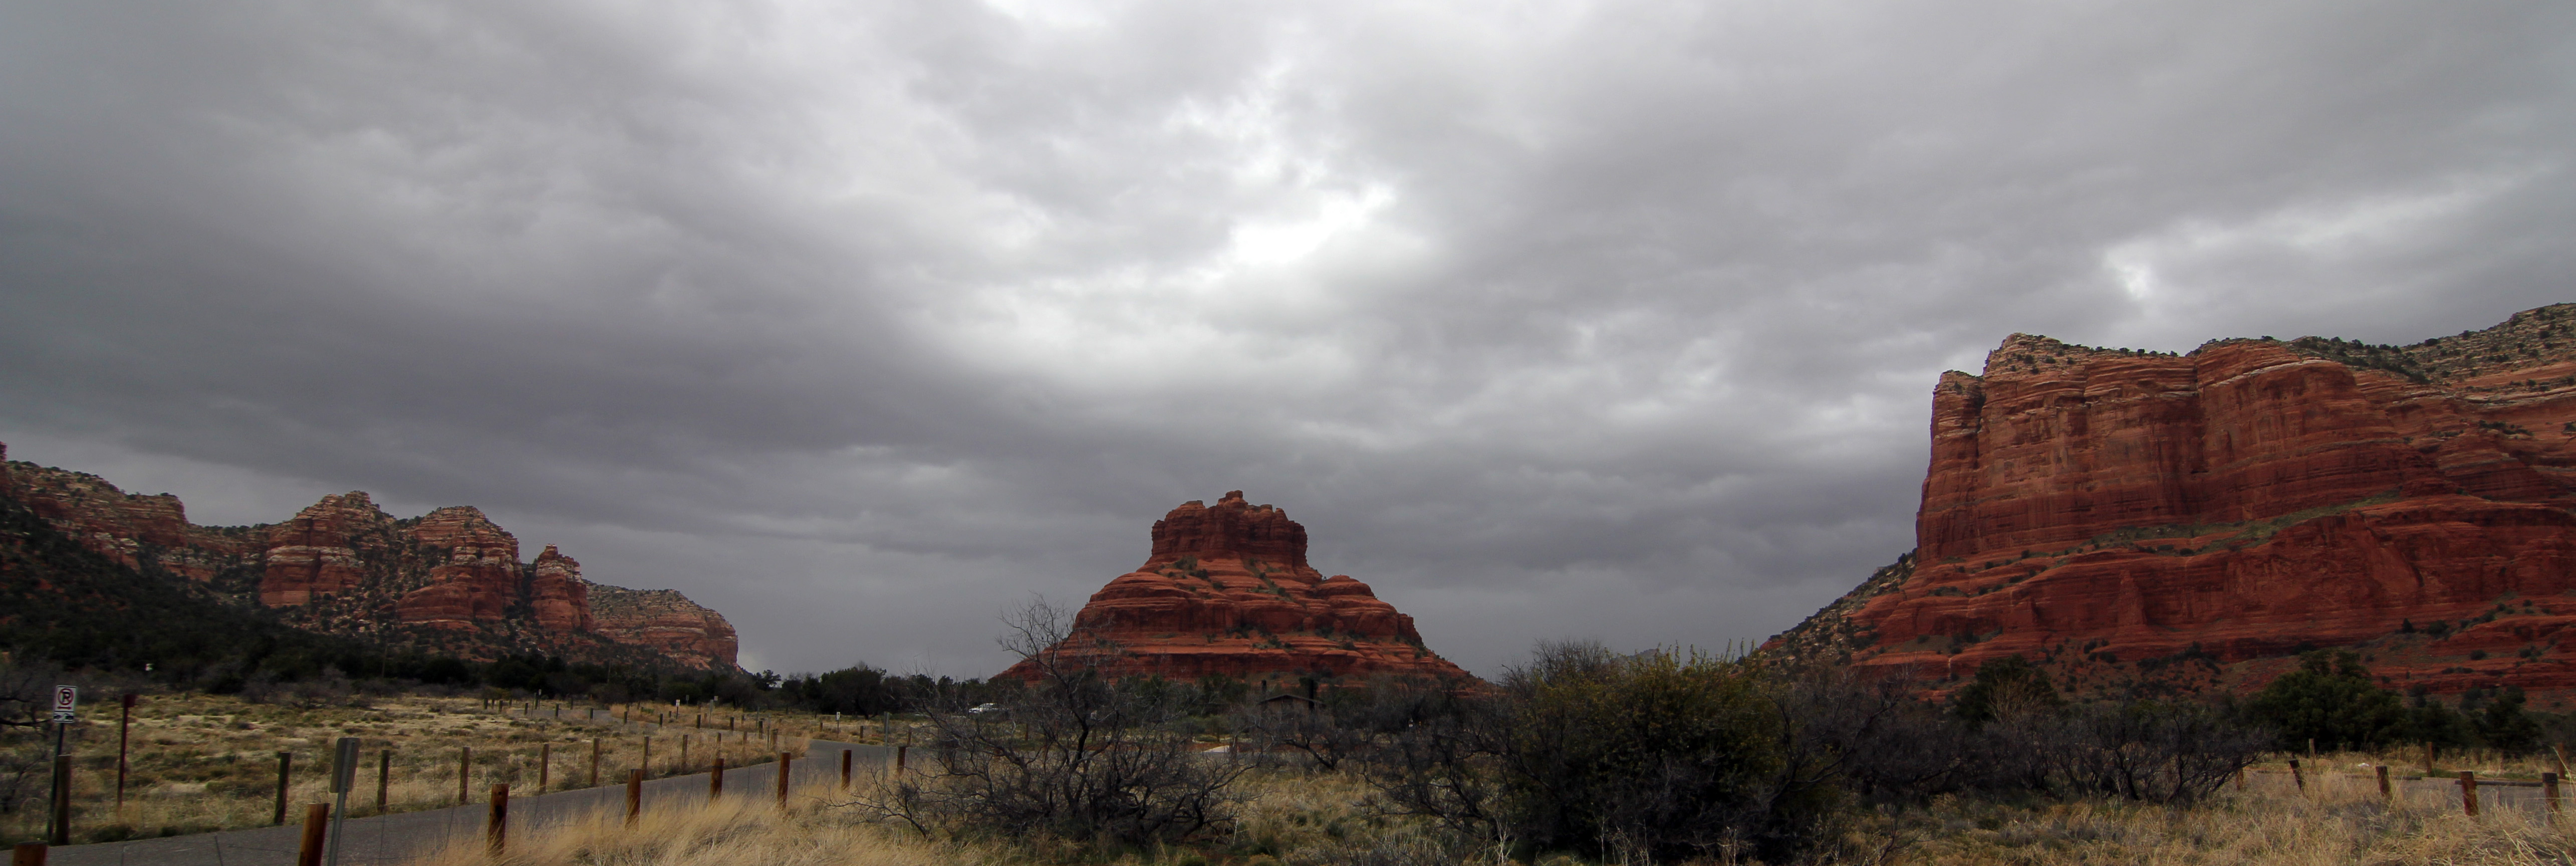
Just as you get to Sedona, you’ll be stunned by some red rock formations. Pictures below. Click for hi-res.
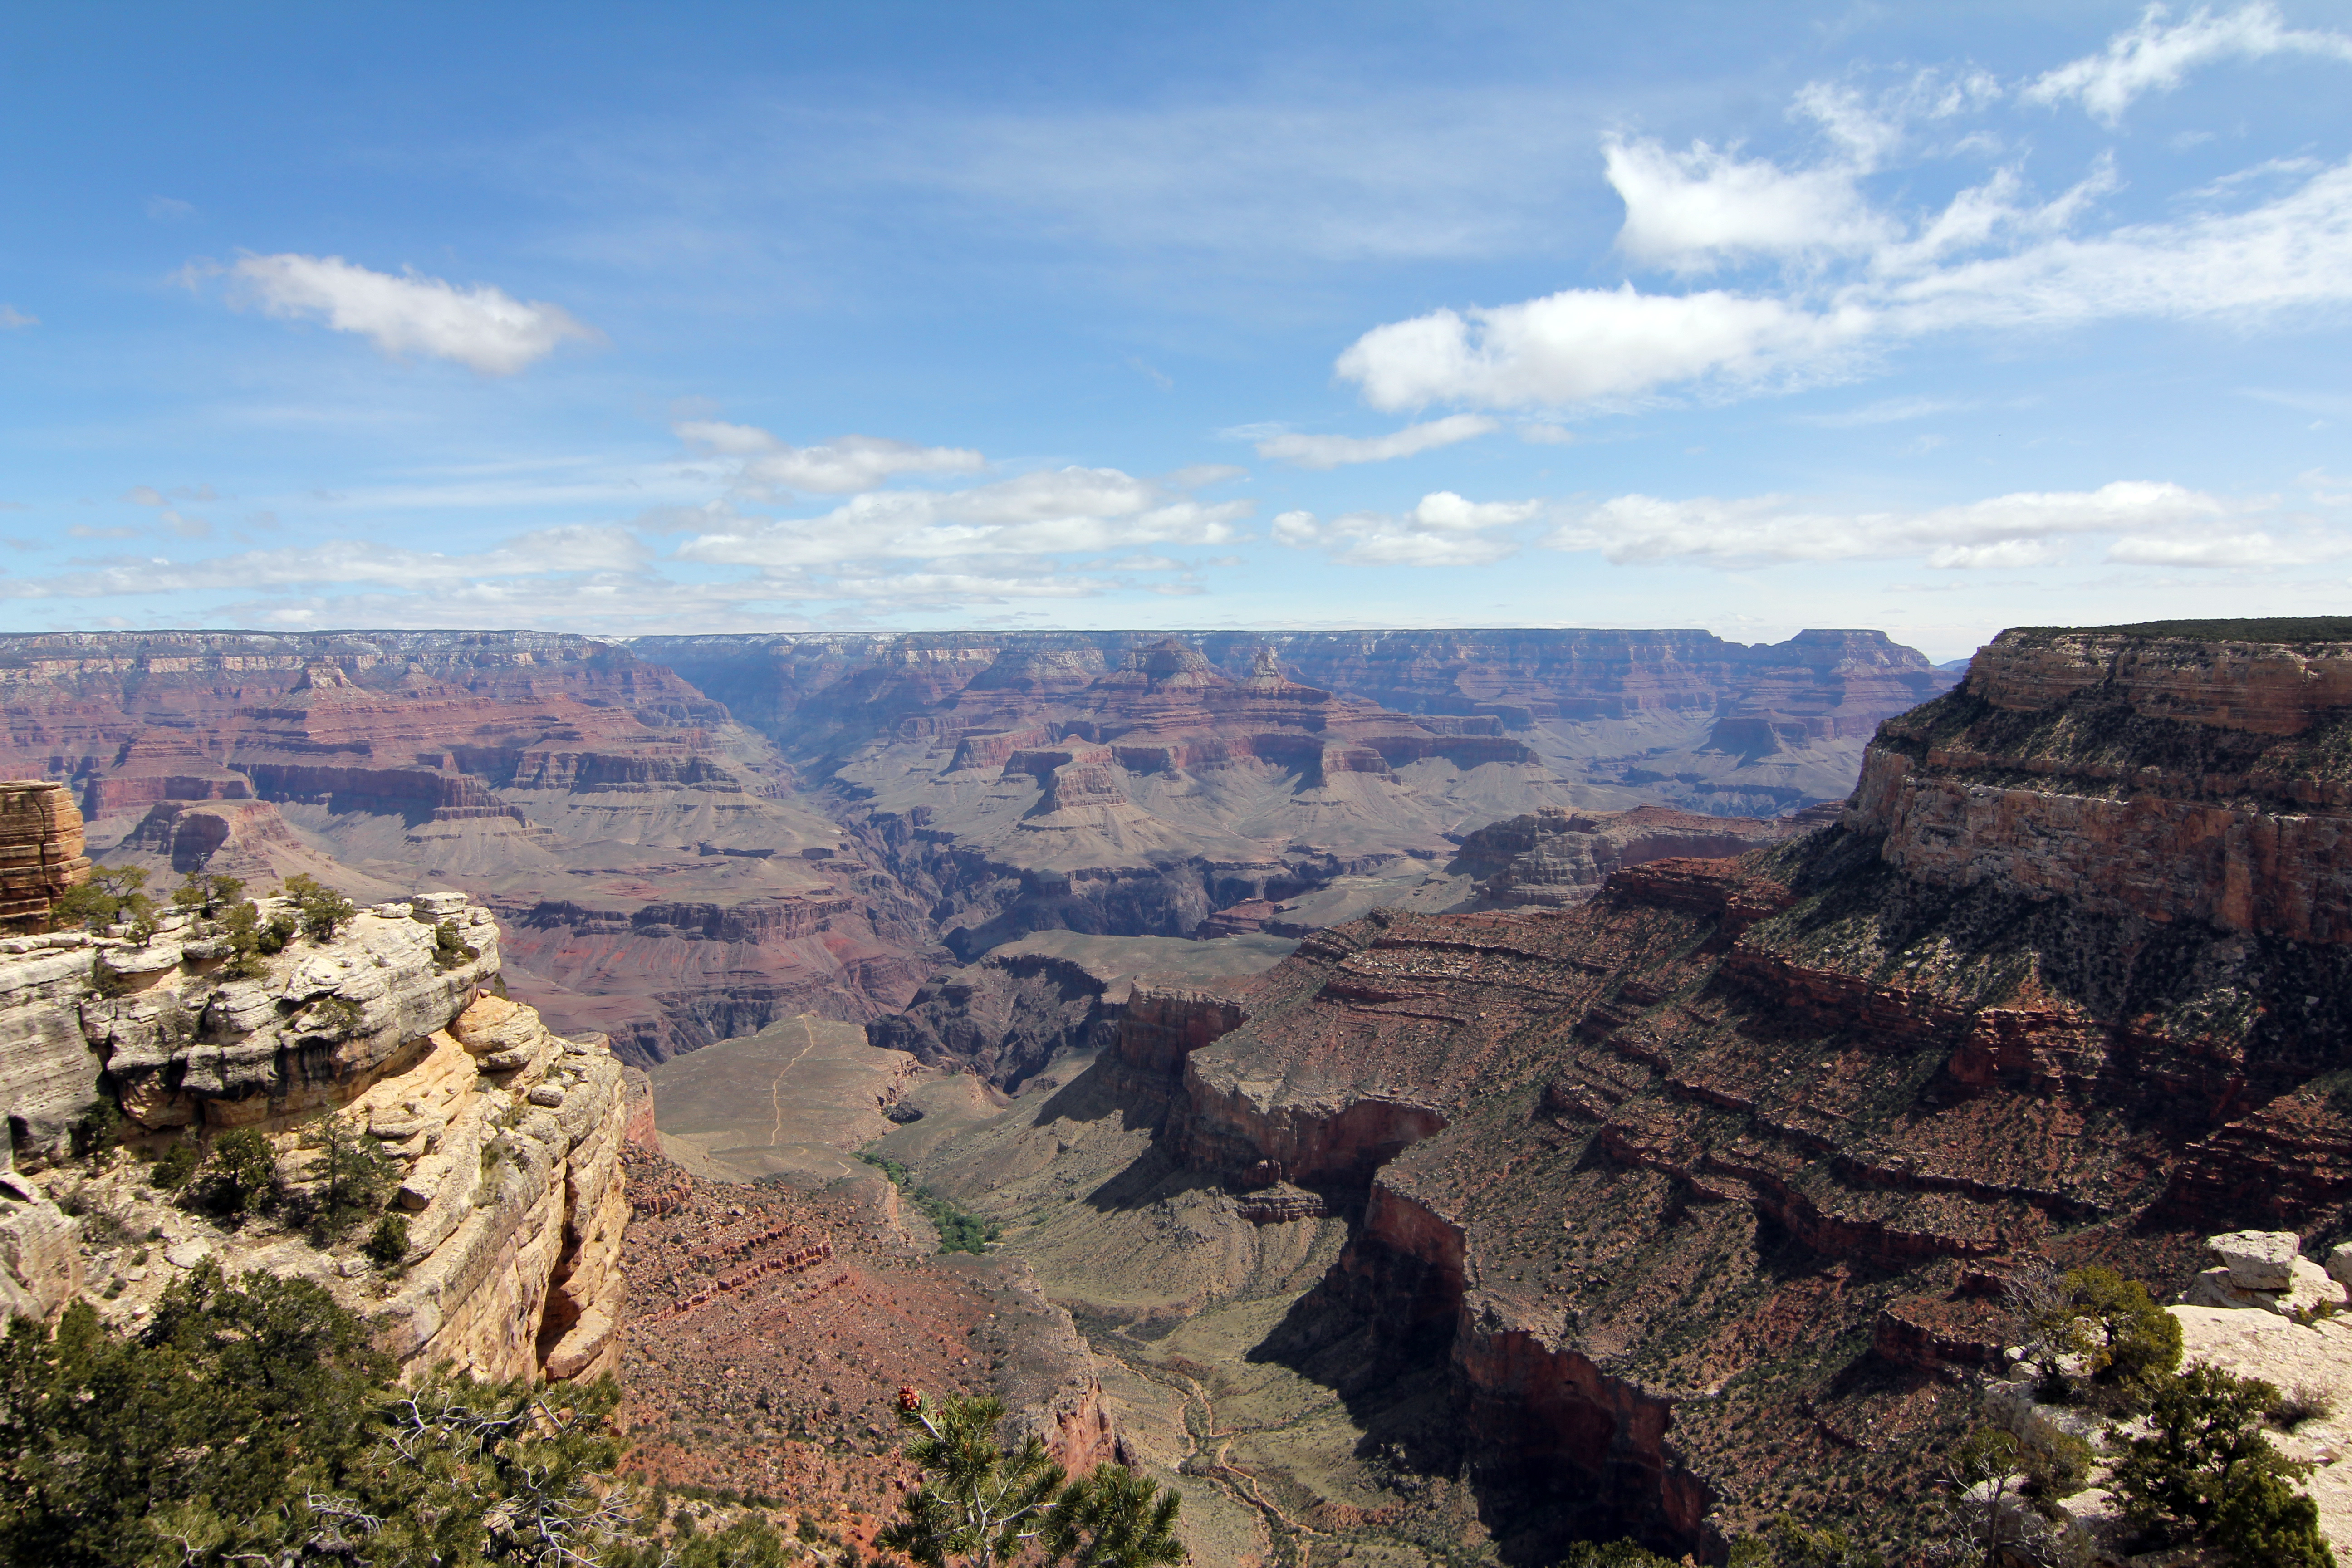
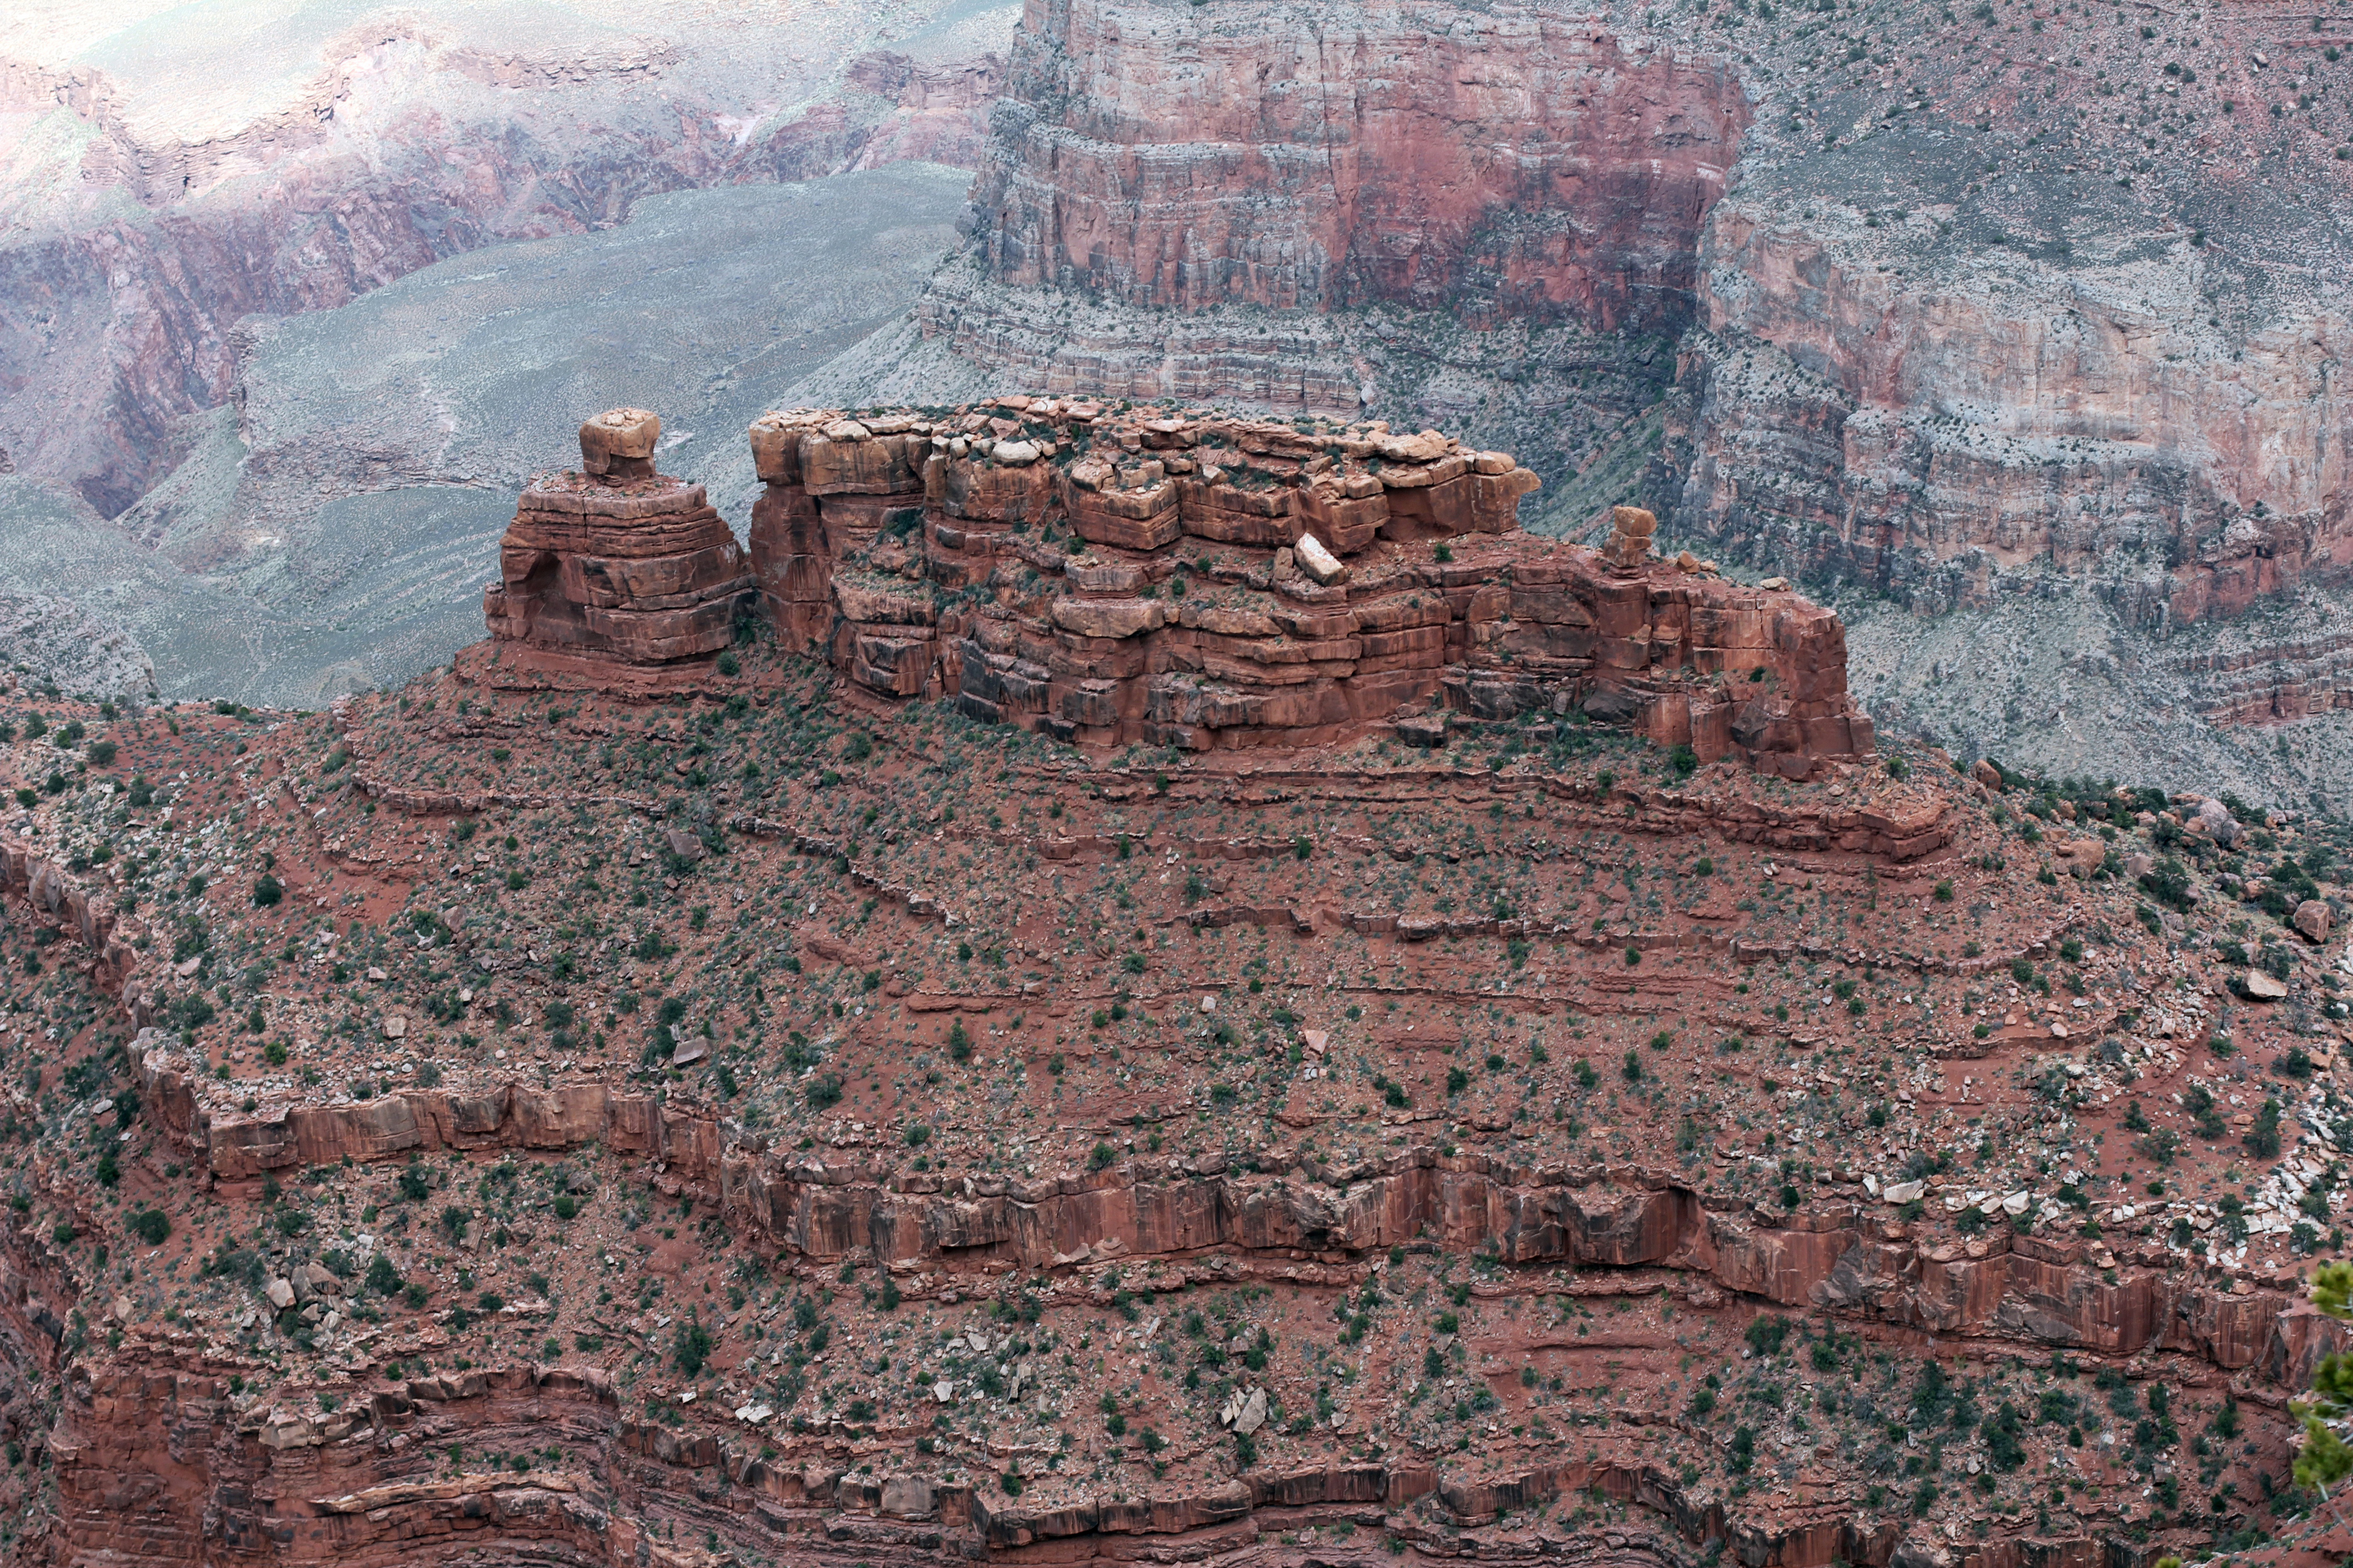
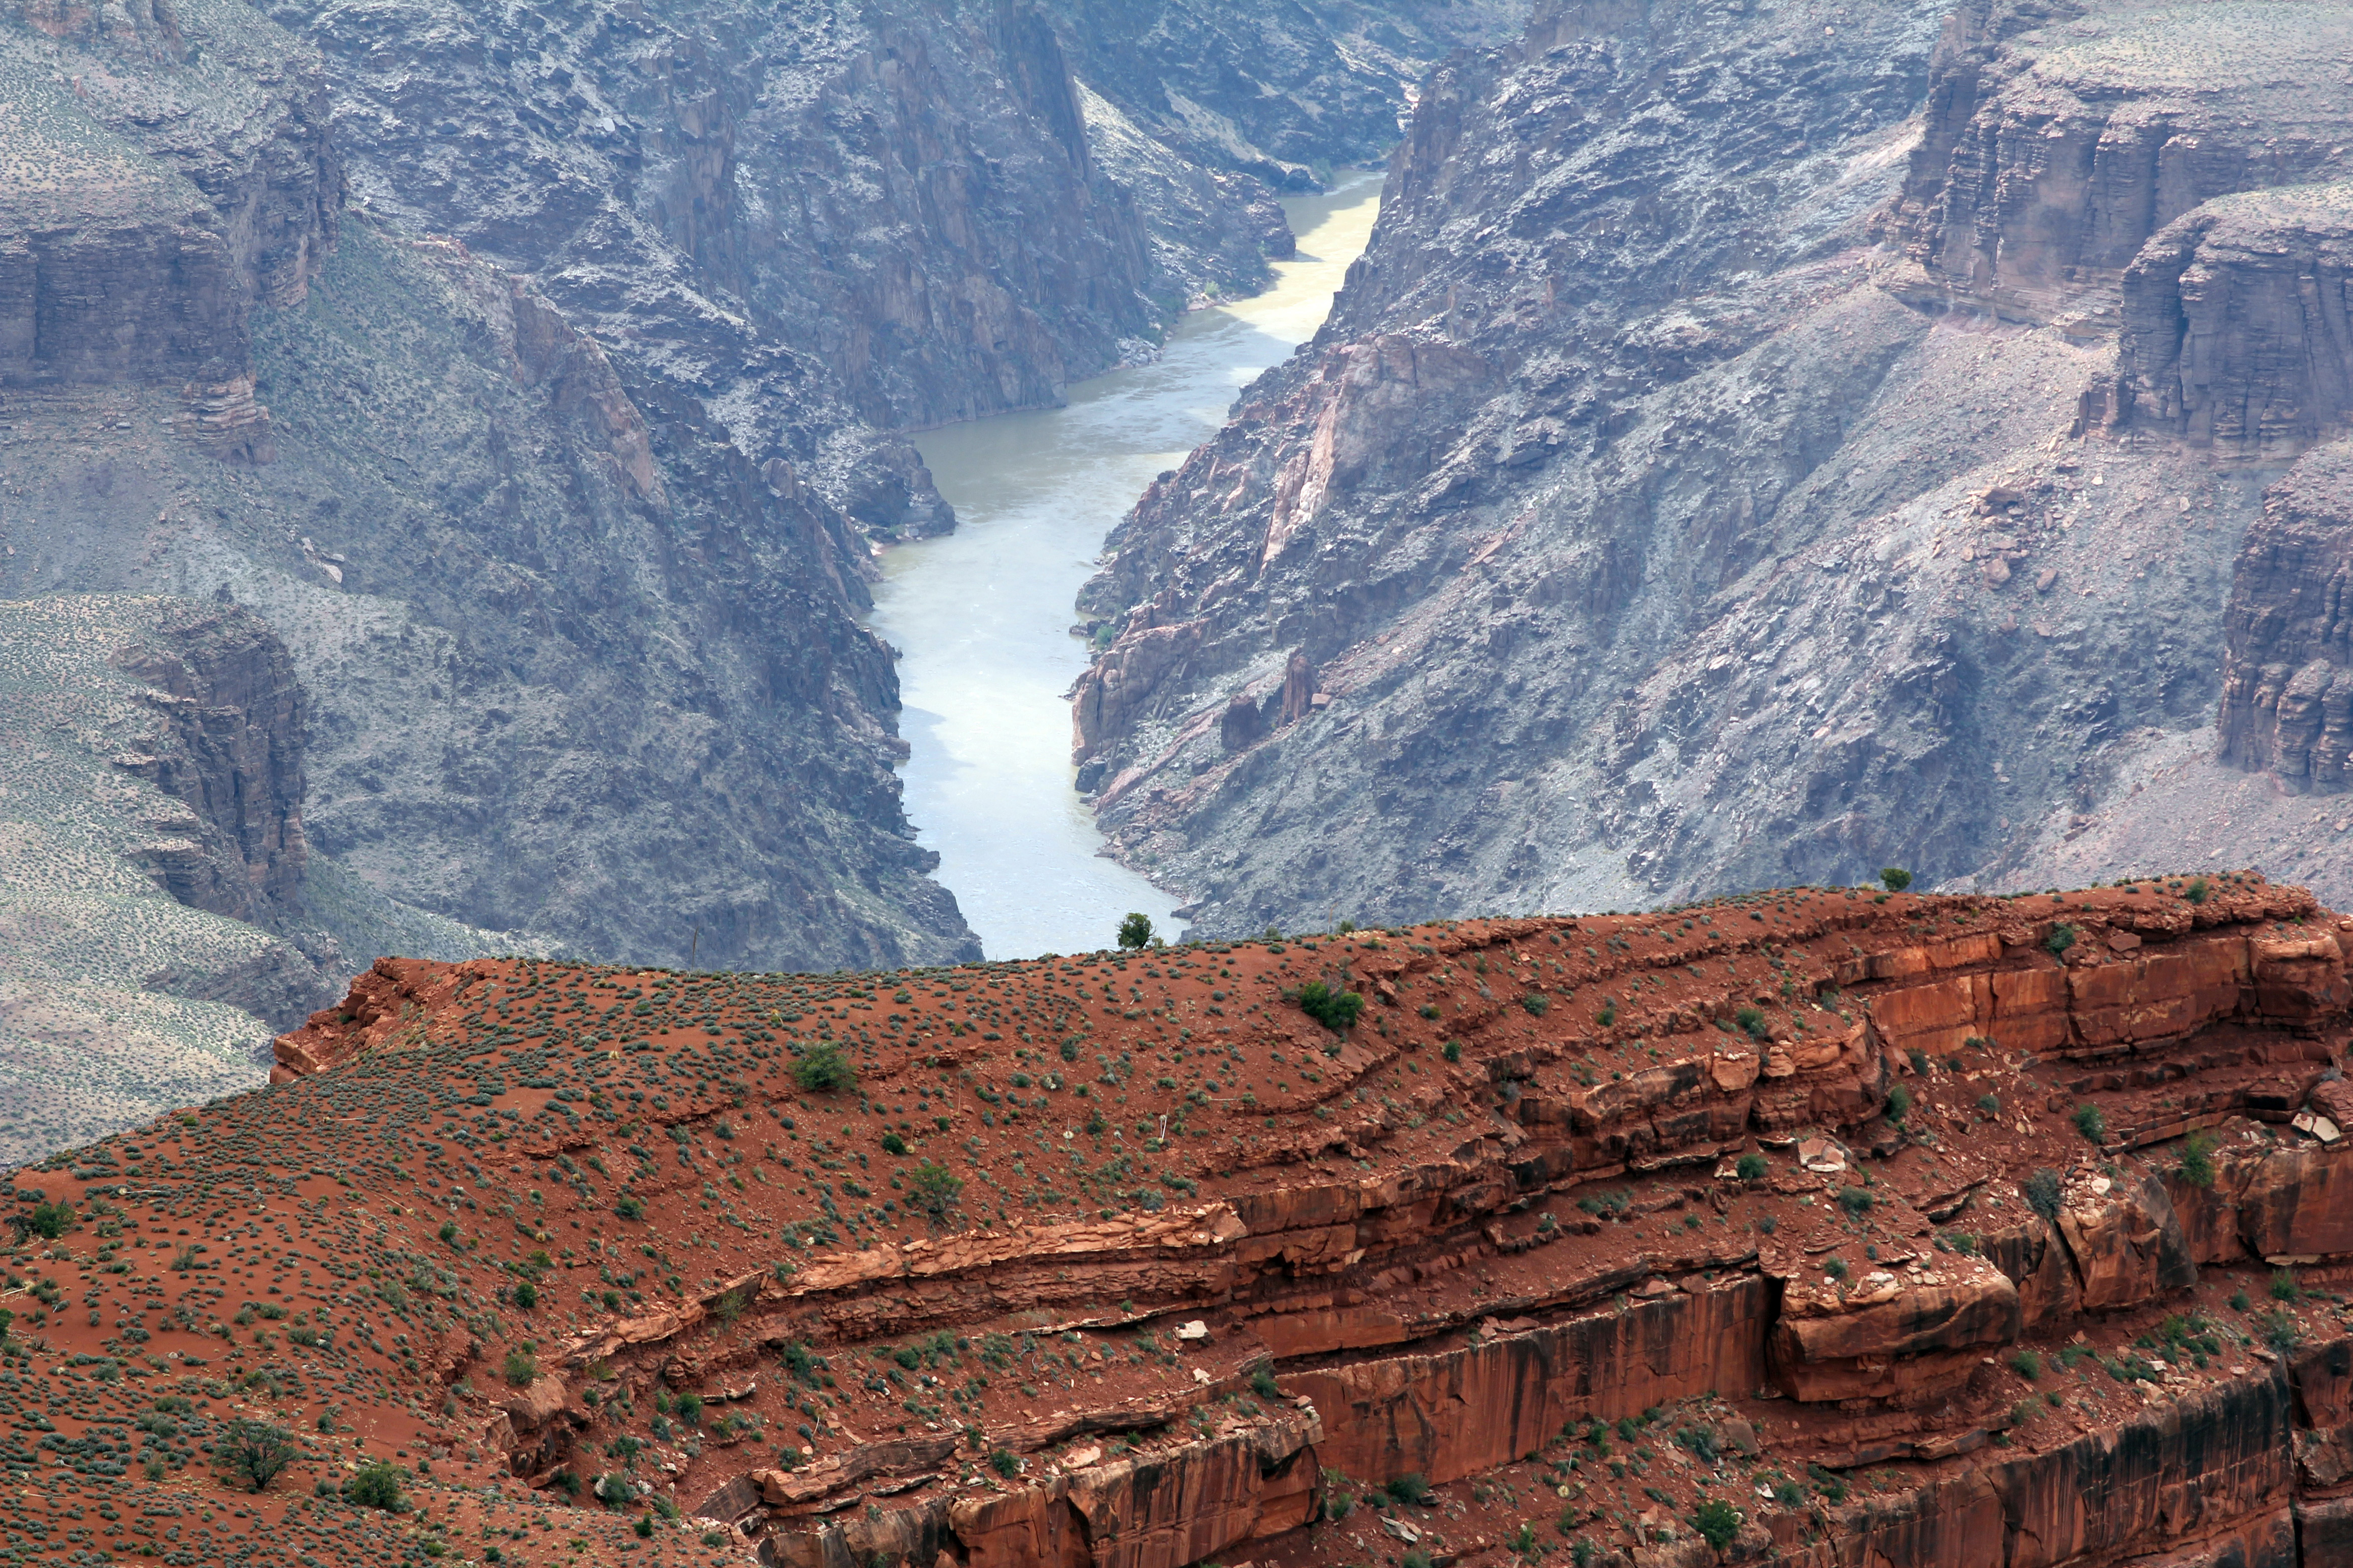
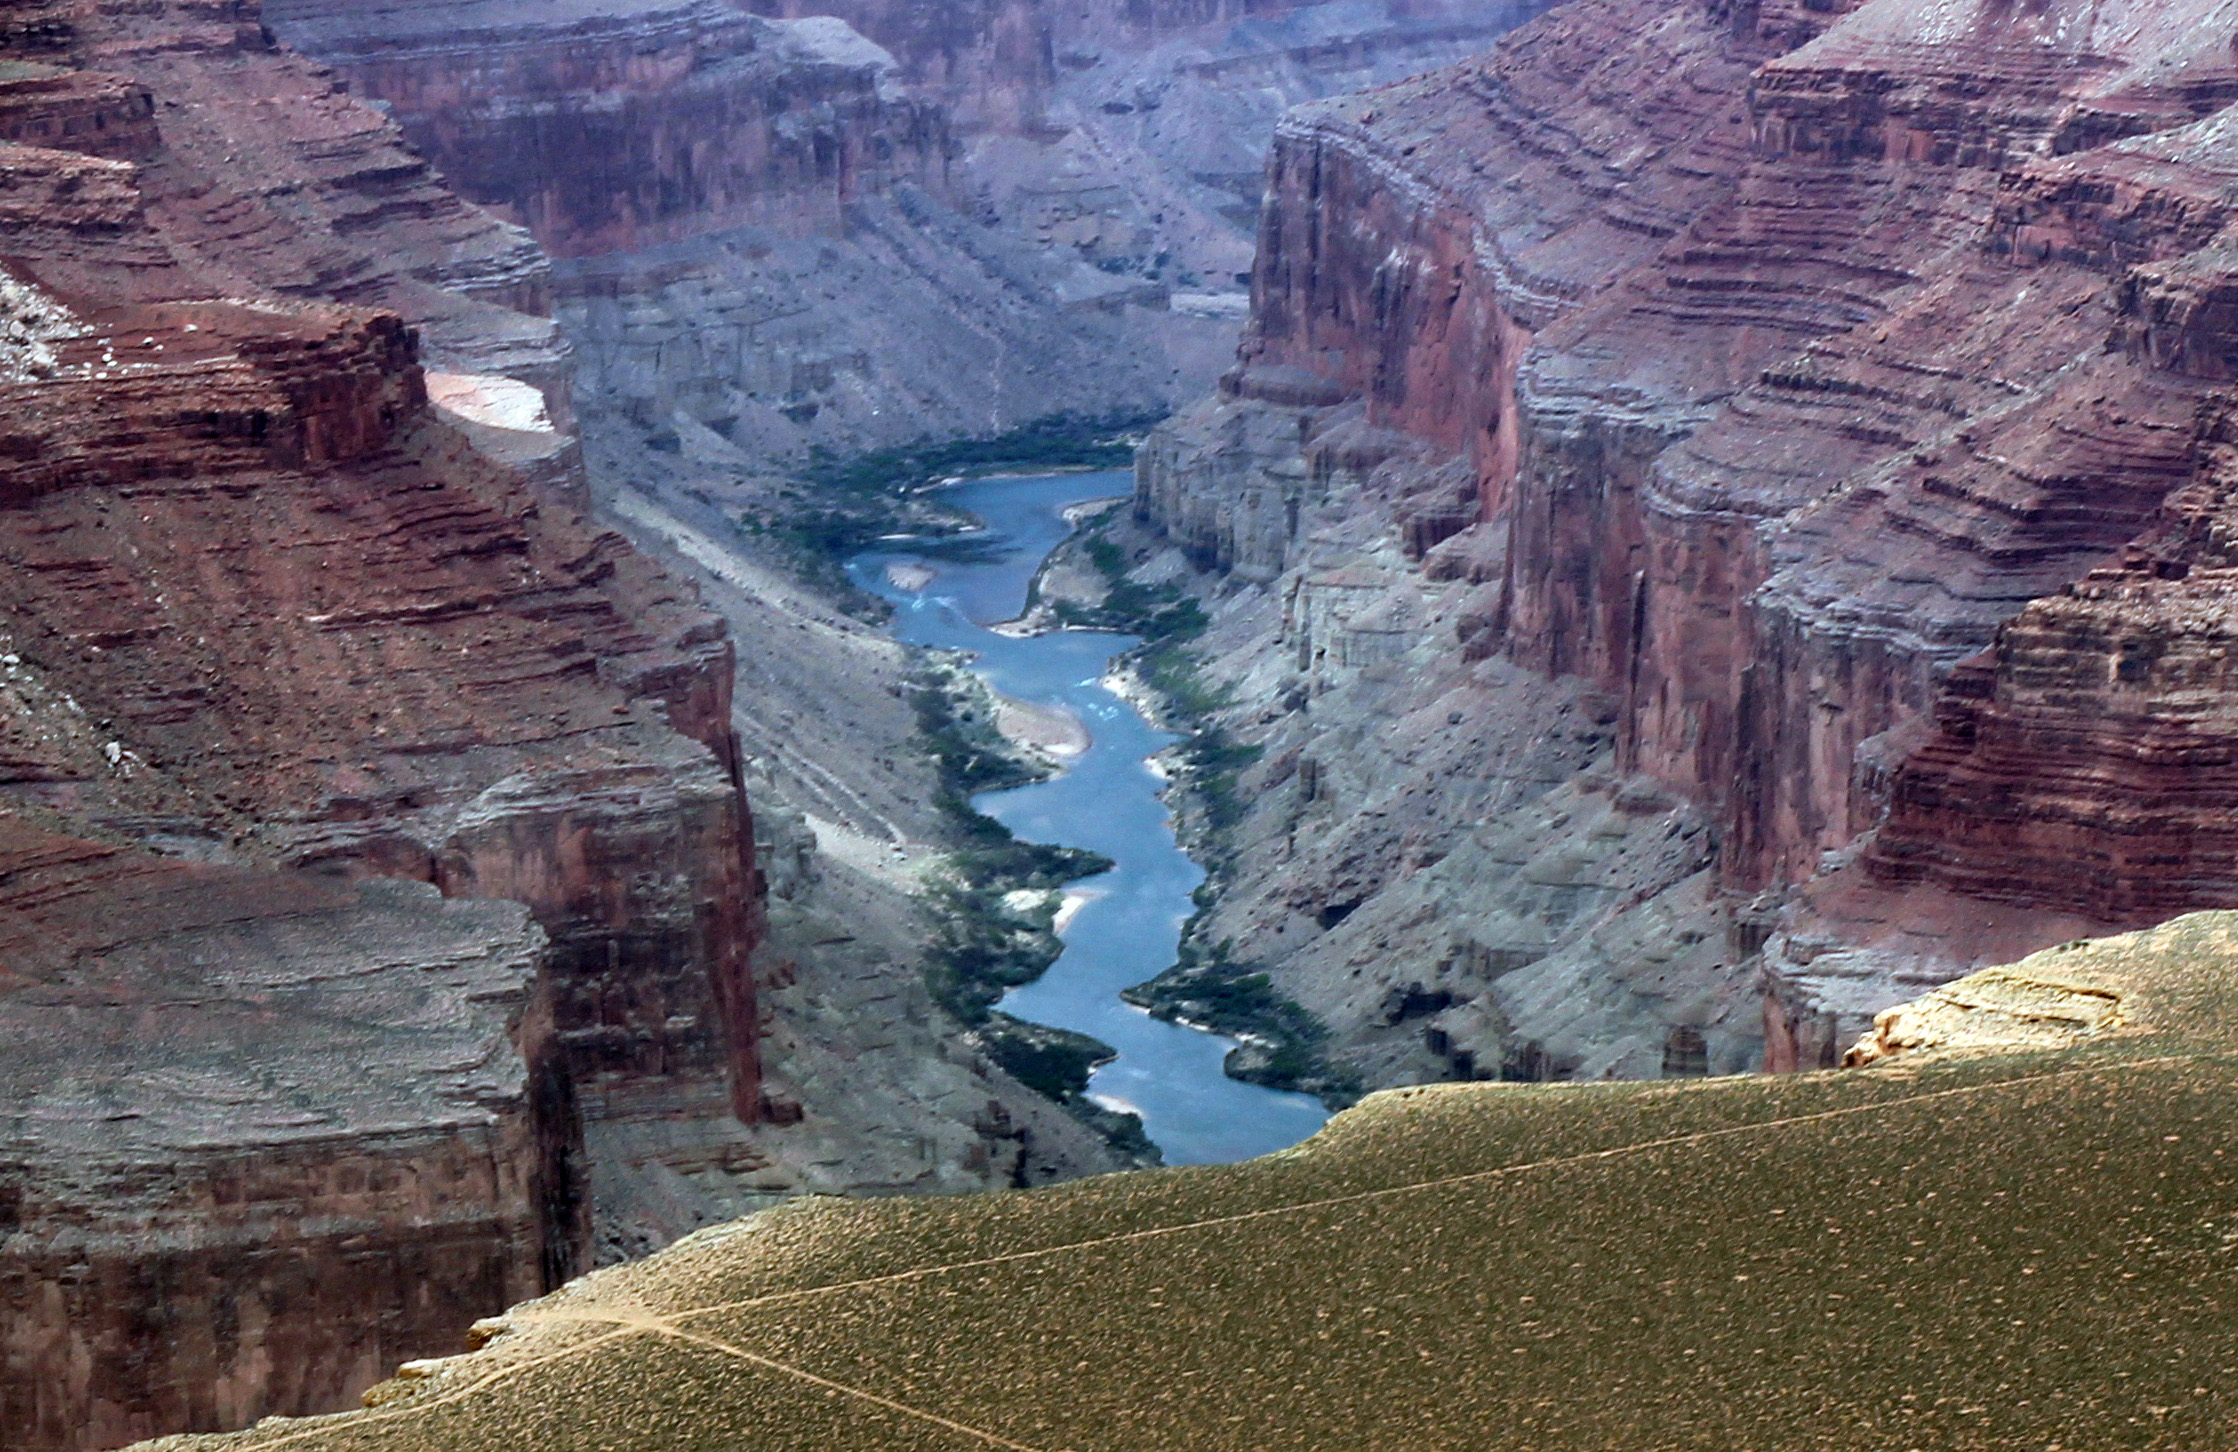
Arizona Trip Part 2, The Grand Canyon
We arrived at the Grand Canyon shortly after sunset. It was pretty cloudy AND snowing, so it wouldn’t have made that much of a difference. The first thing you notice upon coming to the canyon is the sheer size. I’ve been there several times before, but it’s been quite a while. (As before, click any image to view it full-resolution).
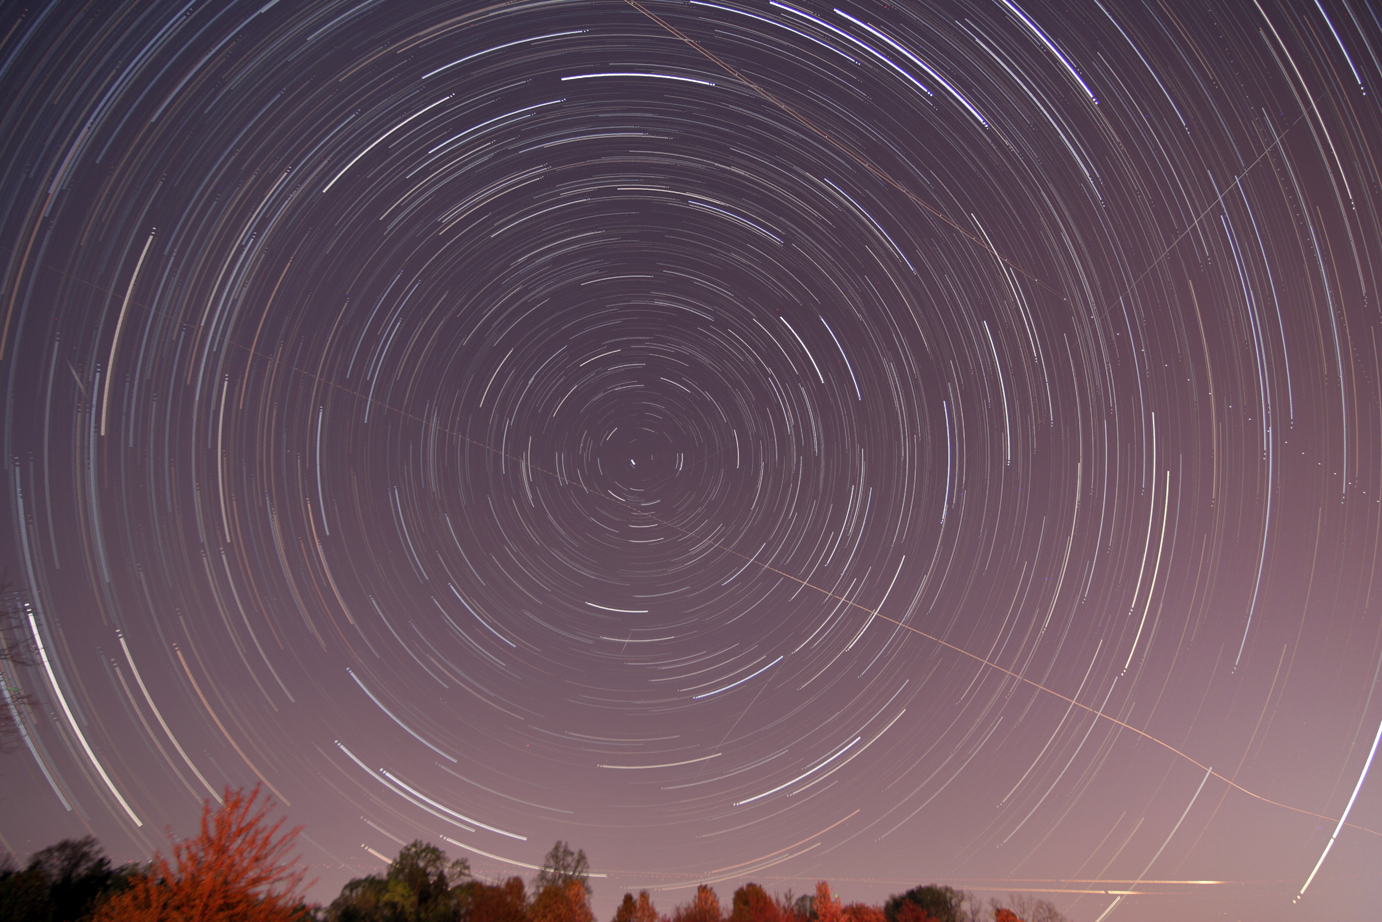
After dinner, we decided to return to see if any “sucker holes” existed so I could get some photos of the stars. We got lucky. Below is a 10m shot taken at ISO 800. You can see star trails around Polaris. I’d point out it wasn’t completely clear the whole time.
I also did a 15″ shot of Auriga, which was just poking out of the clouds. The stars really were dazzling here.
Also visible here is Jupiter, just above the clouds.
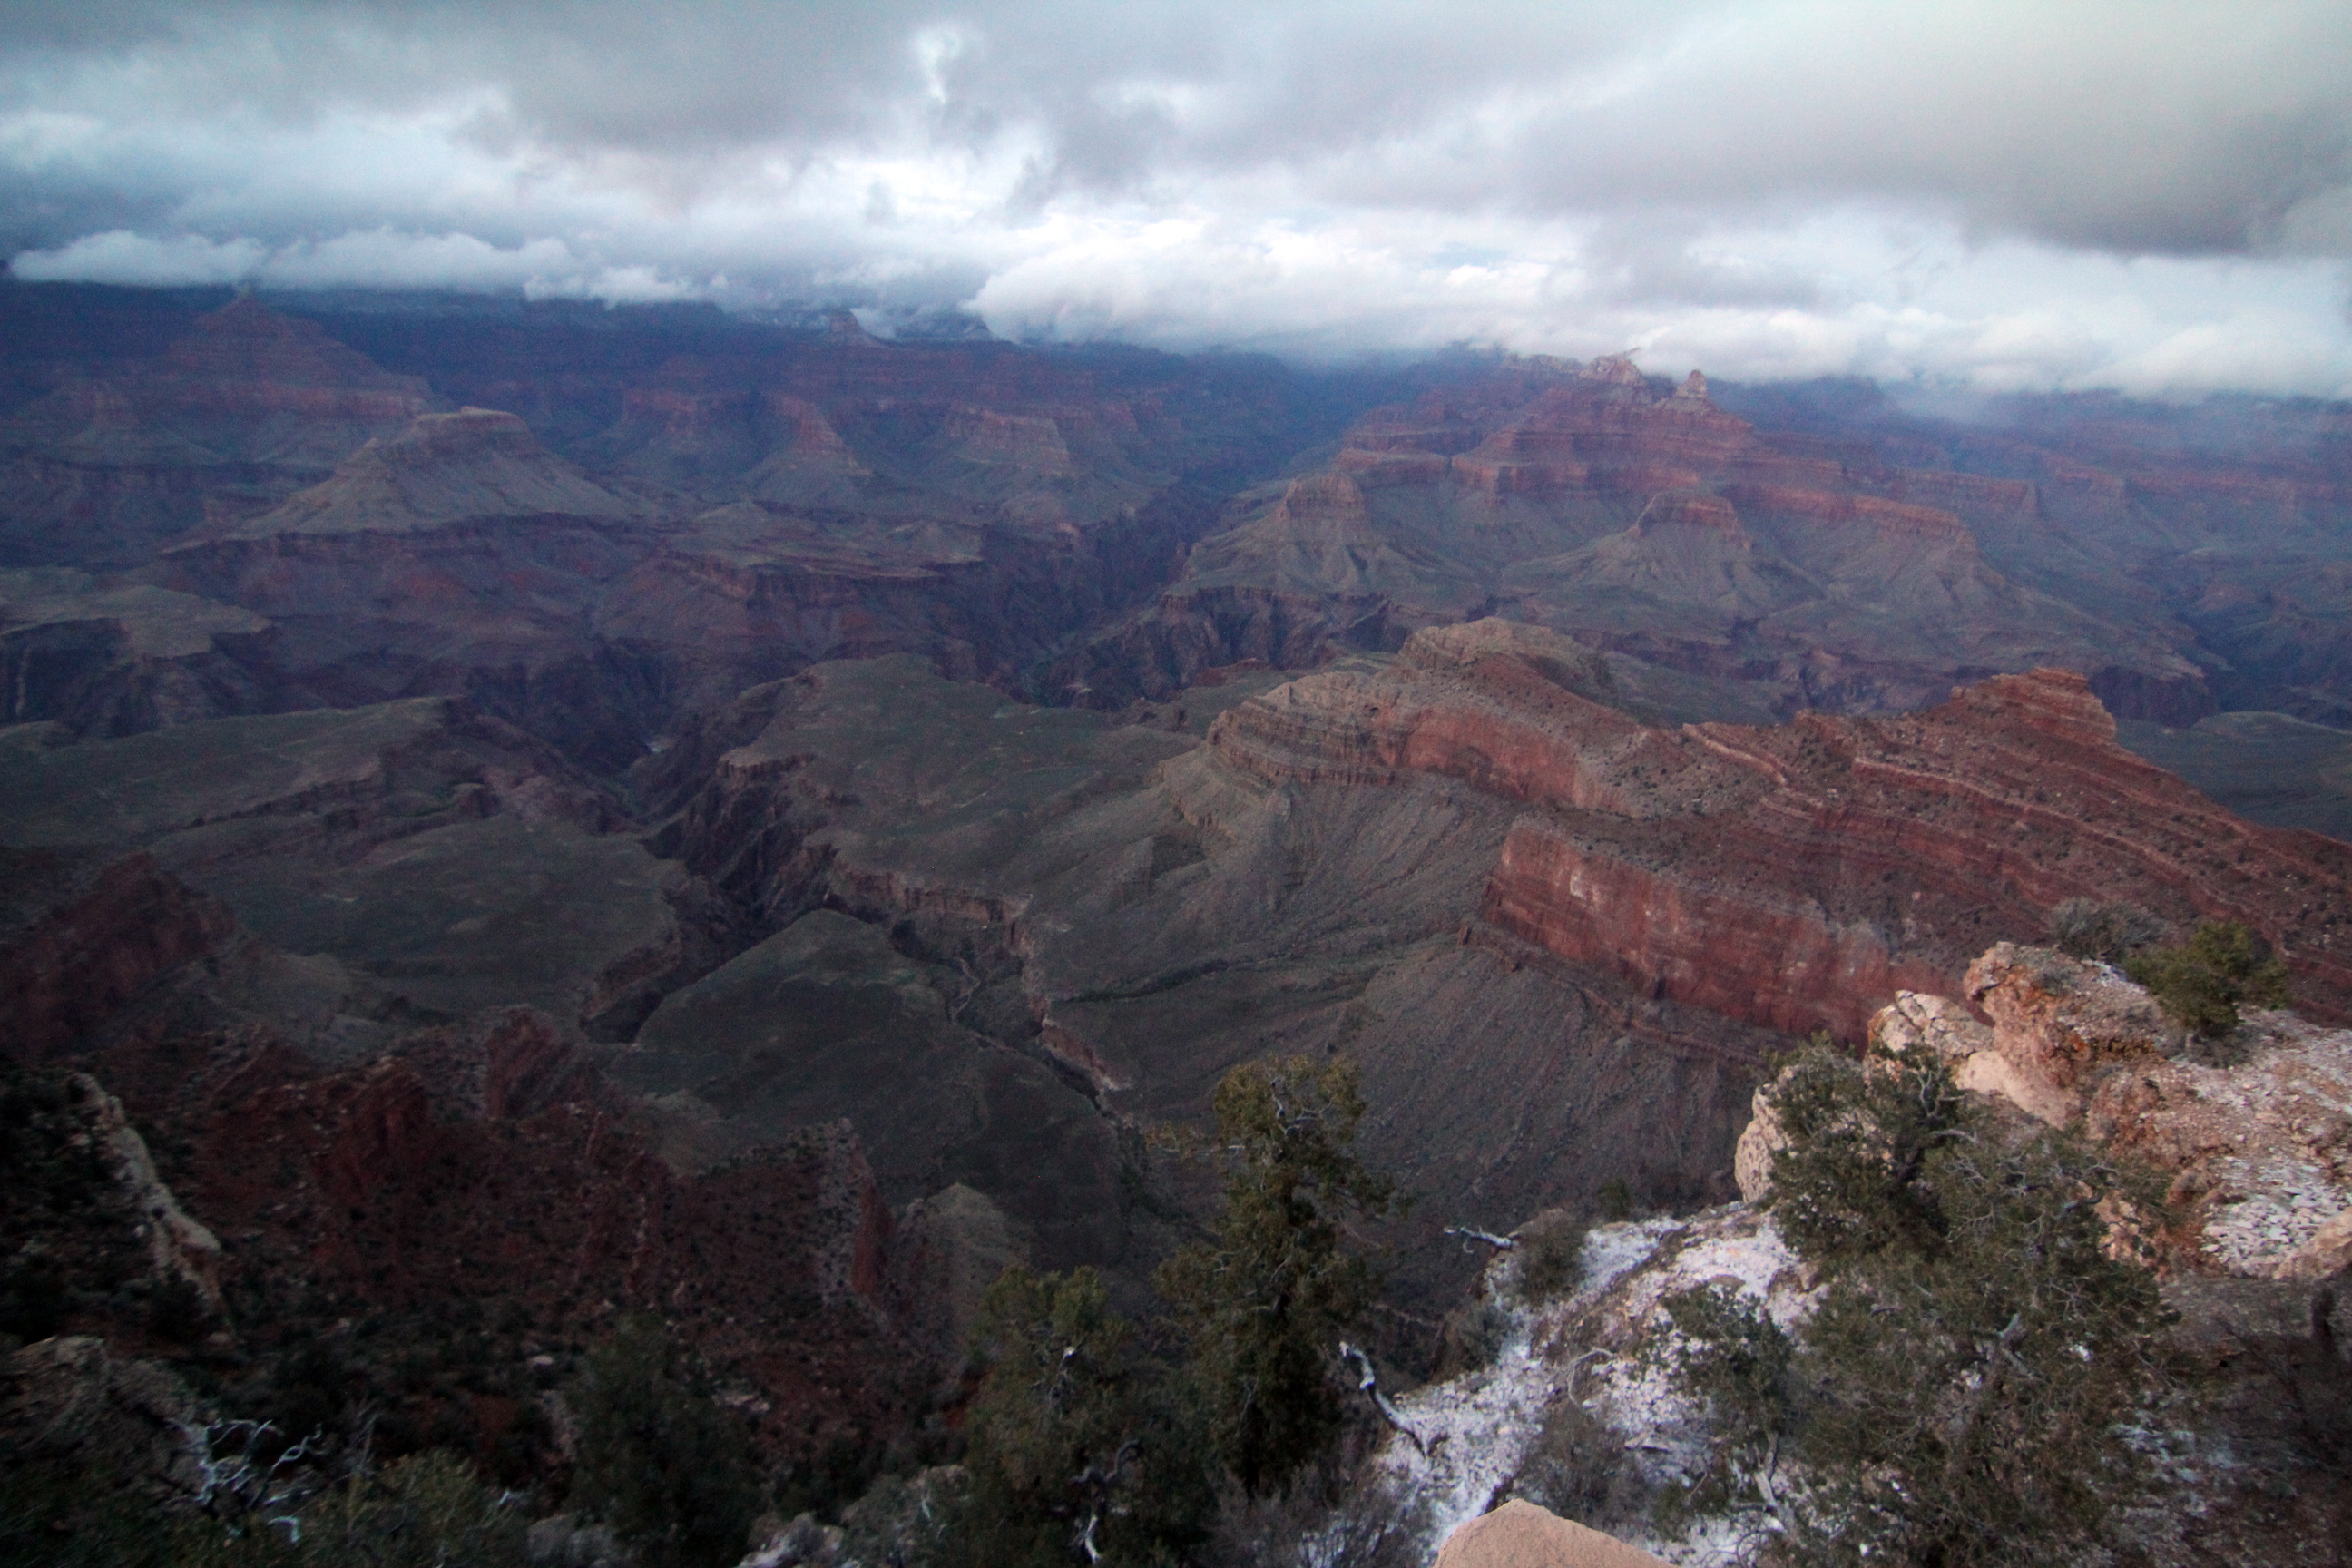
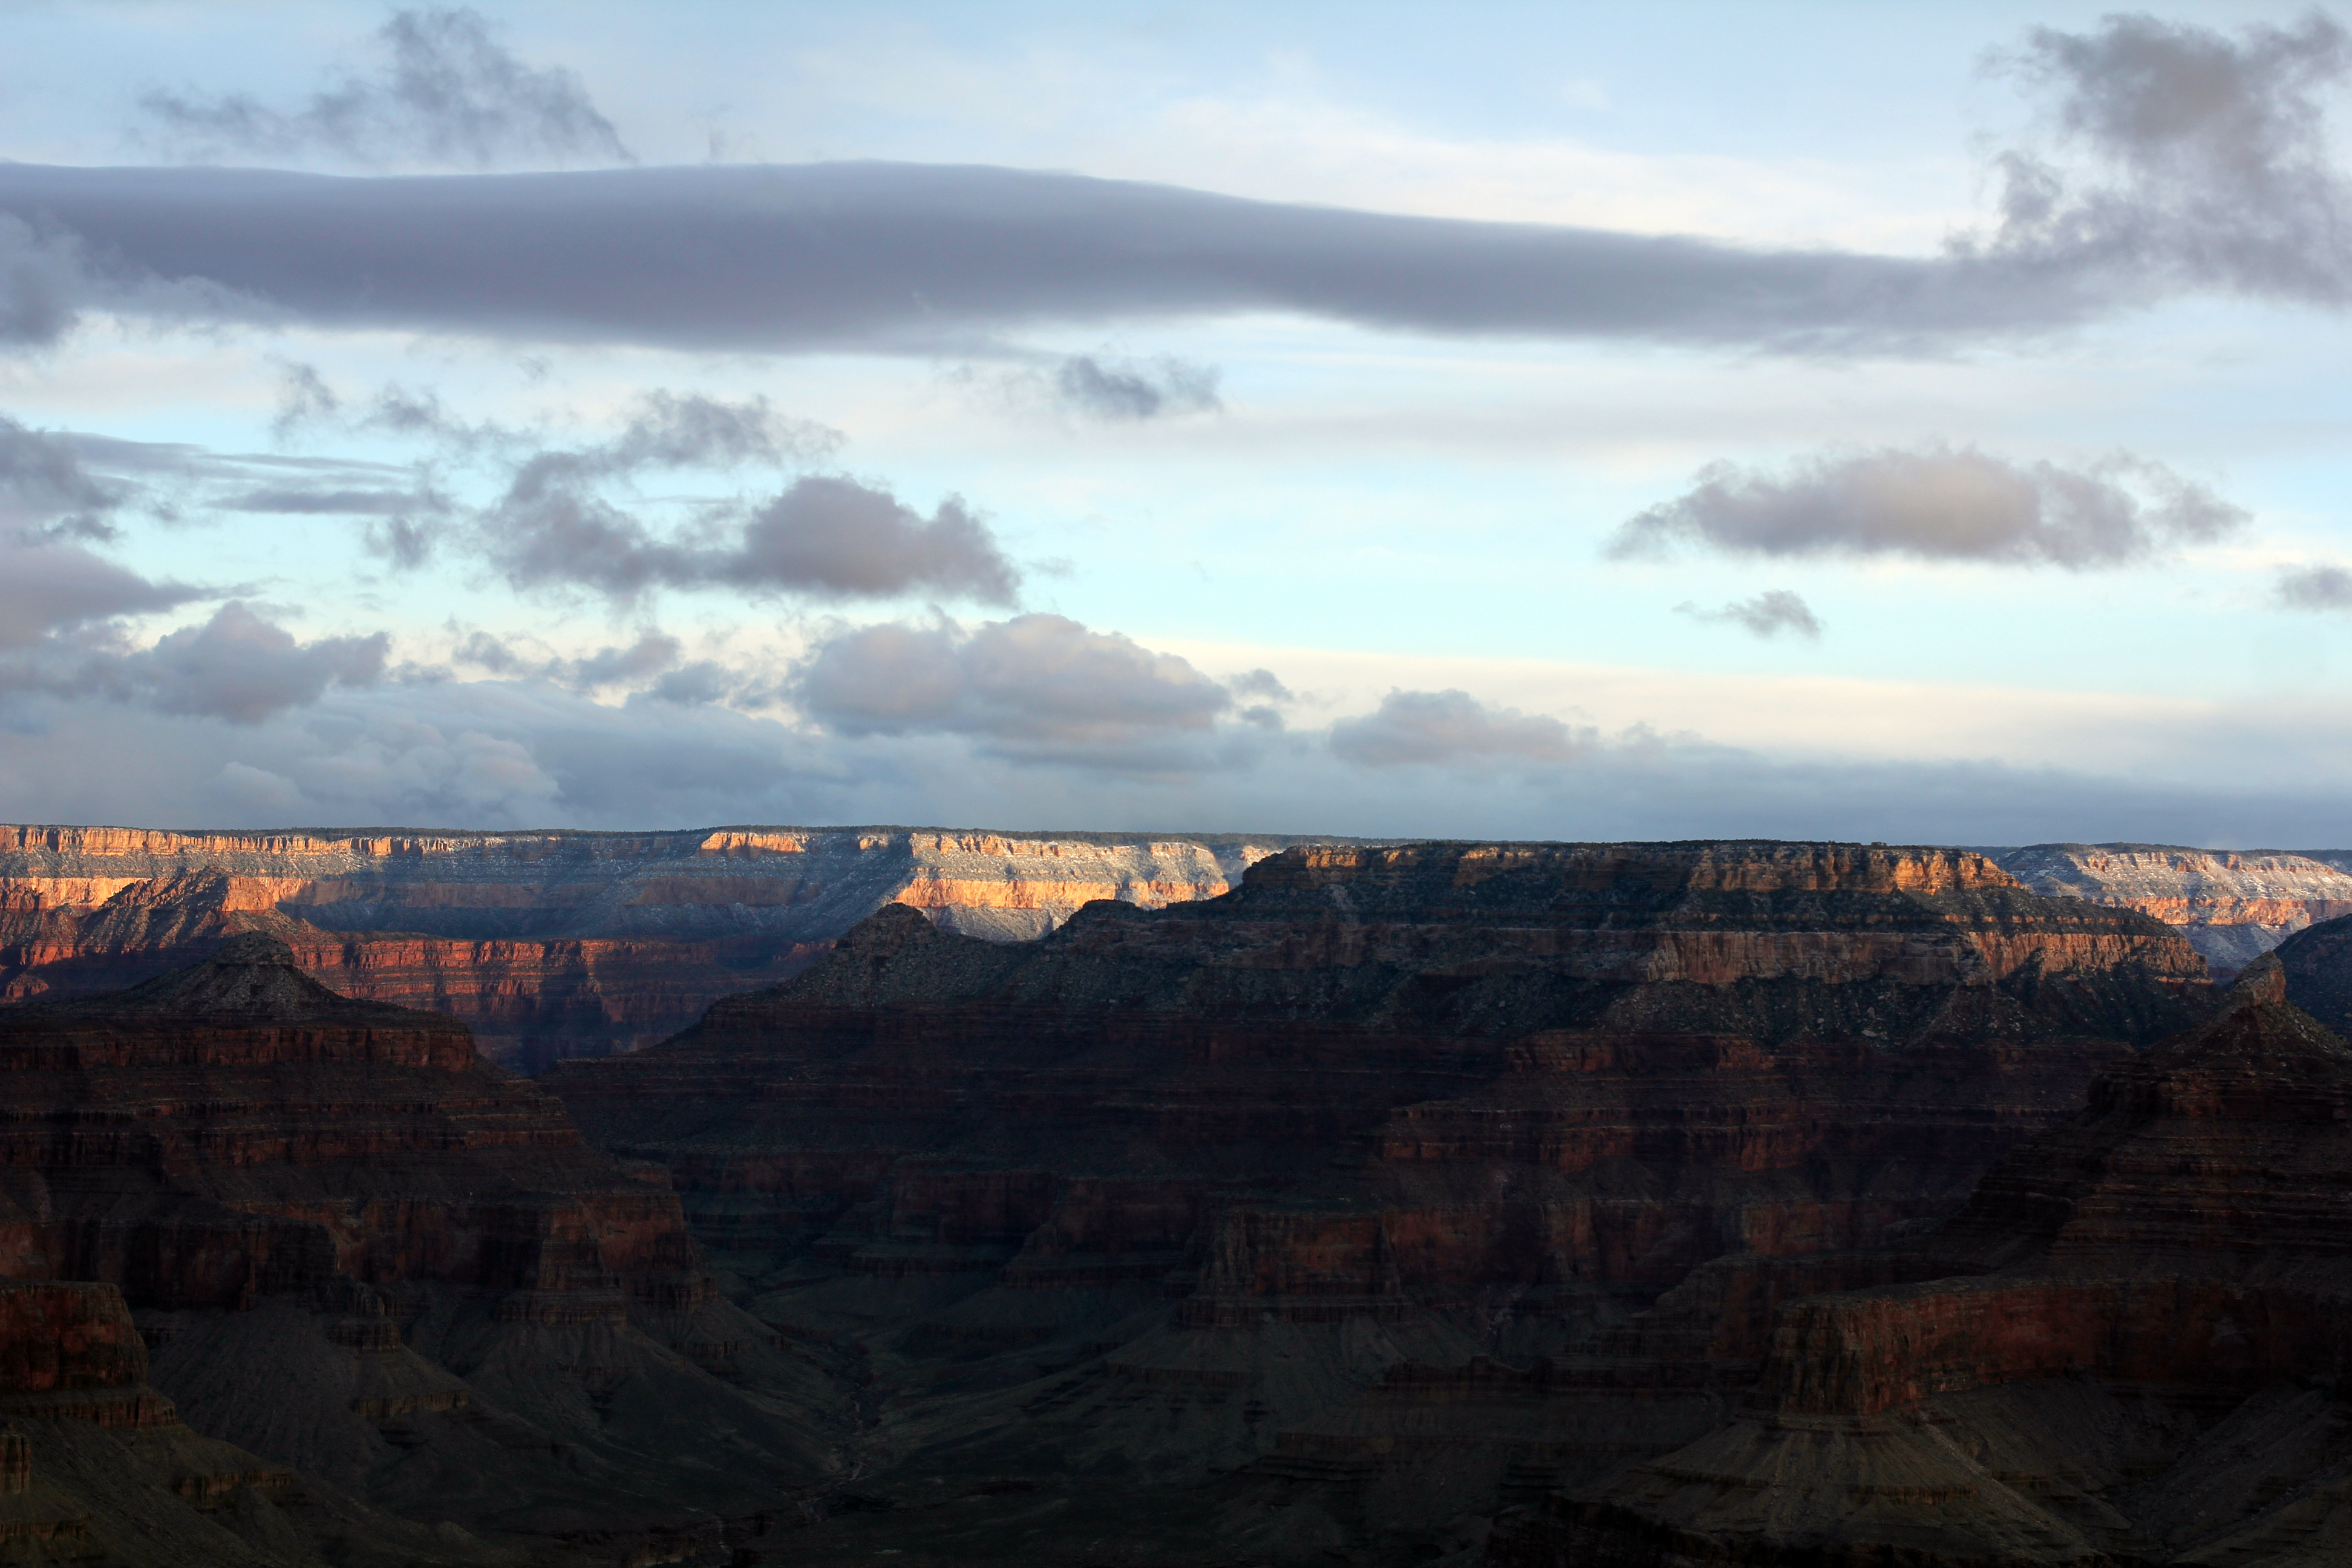
The next morning, we woke up at 5 AM to watch the sunrise. It was pretty cloudy, but there were some holes.
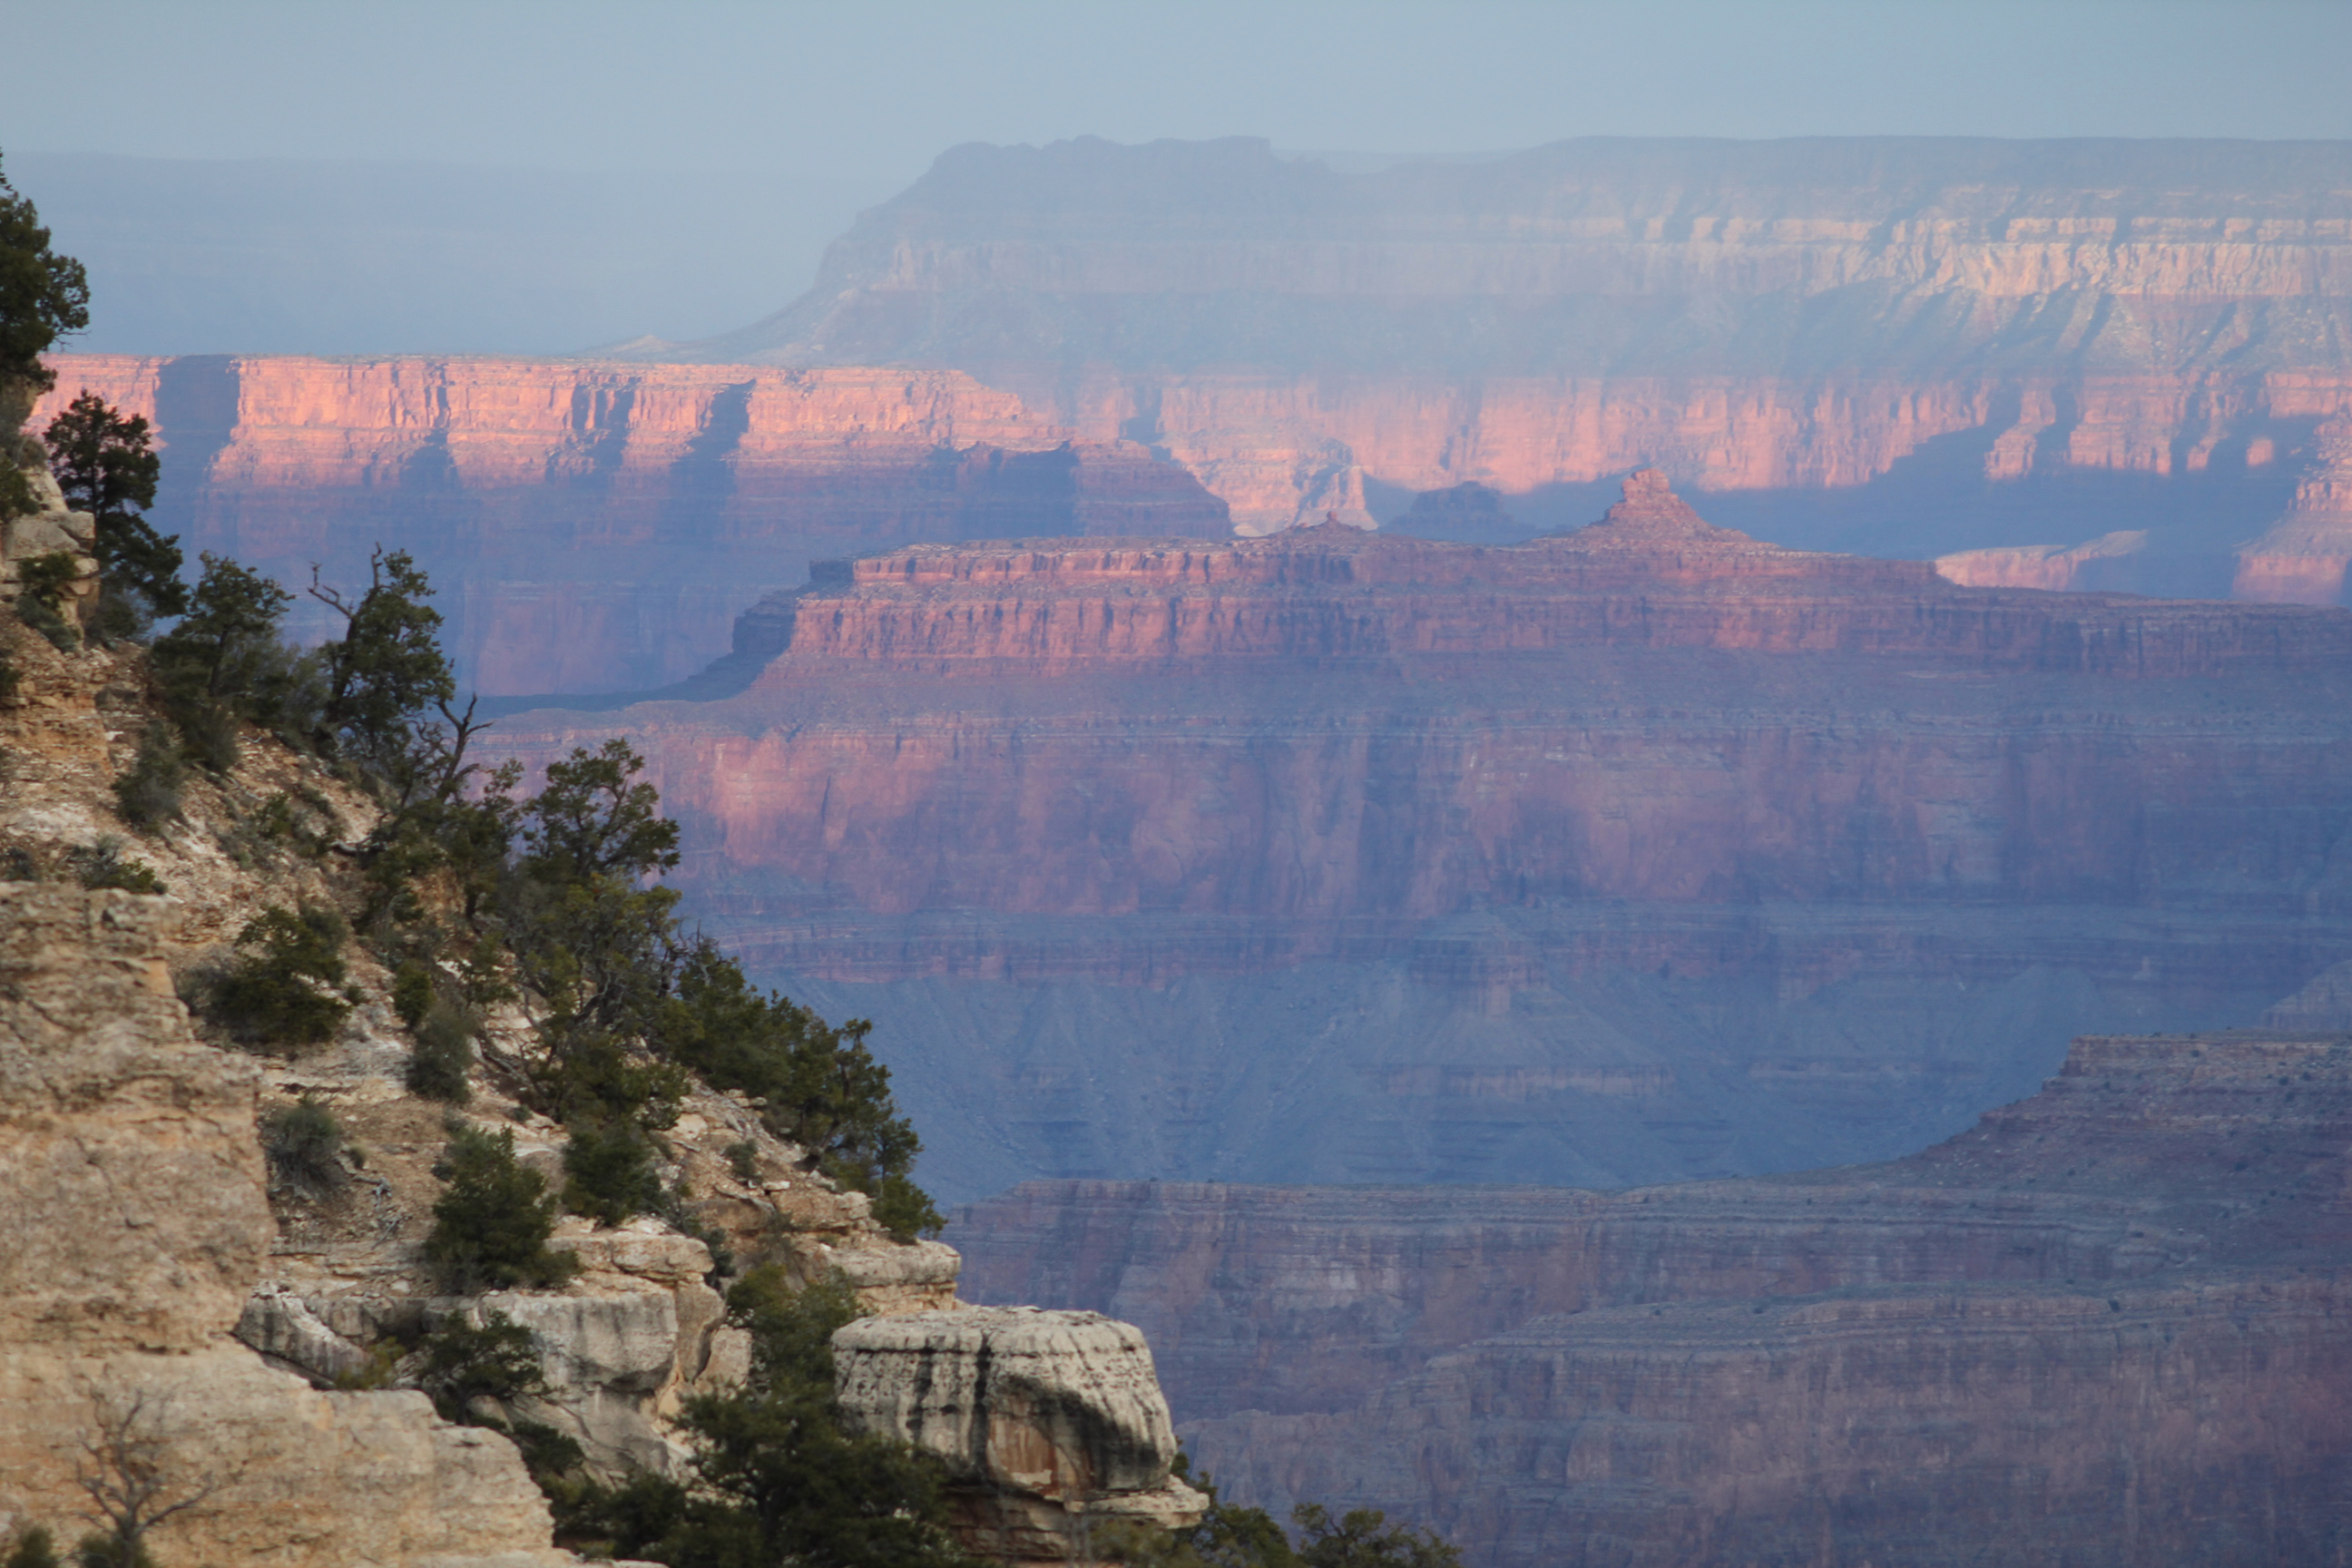

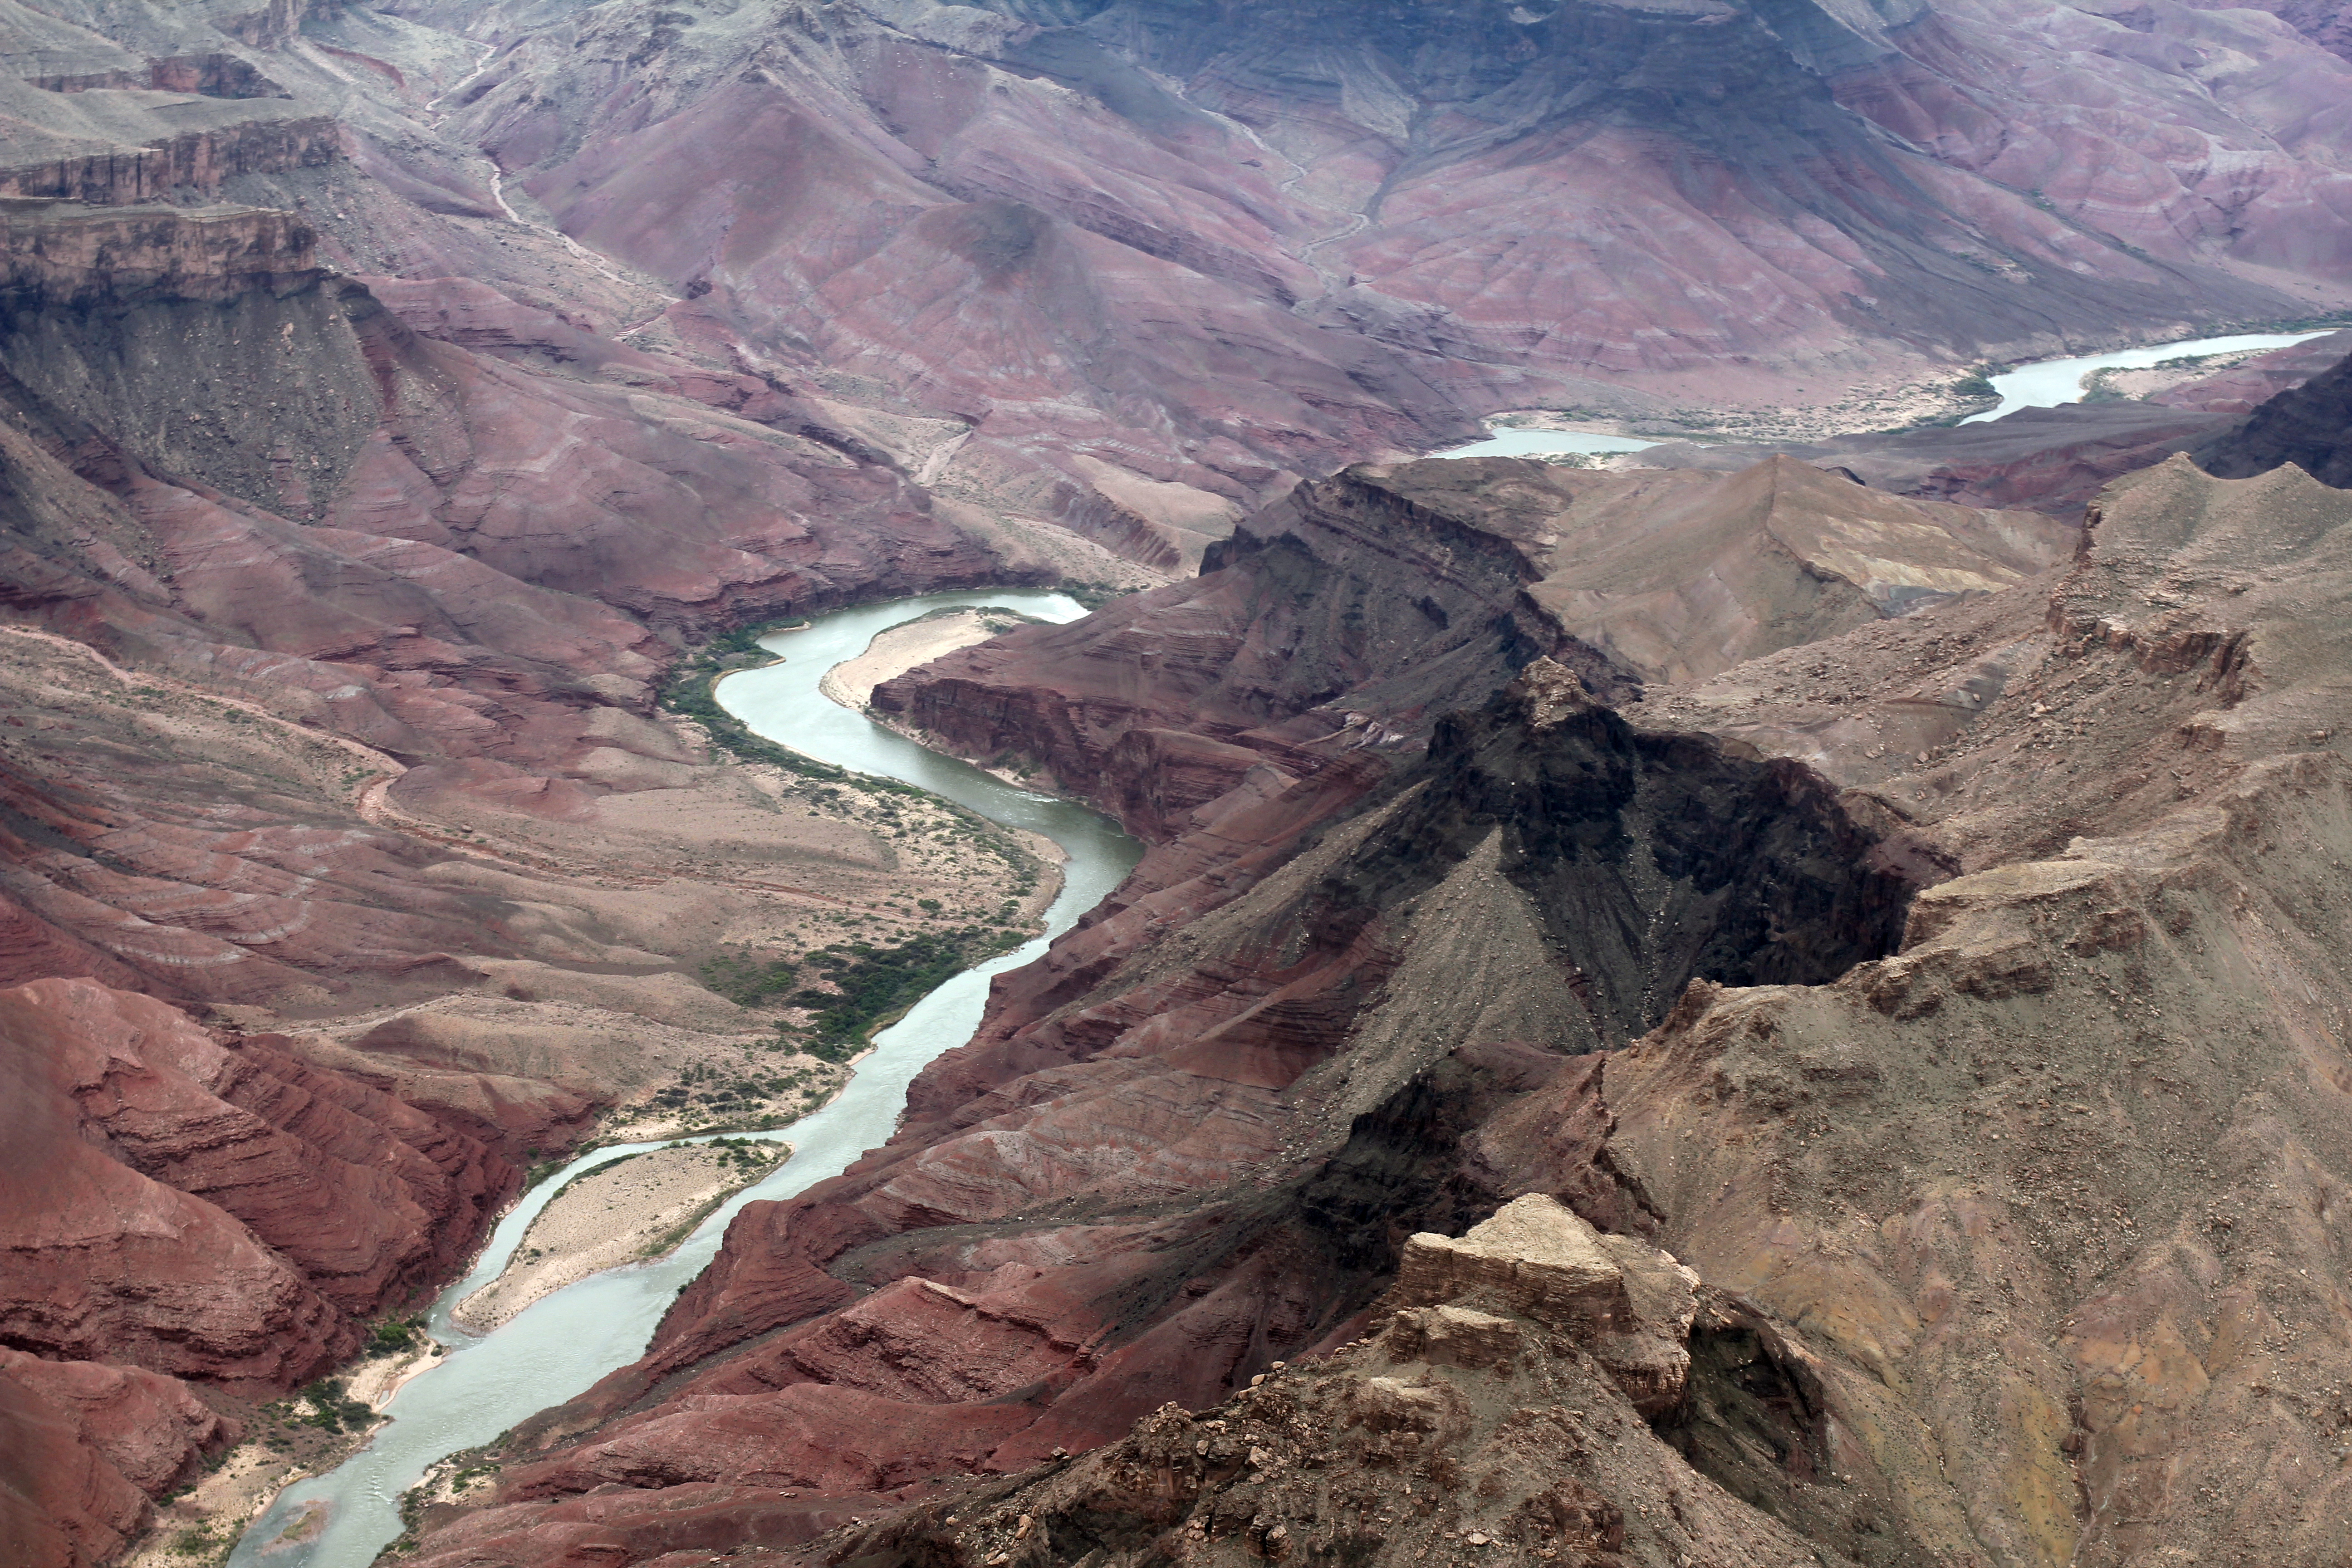
We spent the rest of the day at various spots throughout the Canyon’s rim. We also did a plane flight over the canyon through Grand Canyon airlines. Below are some of the best shots:
I did take a lot more images. I will soon post a link to some lower-res shots of all the rest.
Arizona Trip Part 1, Picacho Peak
I just completed a week-long vacation in Arizona. The main purpose was to get another night at Kitt Peak National Observatory for their Advanced Observing Program. I’ll blog thoroughly about that later, but I wanted to share some pictures and thoughts from the other stuff I did. You may click any picture for a higher-res version. (Warning: Some of the hi-res files are huge).
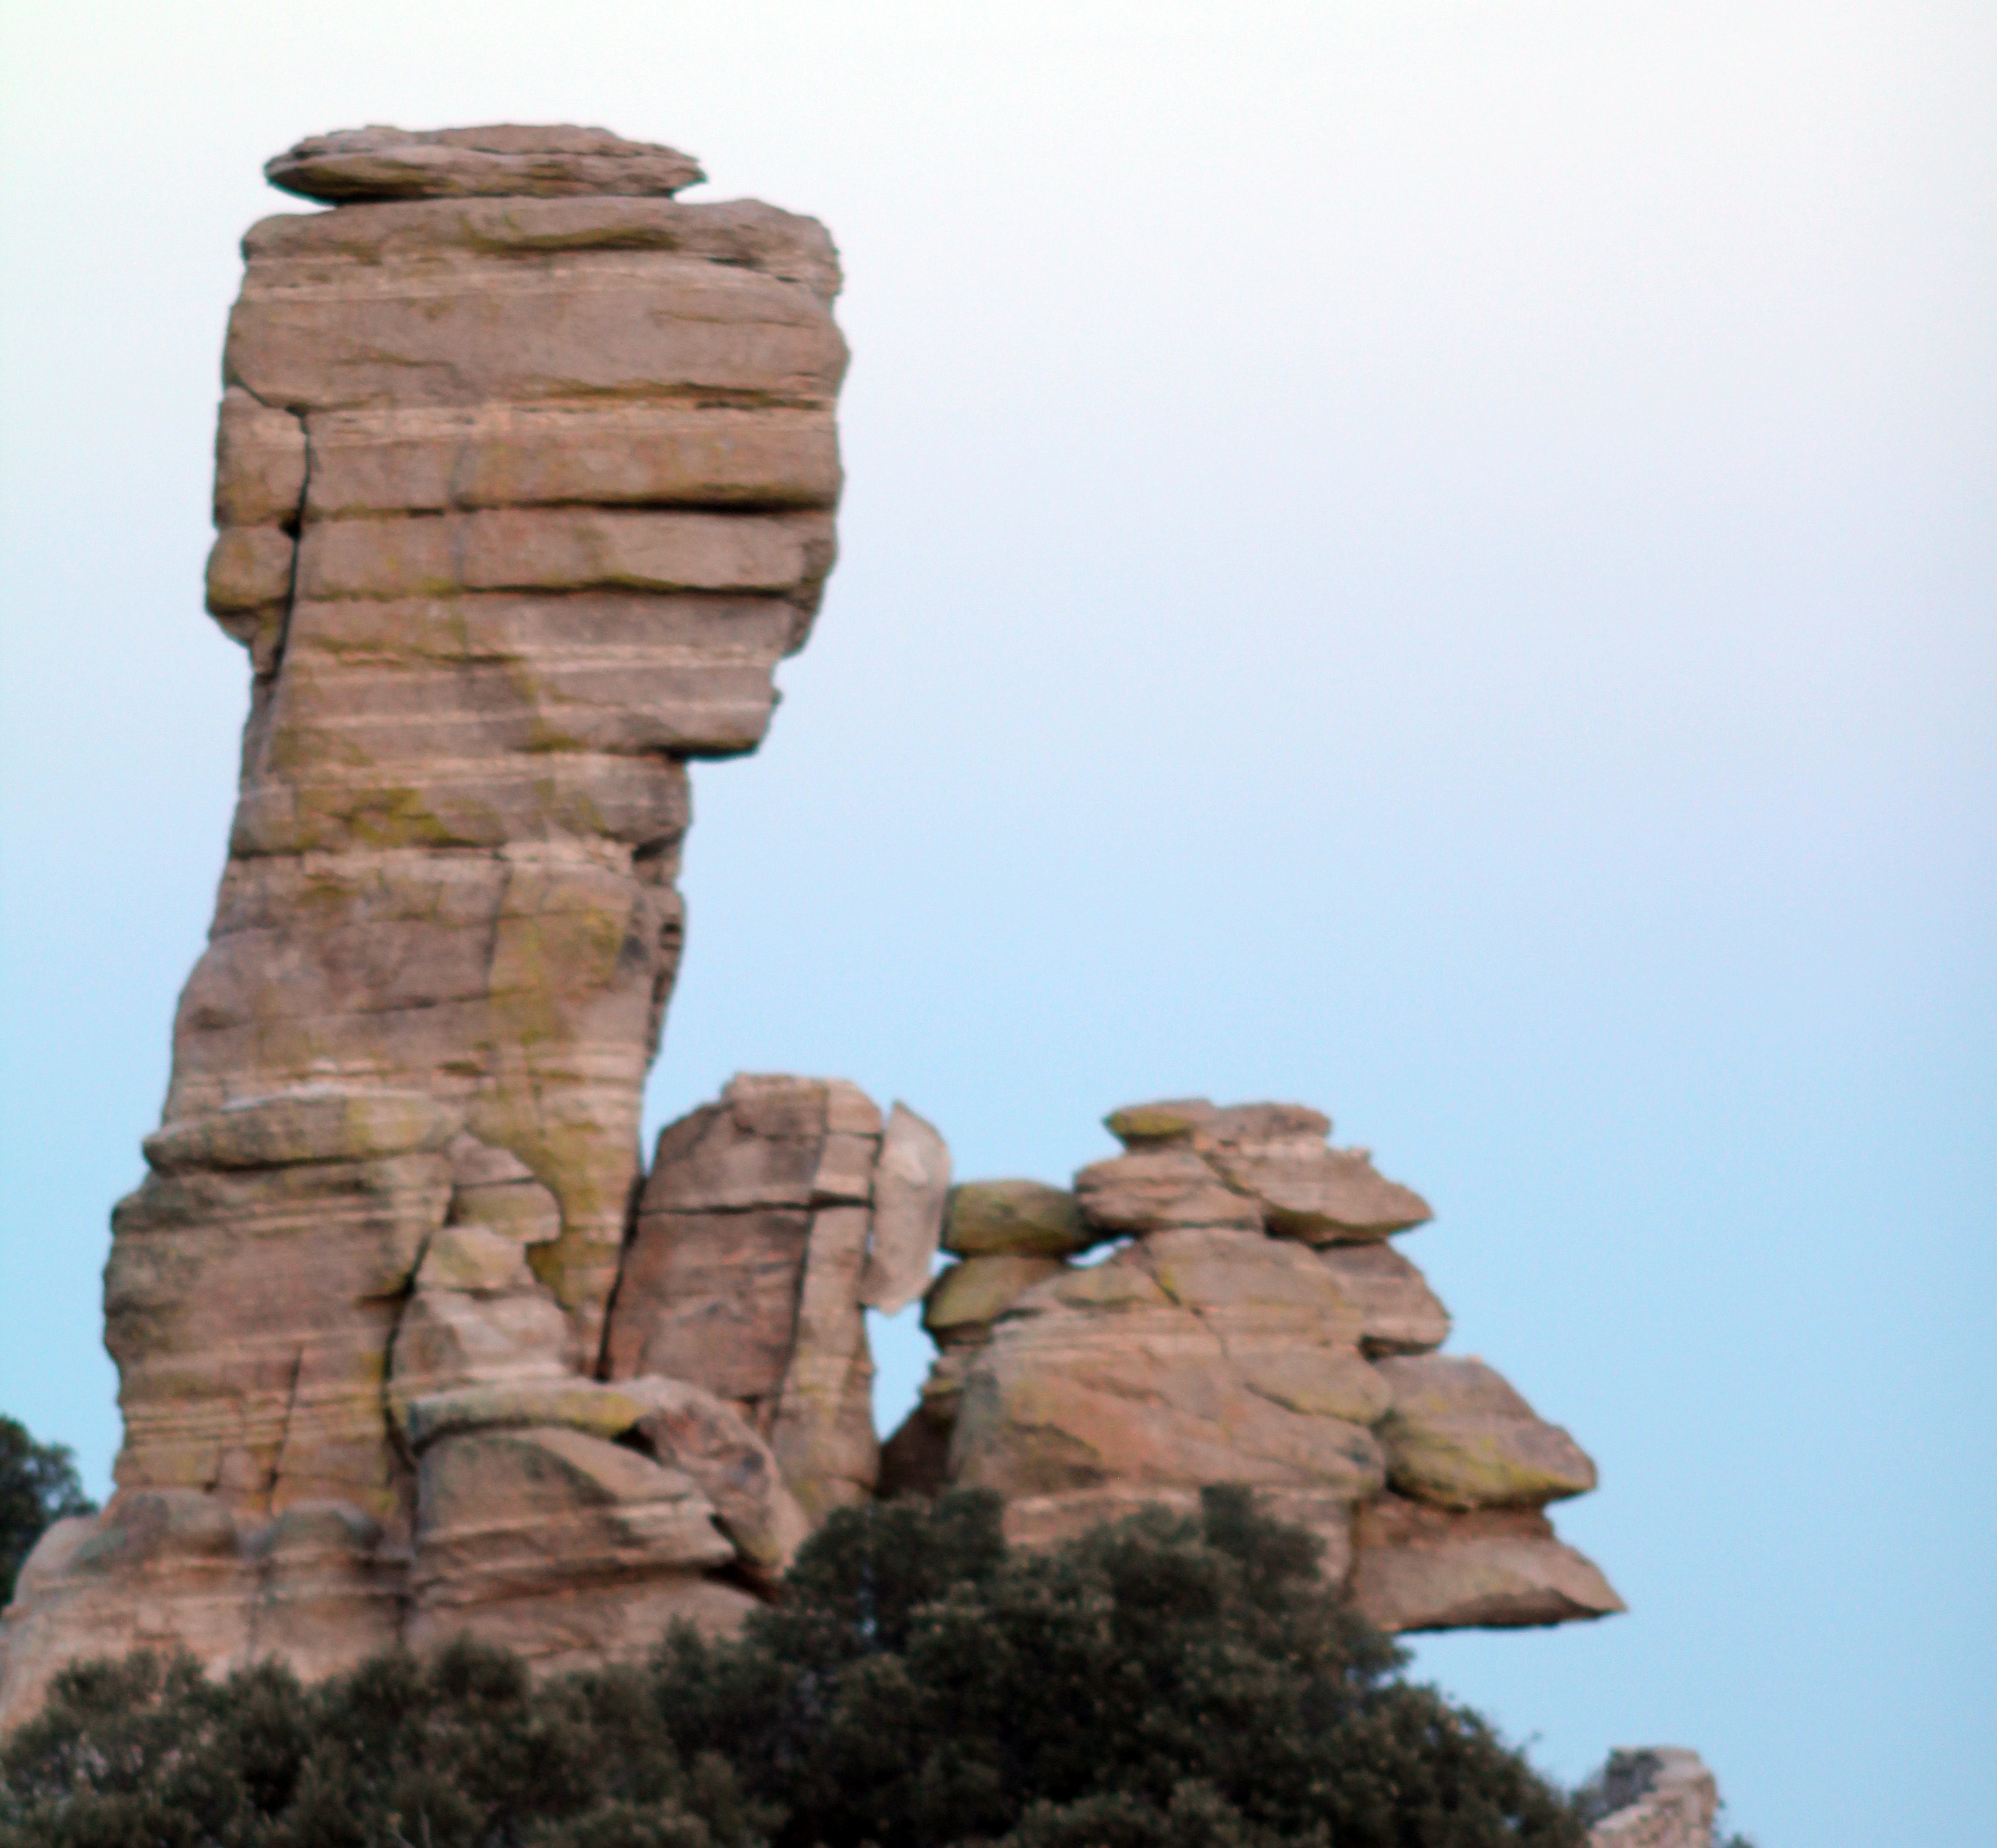
The last time I was in Arizona, I was driving from Phoenix to Tucson, admiring the view, and trying to find a place to stop off for some pictures. About halfway, I saw an awesome-looking mountain on the right side of the road, and decided to pull over. It’s called Picacho Peak and is absolutely gorgeous.
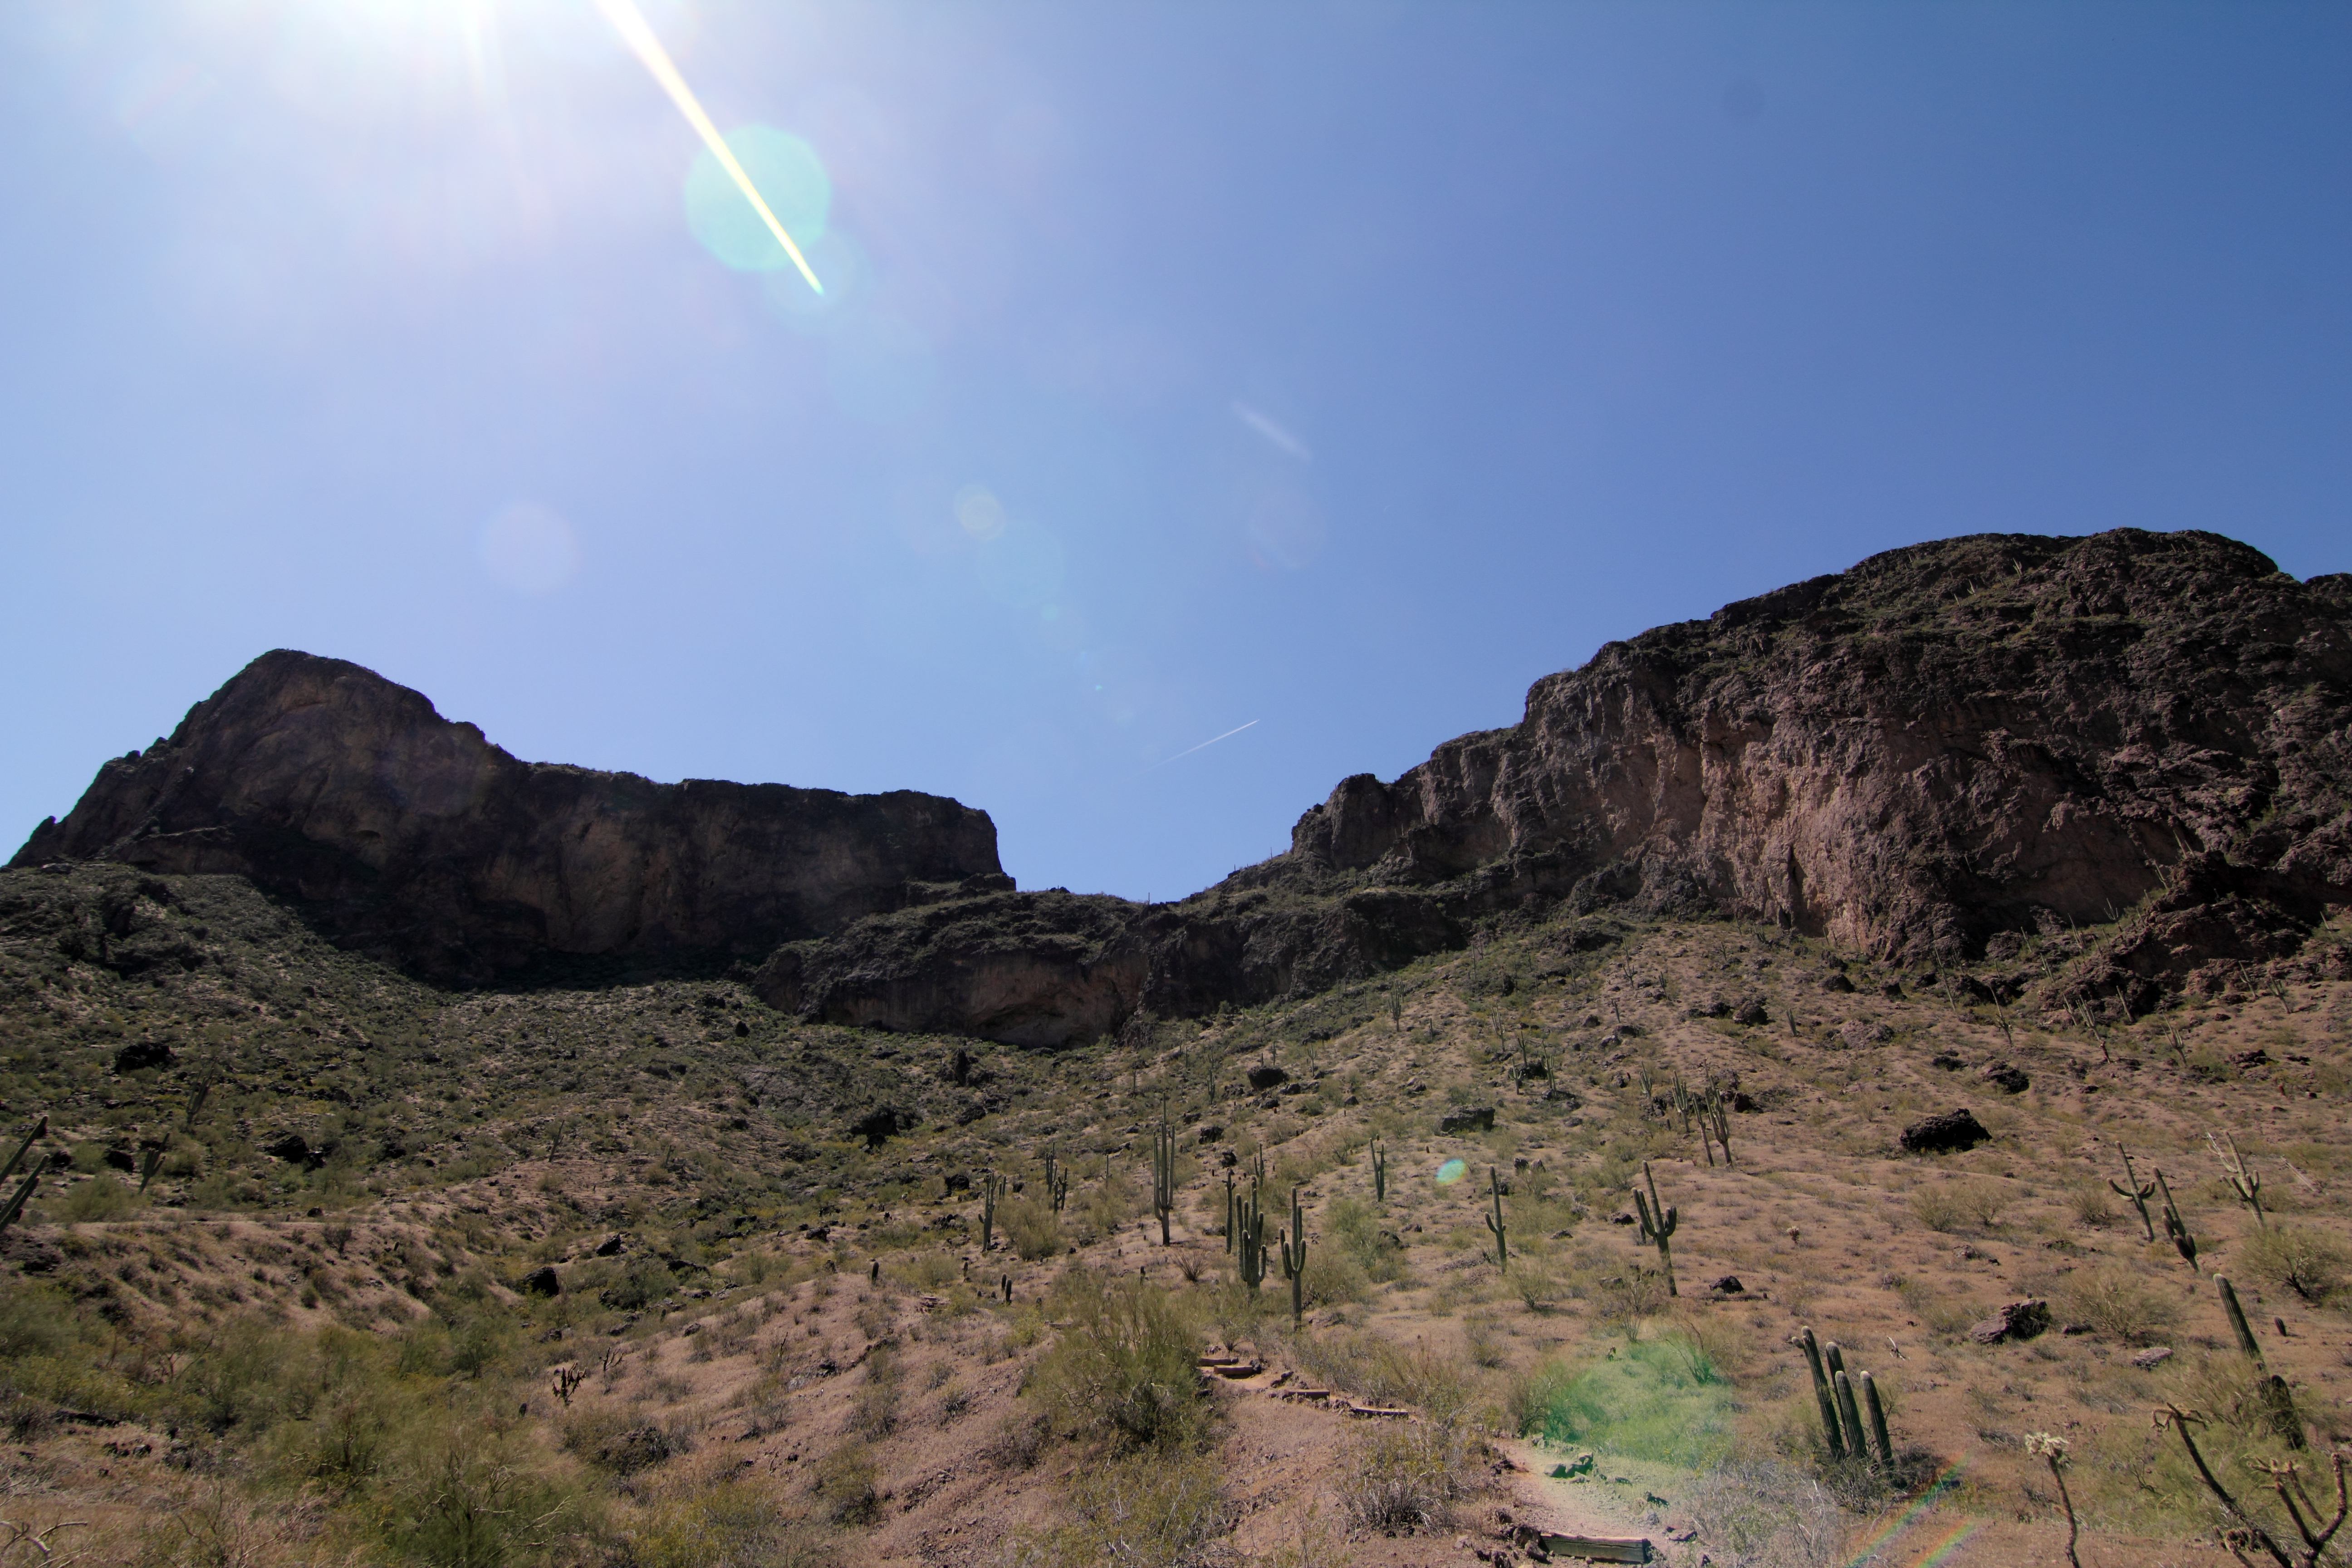
Picacho Peak is on the left. Not seen here is a small peak further to the left. You can’t hike to the top of it, but you can hike around it and get nice views of the desert. It’s only about a mile. The peak itself is at 3,374 feet and is either a 2- or 3-mile hike depending on which trail you take. We decided on the Hunter Trail, which was about 2 miles. The other trail (Sunset Vista) is longer, but less strenuous. It follows a gradual slope up the right side of the mountain.
The first part of the trail involves hiking up to the mountain face. This is quite challenging as it’s basically a “path of steepest ascent” climb.

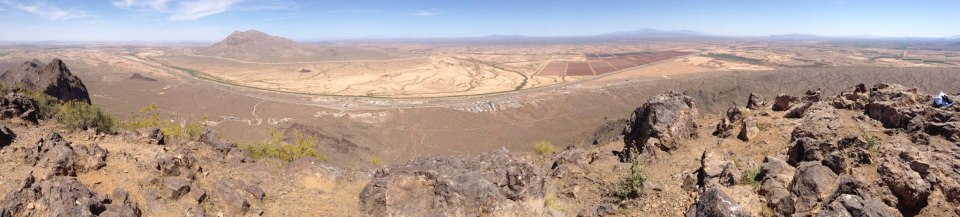
From here, you hike around the rock face to the saddle point between the two larger peaks.
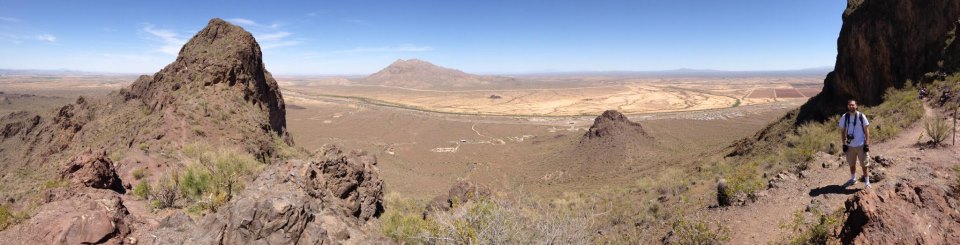
The next part was very challenging. You climb down about 300 feet around the back side of the mountain using cables. I decided to turn back once I got to the bottom of this drop, mainly out of exhaustion. I don’t do a lot of hikes, so I wasn’t incredibly well-prepared for this one. I wish I had done it before going down 300 feet though, cause going back up was very strenuous. My friend made it to the summit. Here are some of his pics:
While the hike back down was easier, once I got to the saddle, I was still very tired. My legs were very wobbly! Wish I could’ve gotten to the top. We were needing to leave to head up to Kitt Peak and I didn’t want to slow my friend down. He figured he could make it to the top pretty quickly, and he did.
The next post will be about the Grand Canyon.
Recent Comments